- A ・ -
VBA18001-R.3719.A
logo�Q0440�forGraphic
070518�Gdesign�ito
Caution: Whenever the SI unit is removed, be sure to make this adjustment.
Procedure
①
Insert the battery into the body, and press the shutter release button for vertical shooting halfway.
②
While half-release timer is working, looking through the viewnder, press the multi-selector button of the
rear cover from right to left or up and down, in order to check lighting condition of each focus frame.
③
Prepare settings as shown on Page A38, and looking through the viewnder, adjust so that the clearance
between the 100 % frame and 98 % frame of all four sides can be seen.
④
Based on the procedure of
②
, light the center focus frame and adjust it so as to be positioned in the central
frame of the parallax/SI chart for D3. Then tighten the two adjustable screws.
⑤
Conrm that the central focus area is in the chart frame, and adhere the area to be jointed.
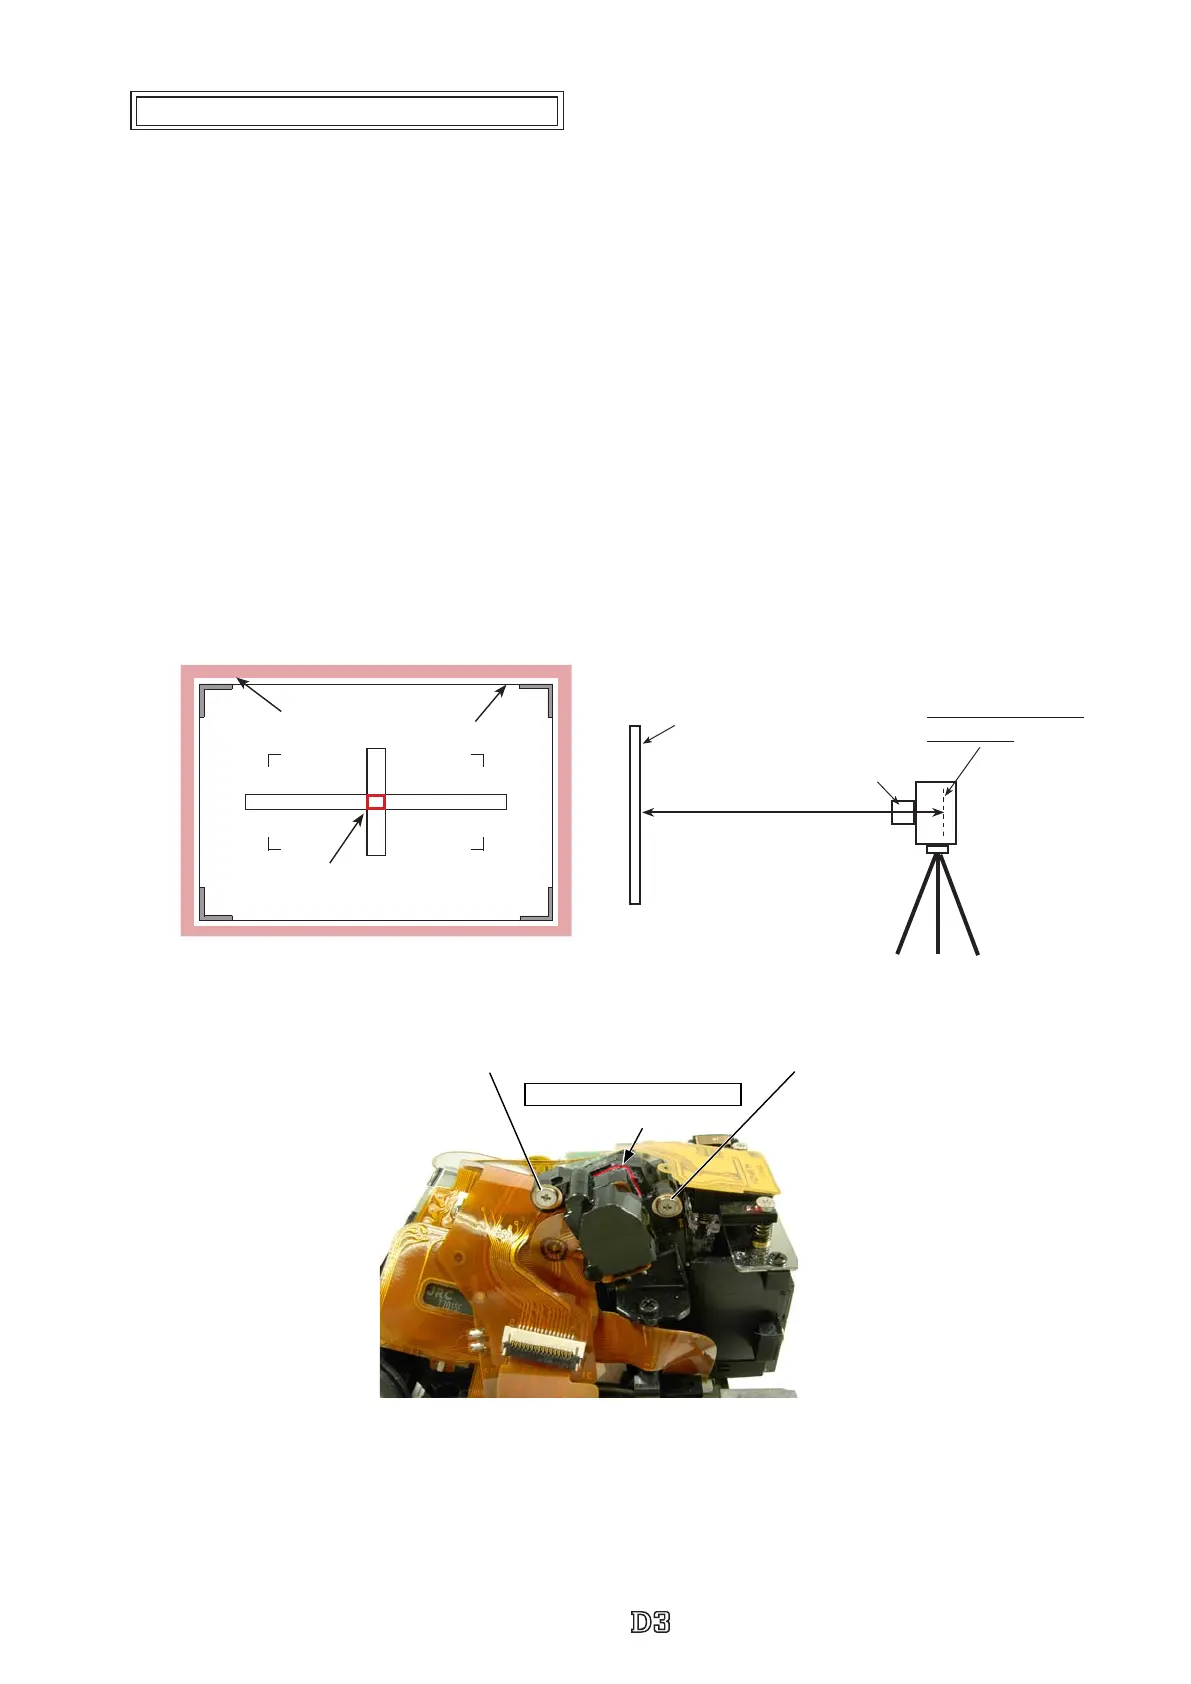
Position adjustment of SI (super impose) unit
70cm
AF50/1.4D
100
%
frame (red)
98
%
frame
(
black
)
Focus frame in center of Viewnder
Parallax / SI chart for D3
(
J63102
)
Parallax / SI chart for D3
(
J63102
)
Mounting surface of
Image-PCB
Joint
Adjustable screw Adjustable screw
Adhesive:Quick drying glue
 Loading...