OCM Pro CF
OCM Pro CF - Rev. 09 as of 07.06.2016 page 41
7.3 Connection of the panel mount enclosure
7.3.1 Fastening the panel mount enclosure
First the panel must be cut out accordingly (see Fig. 7-18). Then, after the en-
closure has been inserted, tighten the 4 clamps integrated in the sides of the en-
closure for fastening.
The panel mount enclosure can be fastened by using the 4 built-in clamps
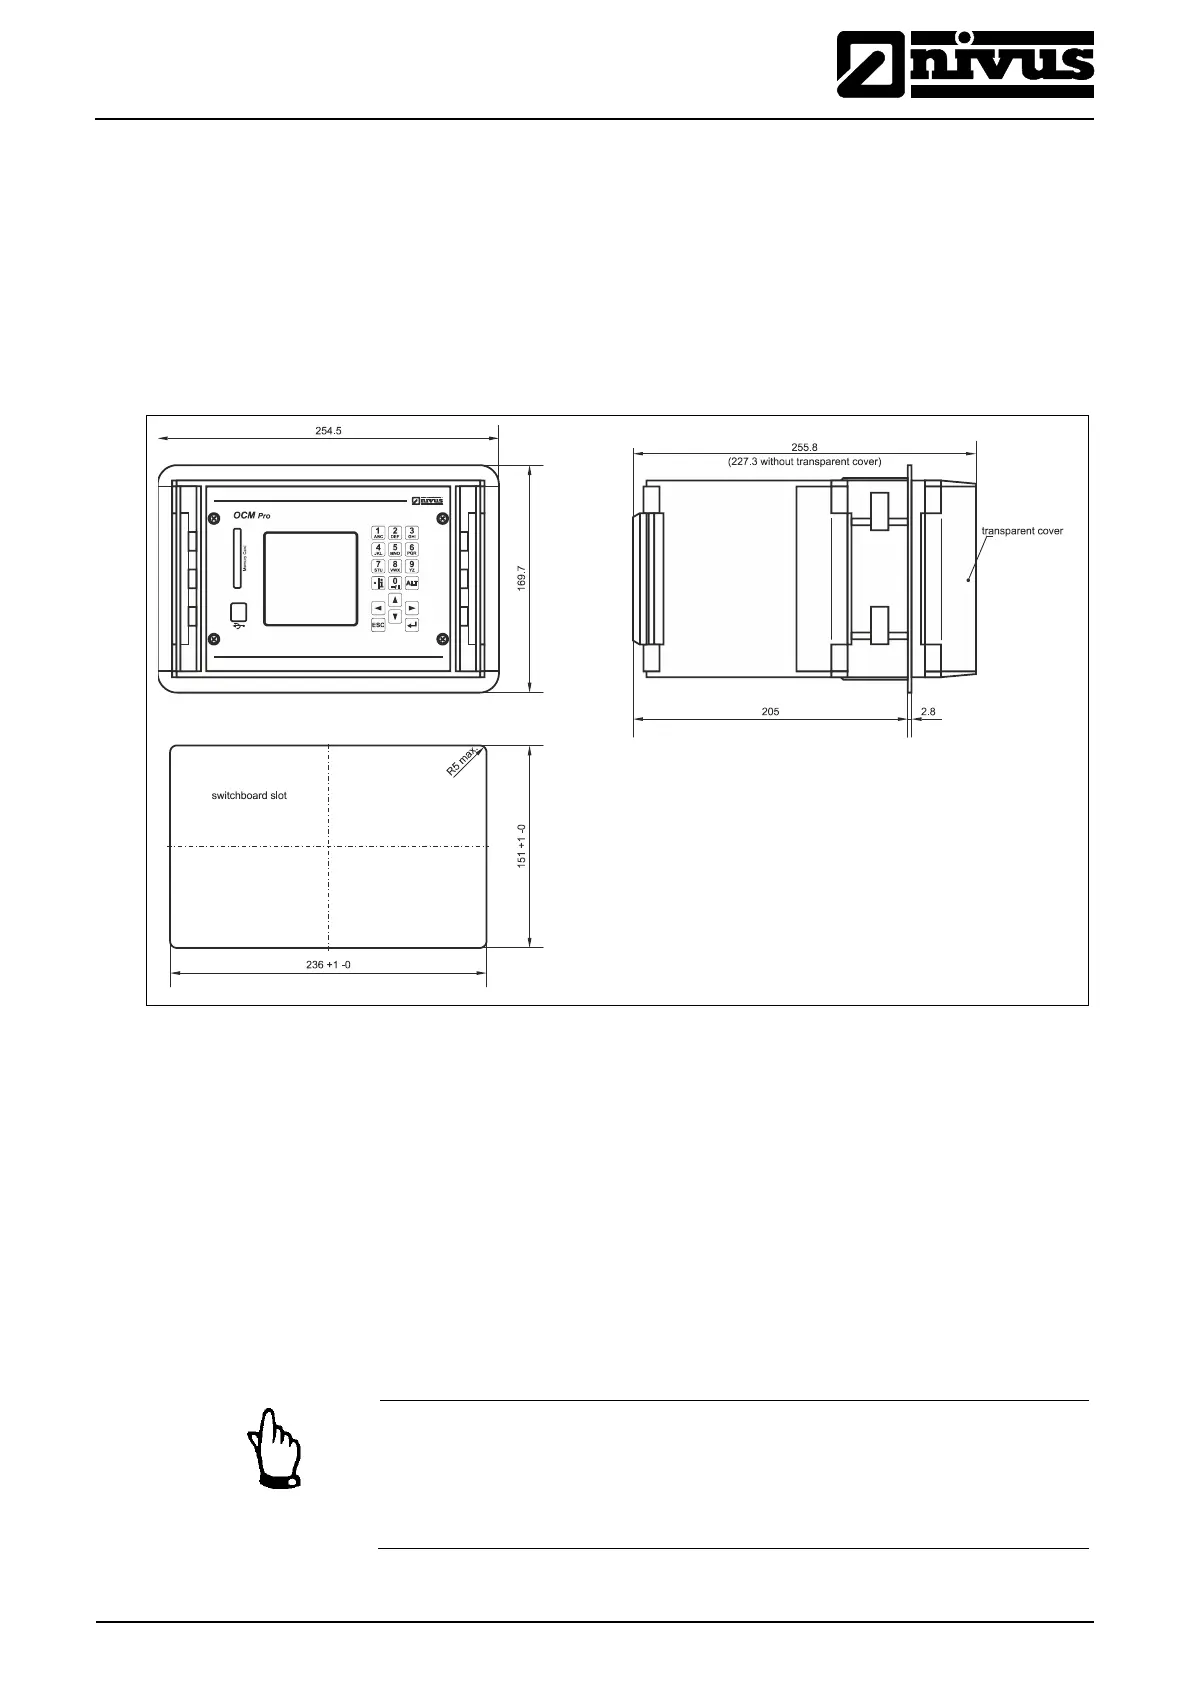
7.3.2 Panel Mount Enclosure Dimensions
Fig. 7-18 Panel mount enclosure
7.3.3 Panel Mount Enclosure Transmitter Connection
General
Prior to connection please see the instructions in Chap. 7.3.
The transmitter is equipped with terminal clamps which ensure reliable connec-
tion of single-wired and multi-wired cables featuring cross-sectional areas of
0.18–2.5 mm² in order to connect power supply as well as digital / analog out-
puts and inputs.
For terminal clamp connection it is necessary to use a slotted screwdriver with a
3.0 mm or 3.5 mm blade.
Note
While connecting, it is helpful to exert slight pressure on the terminal clamp
screw.
This ensures safe cable connection by opening the clamp.
 Loading...