2-2 Connectors
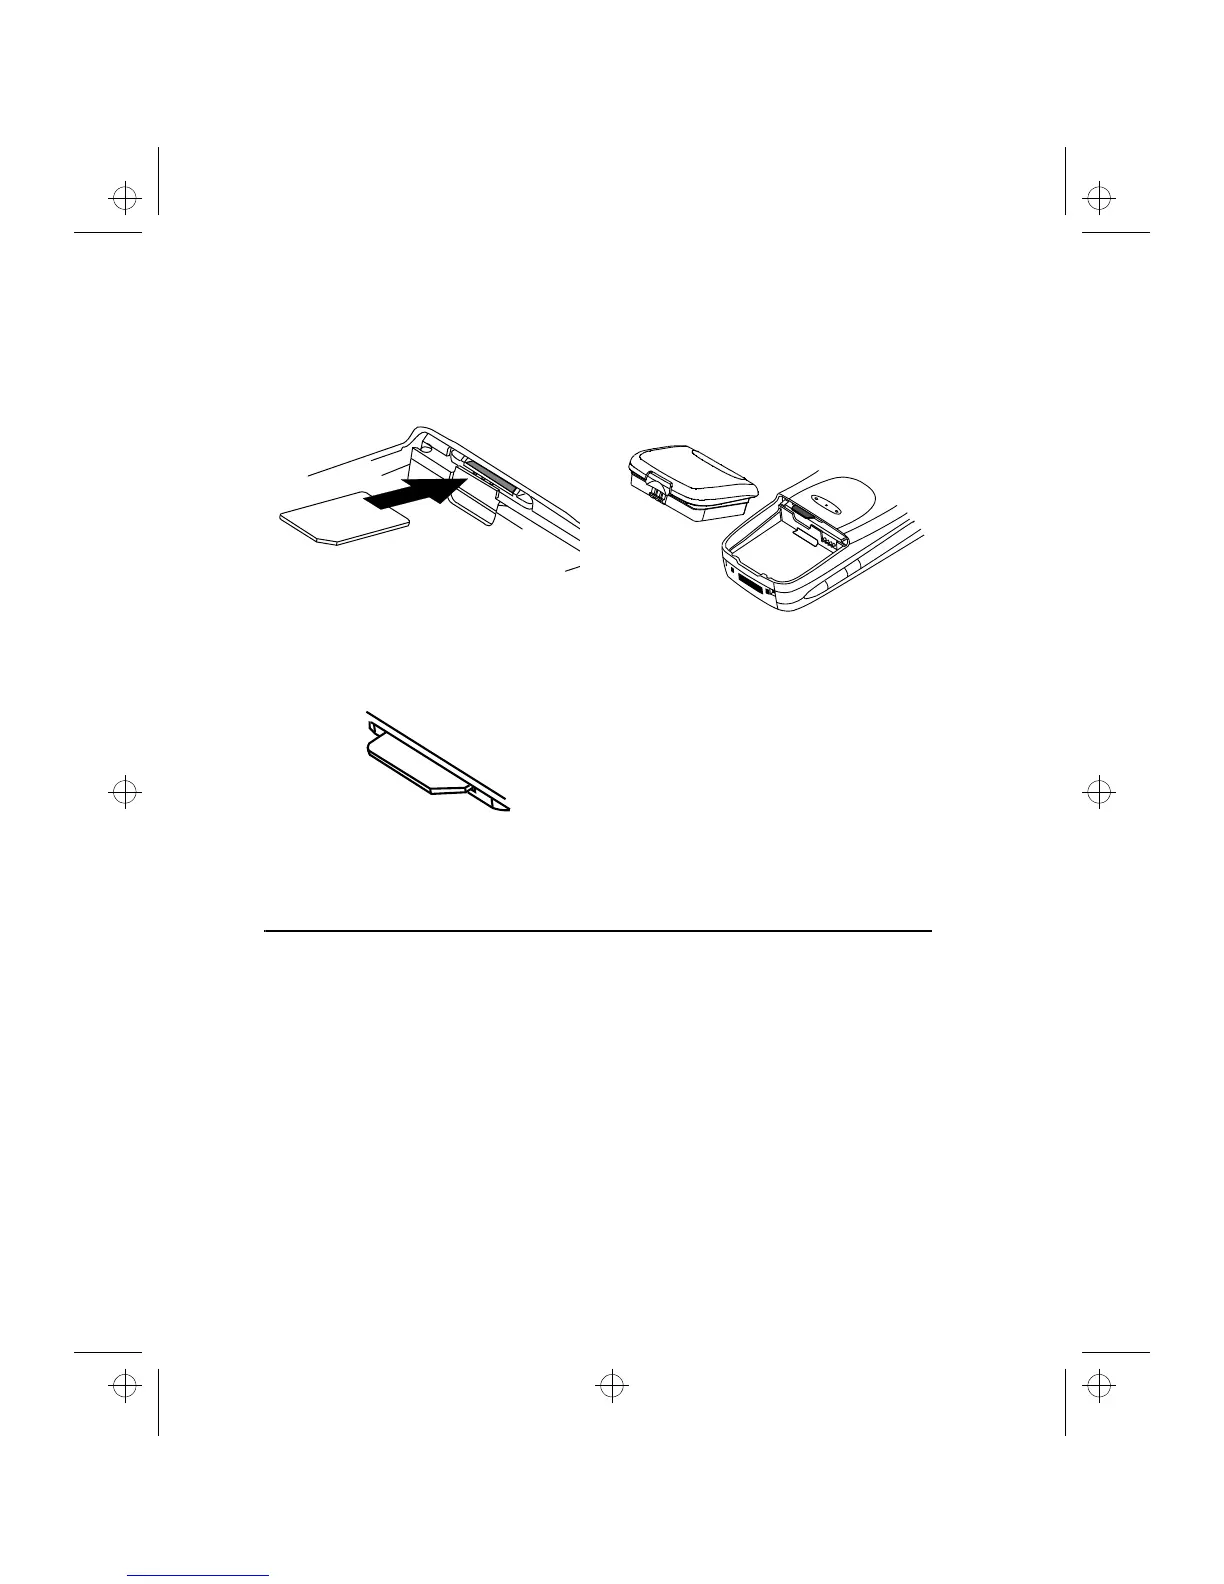
Slide the card into the SIM card slot (figure 2-
2). Make sure that the gold contacts of the
SIM card are facing down and the bevelled
corner of the card is on the right side.
When the SIM card is properly inserted into
the SIM card slot, the bevelled corner will re-
main visible (figure 2-3).
When you are sure that the SIM card is correctly
installed, replace the battery:
Insert the battery in the communicator so
that the side with the four golden connector
plates goes in first (figure 2-4).
Push the battery down towards the catch un-
til it clicks into place. Make sure the battery
is properly installed before switching the
power on.
Note:
The battery does not fit into place if the
SIM card is not correctly installed. Do not force
the battery into place! Check that you have in-
serted the SIM card into the slot as described
above.
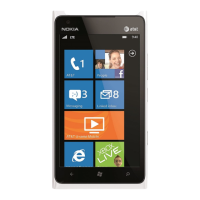
Connectors
(1) IrDA-SIR infrared port for connecting to a PC
or a printer (see figure 2-5). Infrared connections
are described in chapter 10 "System: Connecting
to a PC"
(2) Antenna connector for car installation (see
figure 2-5)
(3) System connector for car installation and for
the adapter (see figure 2-6)
(4) Adapter for connecting the charger and the
RS232 cable to the communicator. The connec-
tor on the left side (5) of the adapter is for the
RS232 cable plug and the one on the right (6) is
for the charger plug (see figure 2-6)
Figure 2-2
Figure 2-3
Figure 2-4
getting.frm Page 2 Thursday, January 16, 1997 4:09 PM