9 Creating print channels
64
9 Creating print channels
Creating print channels is necessary for connecting the scanner to the PC on which the controller is installed.
9.1 Creating print channels
Create print channels following the procedure.
Copy the created print channel and paste it to the empty channel, then create the channel to print from films.
1. Access the Controller Main Display.
Bringing up the display
Click Back on the Input Media display. → Click Back on the System management display. → Click End on the
Management Tool display.
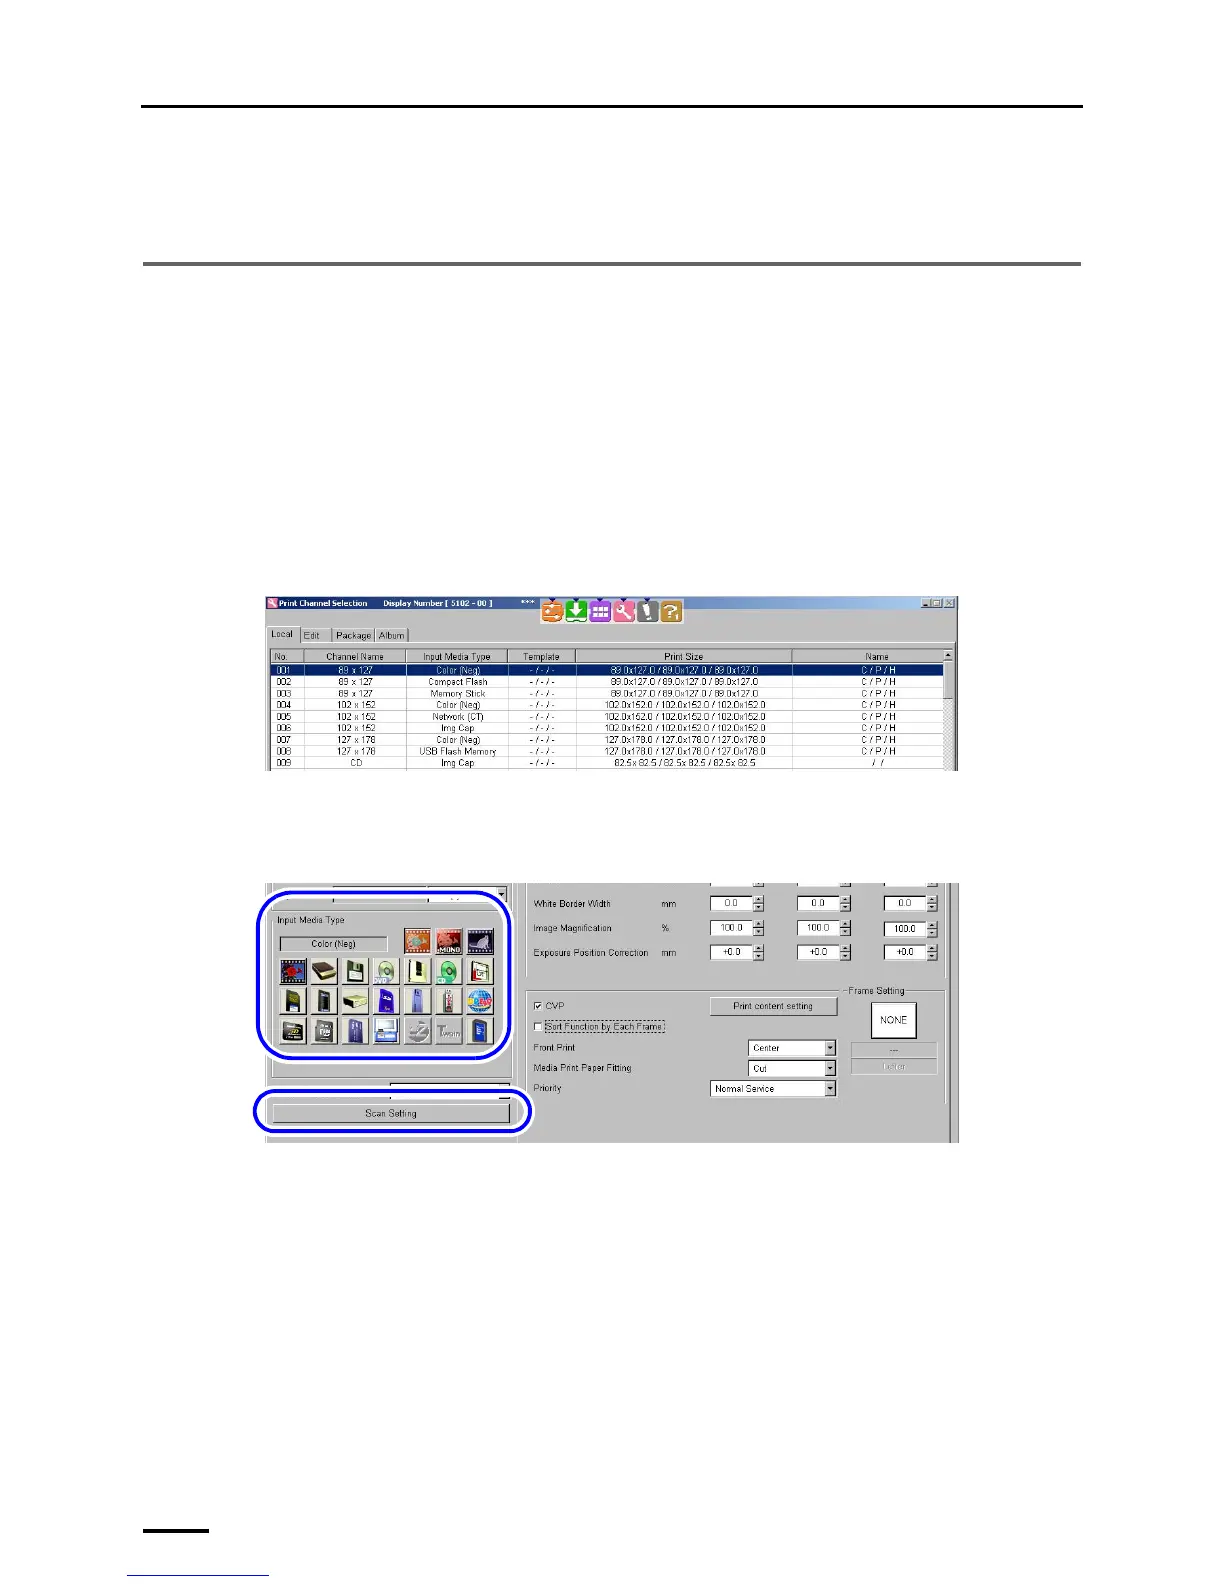
2. Access the Print Channel Selection display.
Bringing up the display
Click F on Controller Main Display. → Management Tool → Print Channel
Example: Print Channel Selection display
3. Select a source print channel and click Copy.
4. Select the copy destination of the print channel and click Paste.
5. Click Setting.
6. Select a film and click Scan Setting.
7. Configure the scanning condition on the Scan Setting display.
• For details, see the Starting Guide Scanning Setting display.
For details of the print channel, see the Operator's Manual Creating Print Channel in Various Settings.
This completes creating print channels.
This completes all installation of the scanner.
Be sure to keep the supplied CD-ROM, manual and accessories.
Print with the created print channel to confirm that the scanner works correctly.
S5102-00-UM00
S5103-00-UM00