NVIDIA DGX A100 Service Manual
3.3. Replacing the Power Supply
1. Be sure you have obtained the replacement PSU and that you have saved the packaging to use
when sending back the failed PSU.
2. Determine whether you need to shut down the system.
▶ If the three remaining PSUs are working and energized, then you do not need to shut down
power to the DGX A100 system.
▶ If fewer than three PSUs are working and energized, then shut down power to the DGX A100
system.
3. Unlock the power cord and then unplug it from the PSU to be replaced.
You may need to dislodge the power cord from the retaining clip.
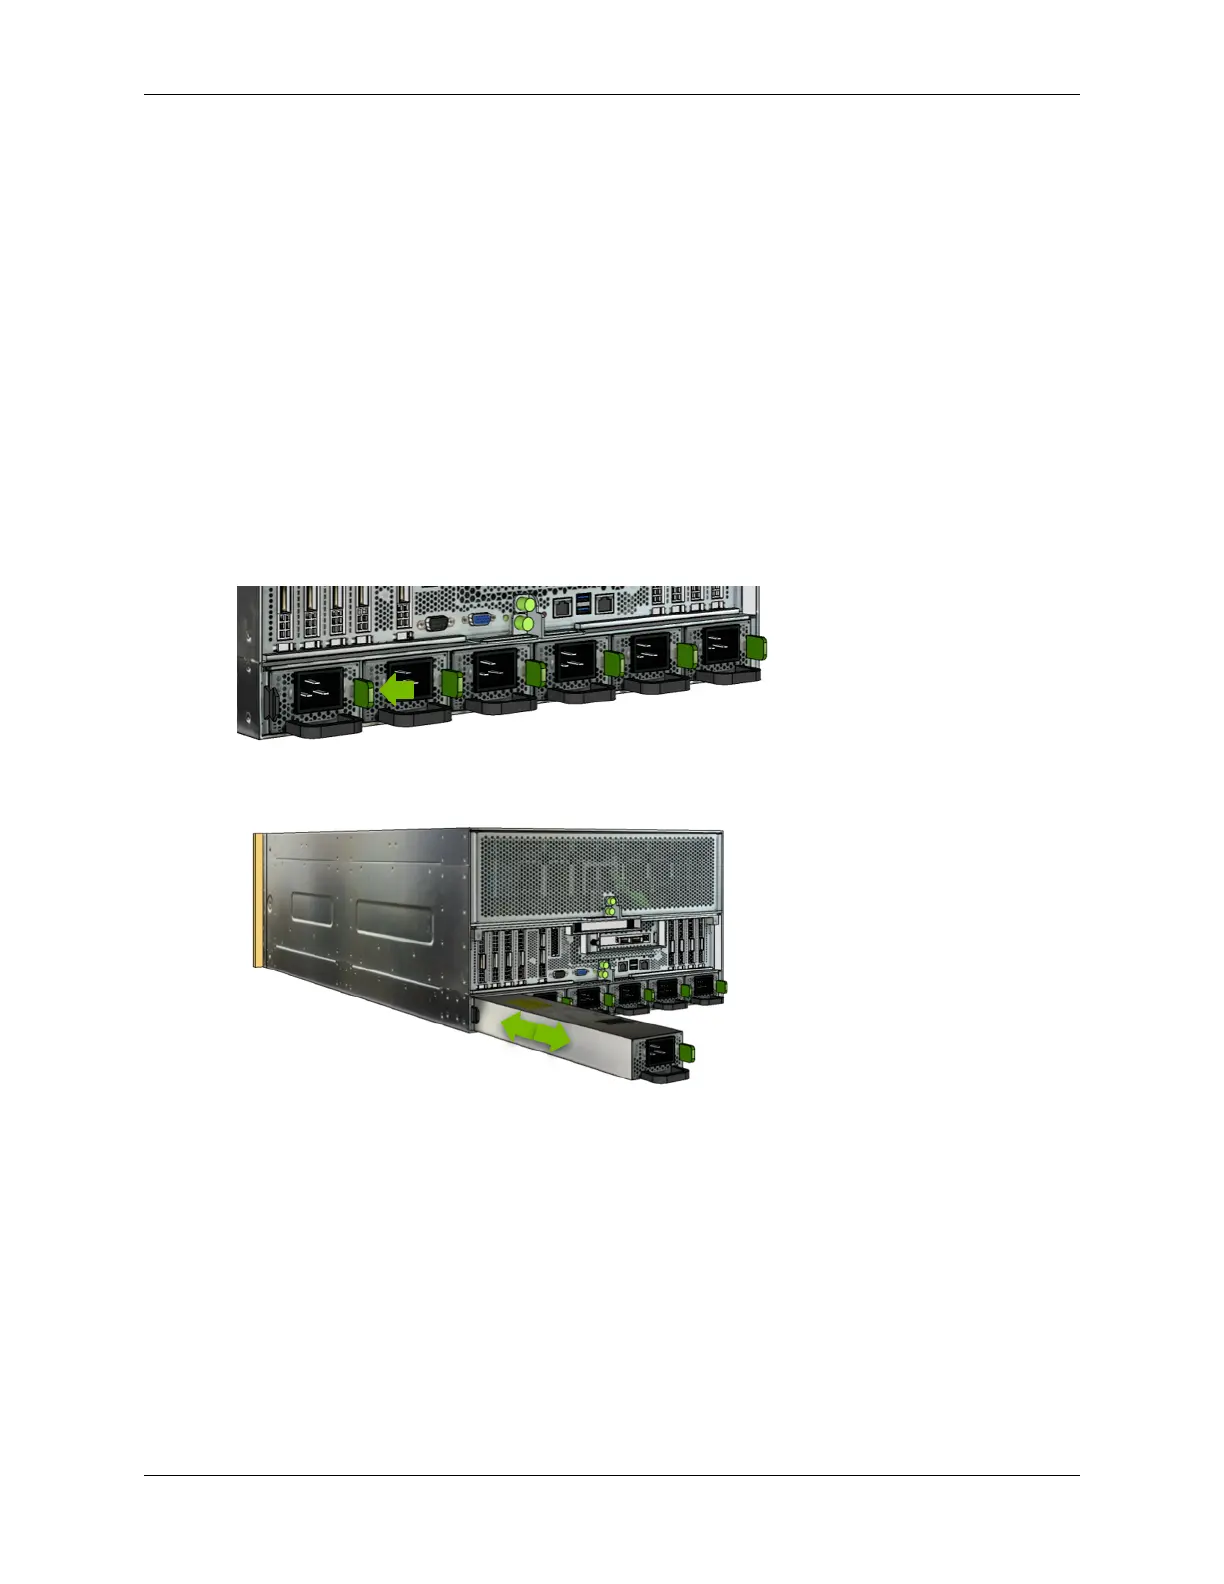
4. Remove the PSU.
1. Push on the green tab to release the lock.
2. Pull on the black handle to remove the PSU from the chassis.
5. Install the new power supply.
1. Insert the new power supply into the chassis and push it all the way in, making sure that the
green locking mechanism engages.
2. Plug in the power cord and lock it in place.
3. If needed, power on the system.
6. Conrm the installation by
▶ Viewing the PSU status from the BMC dashboard->``Sensors`` page.
▶ Running nvsm show health to conrm all power supplies are healthy.
Pack the old power supply and ship it back to NVIDIA Enterprise Support.
10 Chapter 3. Power Supply Replacement

 Loading...