NVIDIA DGX A100 Service Manual
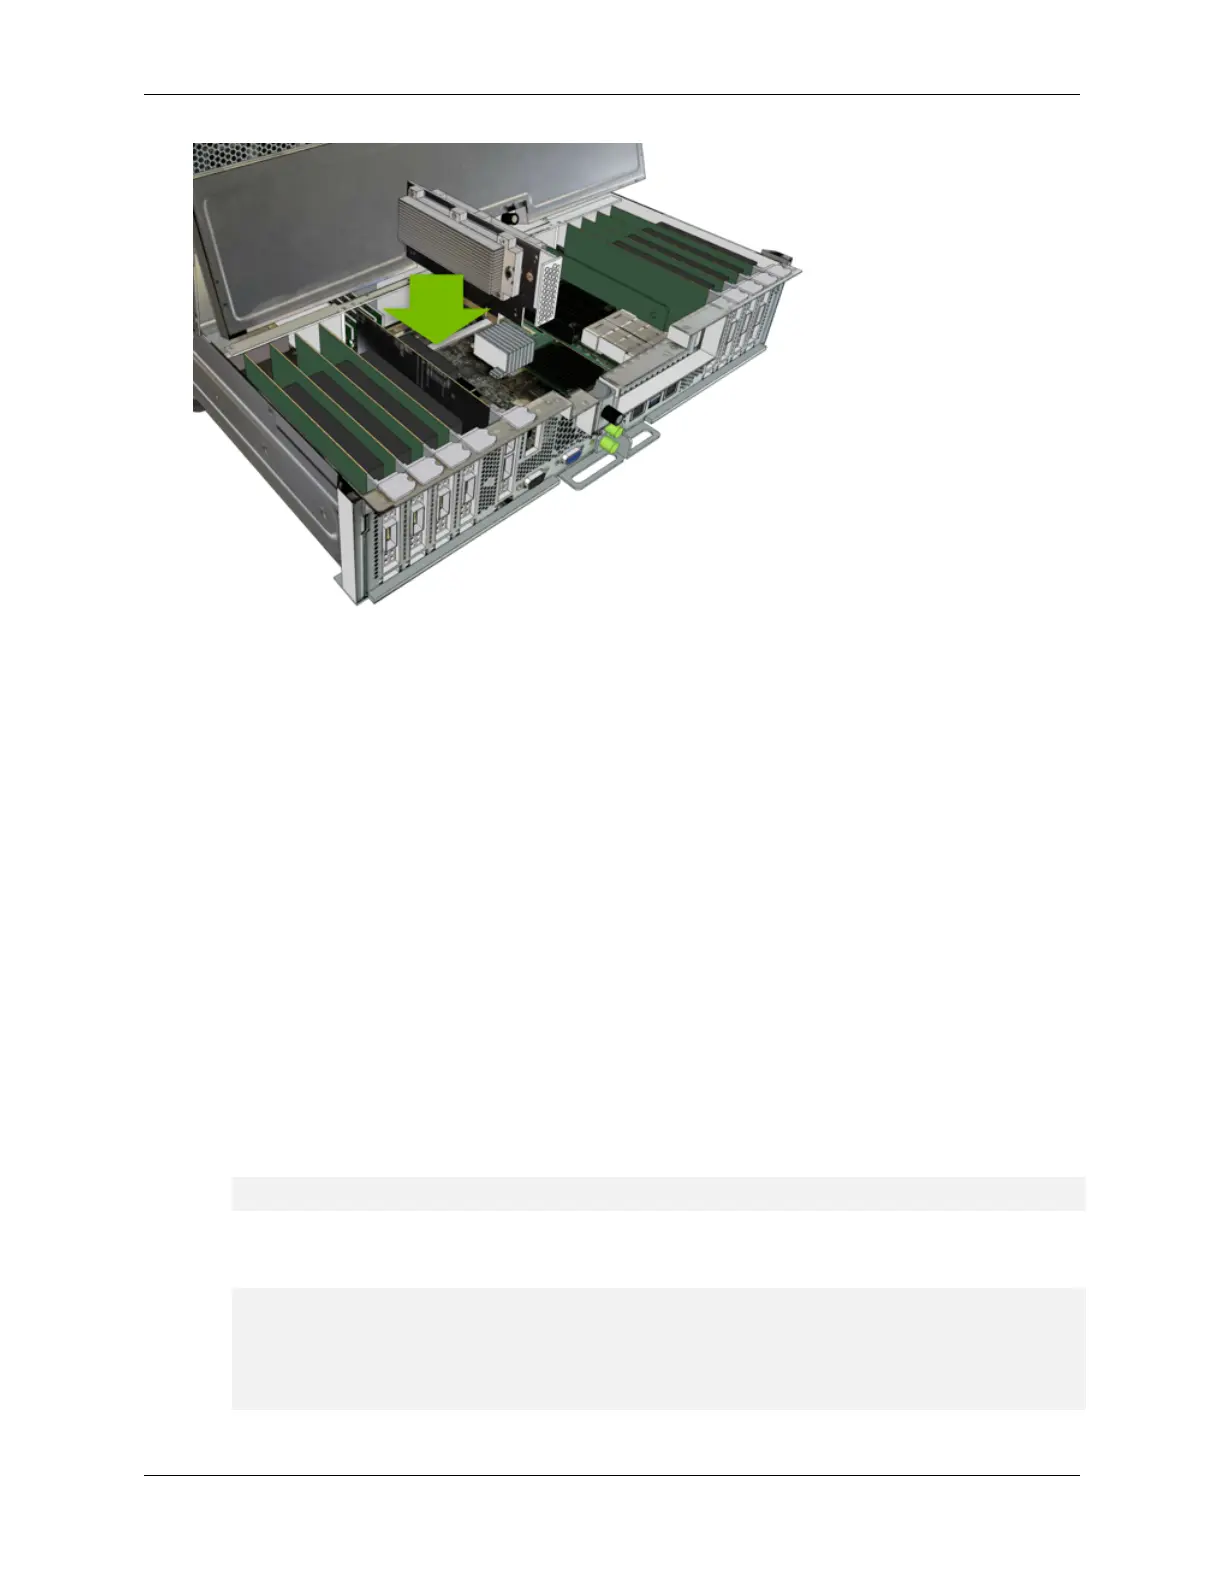
10. Close the motherboard tray lid and then install the motherboard tray.
Refer to the instructions in the section Replacing the Motherboard Tray.
11. Connect all the cables to the motherboard tray, connect all power cords, then power on the sys-
tem.
Rebuild the RAID 1 array according to the instruction in the section Rebuilding the Boot Drive RAID 1
Volume.
10.4. Rebuilding the Boot Drive RAID 1 Volume
After replacing a faulty M.2 OS drive, you must rebuild the RAID 1 array.
1. If you have not already done so, boot the DGX A100 system and log in.
2. Rebuild the boot drive mirror.
In the following steps, replace X with the number that corresponds to the replaced drive. If you
did not note this information when identifying the failed drive, then follow the instructions in the
rst step of Identifying the Failed M.2 NVMe.
1. Start the rebuild process.
$ sudo nvsm start ∕systems∕localhost∕storage∕volumes∕md0∕rebuild∕
2. Enter the device name of the spare (replaced) drive when prompted - either nvme0n1 or
nvme1n1, depending on which drive was replaced.
PROMPT: In order to rebuild this volume, a spare drive
is required. Please specify the spare drive to
use to rebuild md0.
Name of spare drive for md0 rebuild (CTRL-C to cancel): nvmeXn1
WARNING: Once the volume rebuild process is started, the
(continues on next page)
44 Chapter 10. M.2 NVMe Boot Drive Replacement

 Loading...