EasyManuals Logo

Nvidia DGX A100 Service Manual

Nvidia DGX A100
108 pages
To Next Page IconTo Next Page
To Previous Page IconTo Previous Page
Page #33 background imageLoading...
Page #33 background image
NVIDIA DGX A100 Service Manual
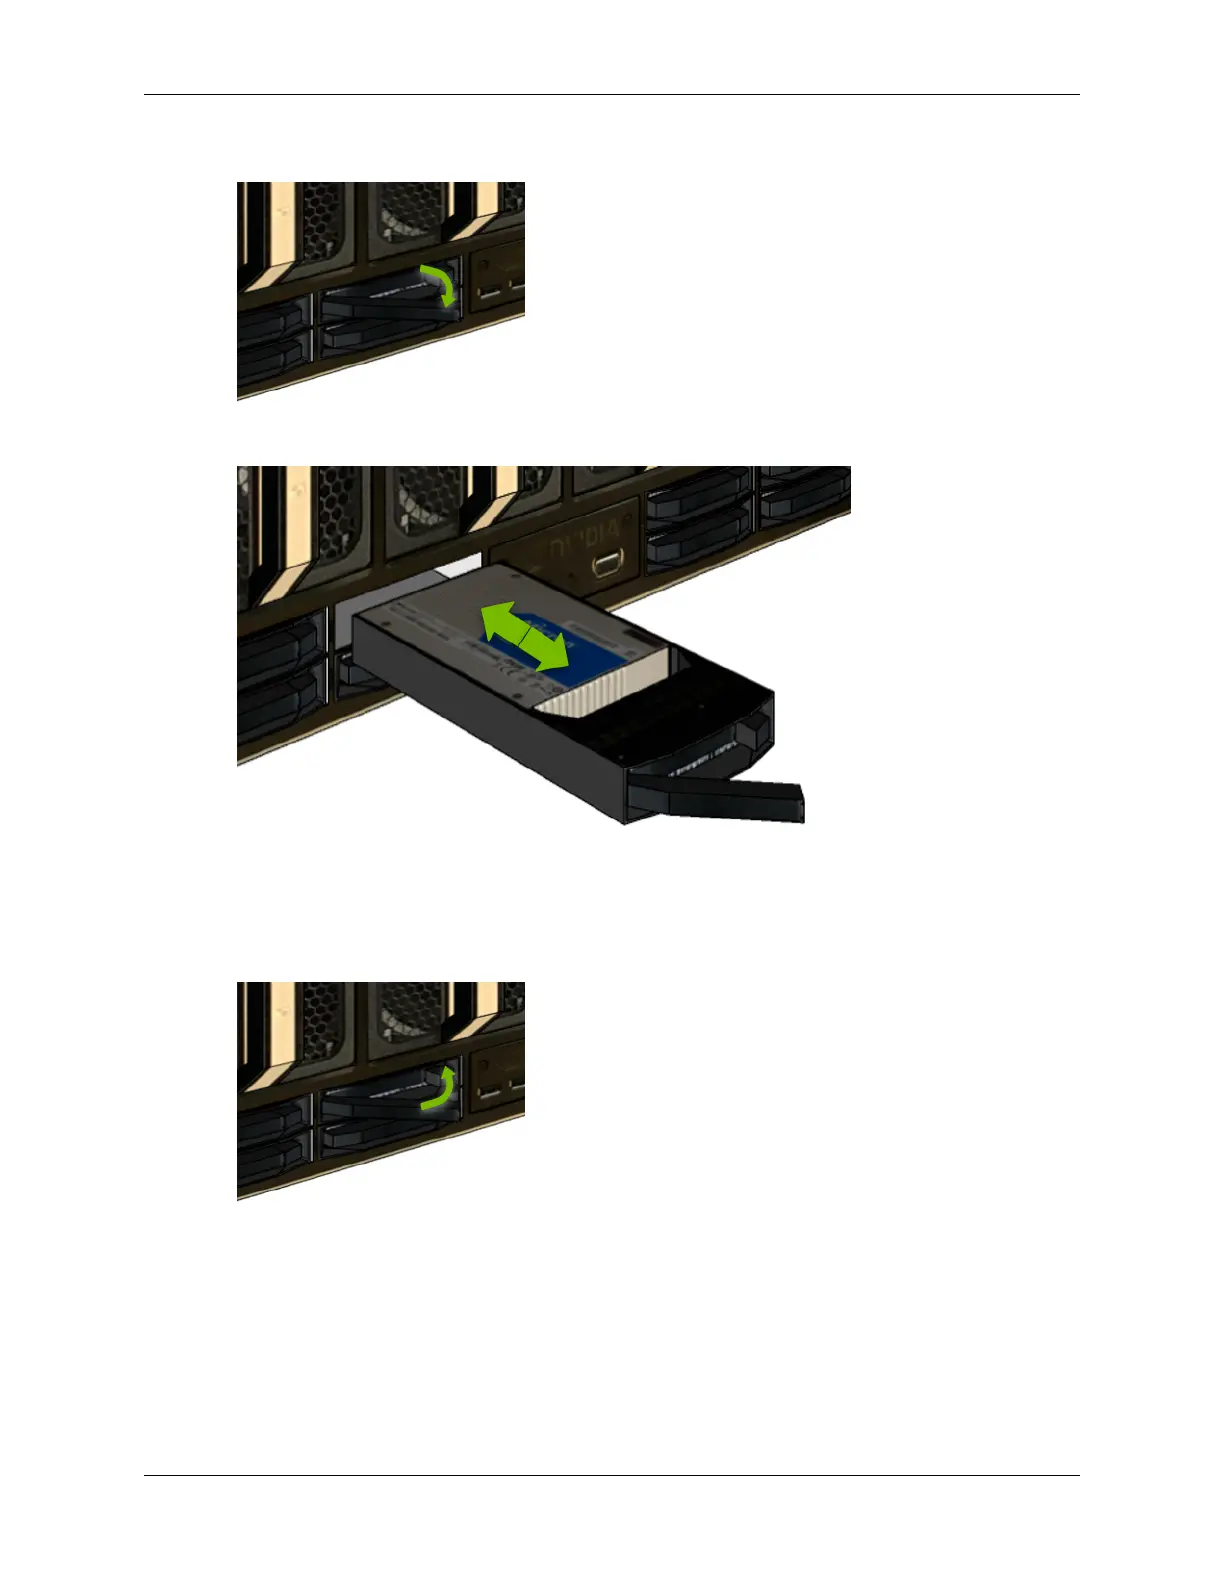
1. Push the lever release button (on the right side of the lever) to unlock the lever.
2. Pull the lever to remove the module.
3. Unlock the release lever and then slide the drive into the slot until the front face is ush
with the other drives.
4. Close the lever and lock it in place.
6. Install the new NVMe drives in slots 4, 5, 6, and 7.
1. Unlock the release lever and then slide the drive into the slot until the front face is ush
with the other drives.
2. Close the lever and lock it in place.
6.3. Installing the Optional NVMe Drives 27

Table of Contents

Other manuals for Nvidia DGX A100

Questions and Answers:

Question and Answer IconNeed help?

Do you have a question about the Nvidia DGX A100 and is the answer not in the manual?

Nvidia DGX A100 Specifications

General IconGeneral
GPU8 x NVIDIA A100 Tensor Core GPUs
System Memory1 TB DDR4
Storage15 TB NVMe SSD
GPU Memory320 GB total (40 GB per GPU)
CPU2 x 64-Core AMD EPYC 7742
Networking8 x 200 Gb/s InfiniBand or Ethernet
InterconnectNVIDIA NVLink

Related product manuals