Printing With NetWare 3-3
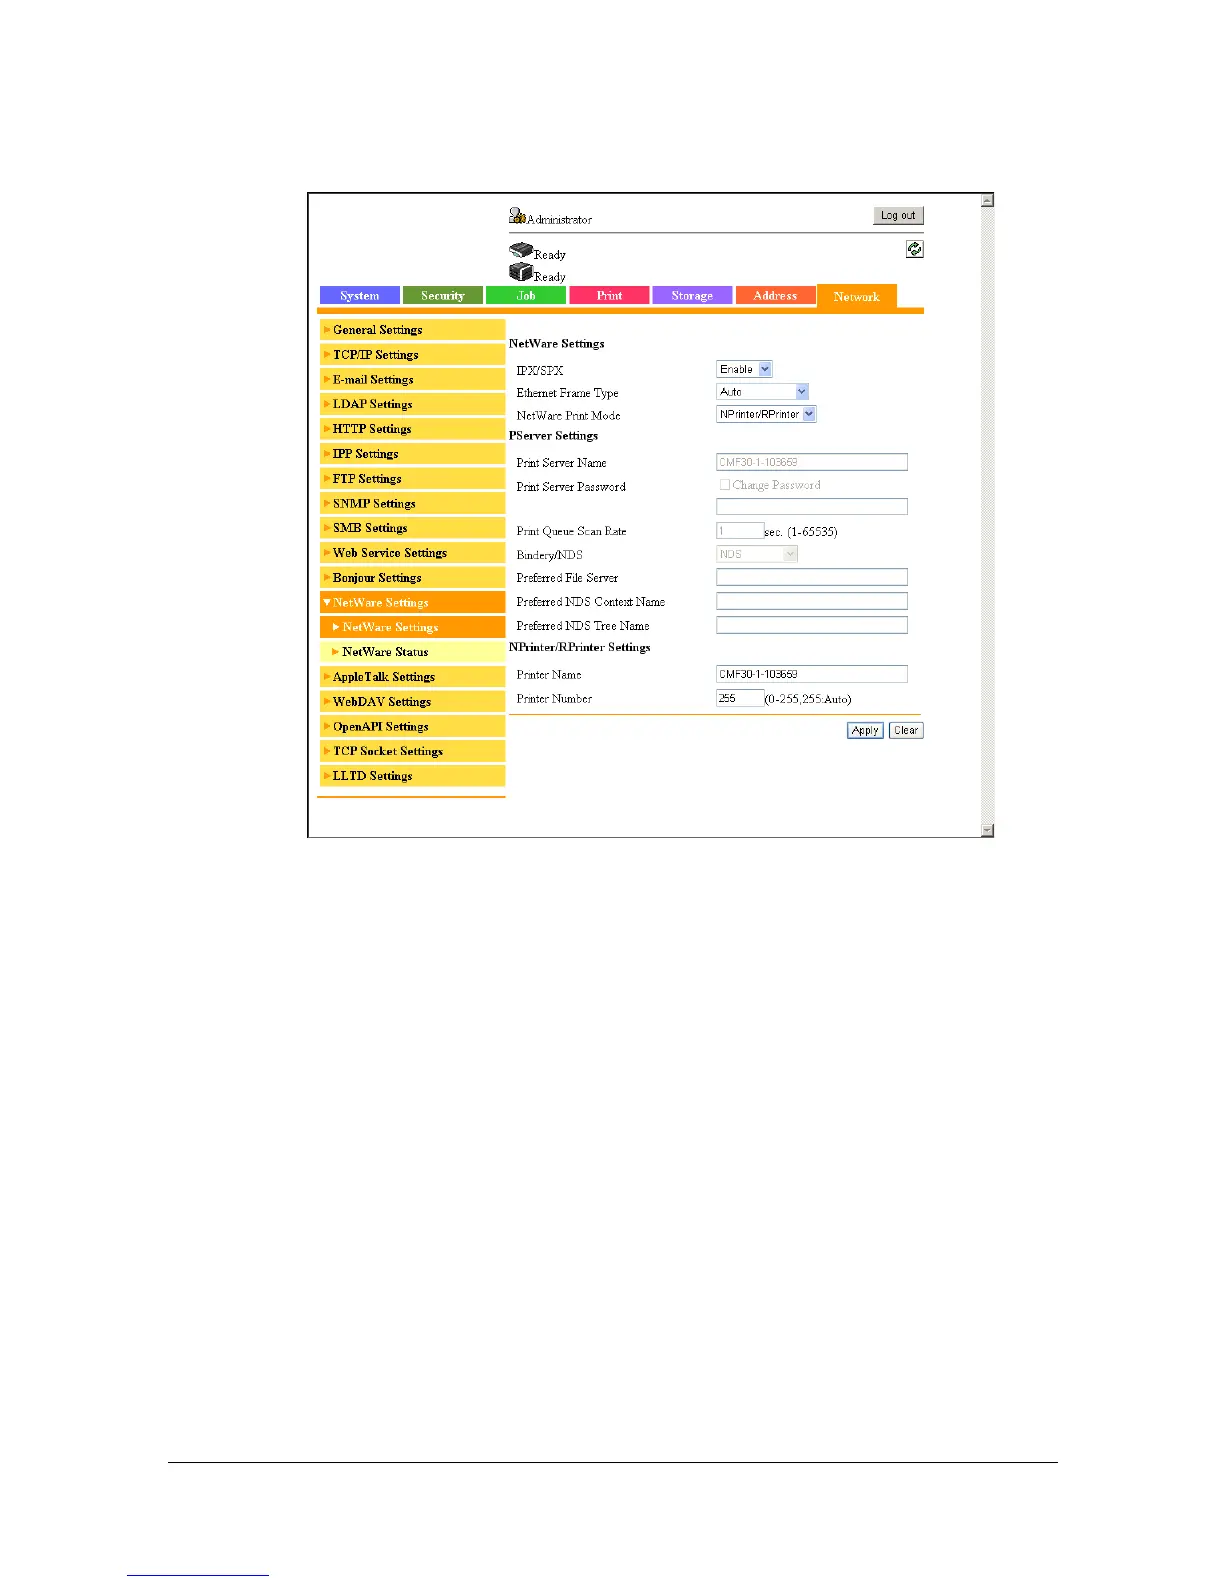
7 In Administrator mode of Web Connection, select [NetWare Settings] from
the [Network] tab, and then specify the following settings.
– [IPX/SPX]: Select [Enable].
– [Ethernet Frame Type]:
Select [Auto]. (Select the frame type according to the network
environment.)
– [NetWare Print Mode]: Select [NPrinter/RPrinter].
– [Printer Name]:
Specify the printer name. (Default: [CMF30-1-XXXXXX])
– [Printer Number]:
Specify the printer number (0-255). When 255 is specified, the set-
ting is [Auto].
8 Restart the printer (turn the printer off, then on again).
9 Use the NetWare server console to display the print server screen, and
then check that the created printer is shown as [Waiting for Job] for the
connected printer (0).
 Loading...