74 EN
Printing
6
By connecting the camera to a PictBridge-compatible printer with the USB cable, you can print
out recorded pictures directly. To find out if your printer is compatible with PictBridge, refer to the
printer’s manual.
PictBridge
The standard that enables digital cameras and printers made by different manufacturers to be
connected, and also allows pictures to be printed directly from the camera.
STANDARD
All printers that support PictBridge have standard print settings. By selecting
[
<
STANDARD]
on the settings screens (
g
P. 75), you can print pictures according to these settings. For
details on your printer’s standard settings, refer to the printer’s manual or contact the printer
manufacturer.
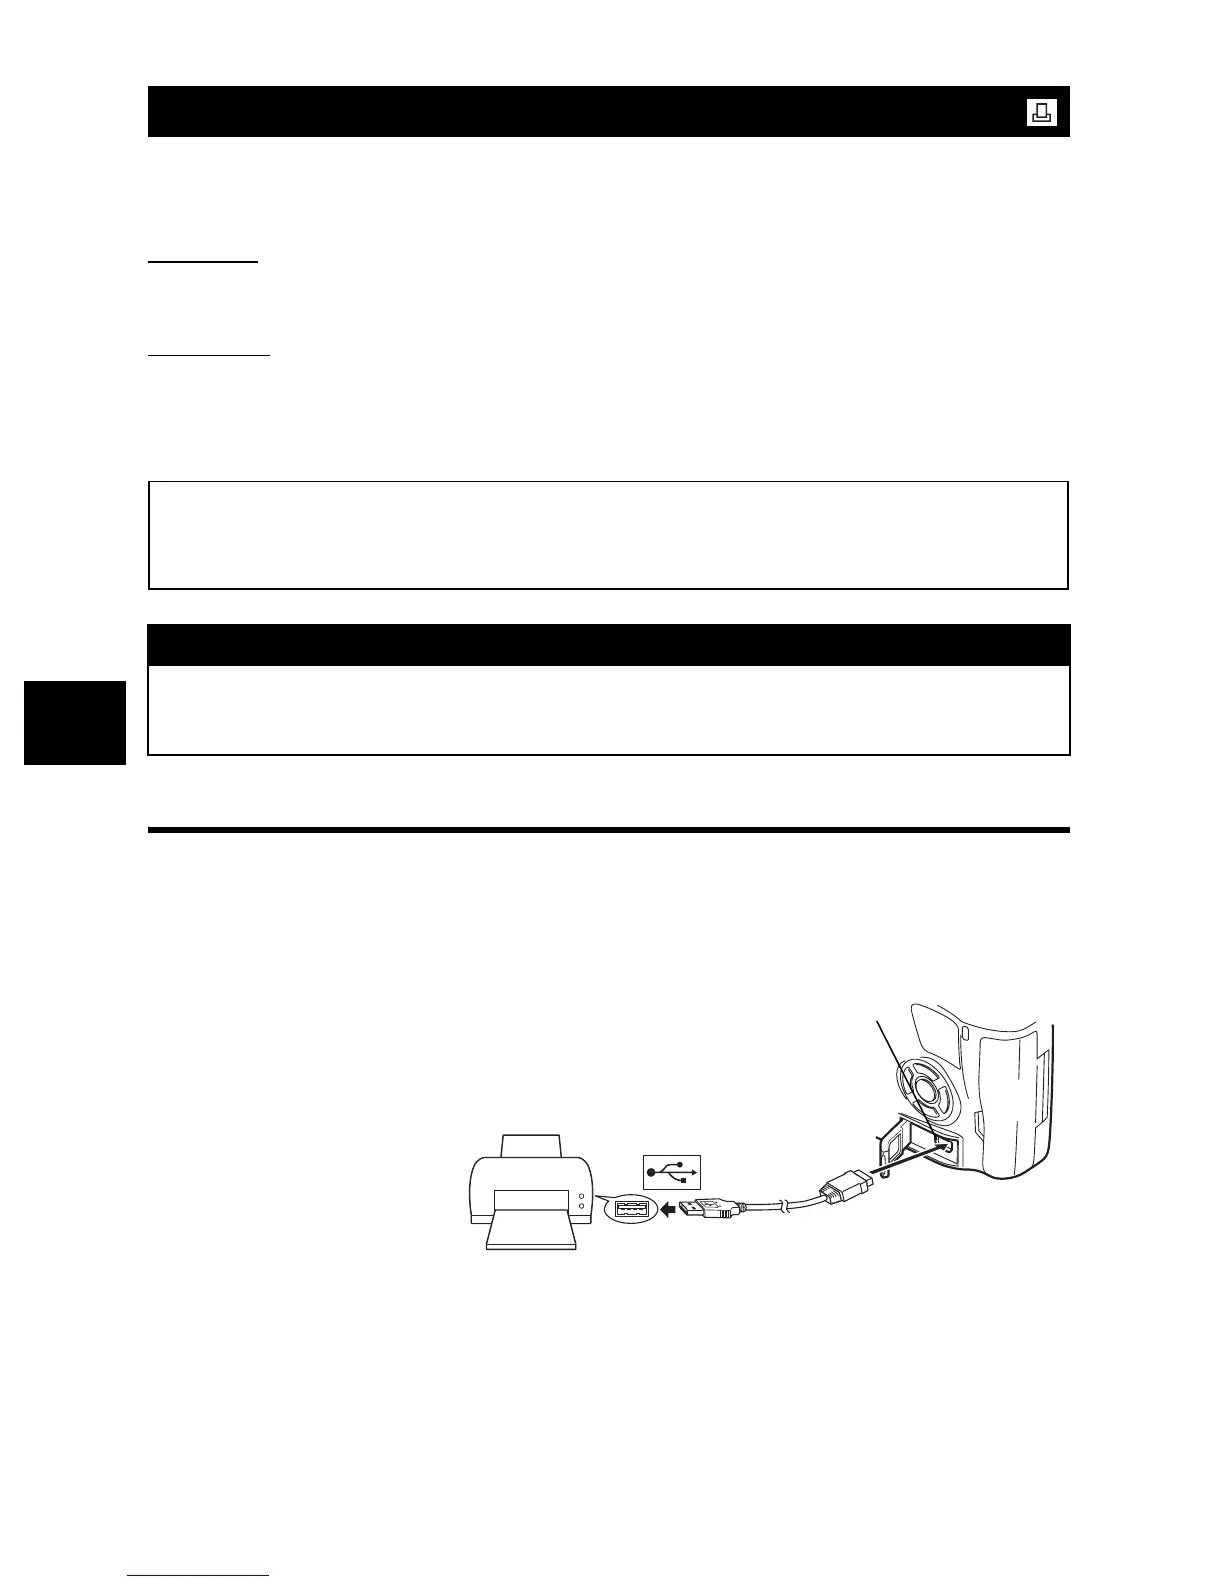
Connecting the camera to a printer
Use the provided USB cable to connect the camera to a PictBridge-compatible printer.
1
Turn the printer on and connect the camera’s multi-connector to the
printer’s USB port with the USB cable
•
For details on how to turn the printer on and the position of the USB port, refer to the
printer’s manual.
2
Turn on the camera.
•
The selection screen for the USB connection is displayed.
Direct printing (PictBridge)
x
Notes
•
Use a fully charged battery for printing.
•
Images recorded in RAW data cannot be printed.
•
The camera will not enter sleep mode while it is connected to the USB cable.
•
The available print modes and settings such as paper size vary with the type of printer. For
details, refer to the printer’s manual.
•
For details on printing paper types, ink cassettes, etc., refer to the printer’s manual.
Multi-connector