EN 79
Using the OLYMPUS Master Software
7
Windows
1
Double-click (OLYMPUS Master) on the desktop.
•
The OLYMPUS Master main menu is displayed.
Macintosh
1
Double-click (OLYMPUS Master) in the [OLYMPUS Master] folder.
•
The OLYMPUS Master main menu is displayed.
•
The first time you start the program, a dialog box appears, prompting you for User
Information. Enter your
[Name]
and the
[OLYMPUS Master serial number]
that is
printed on the affixed label, then select your region.
Closing OLYMPUS Master
1
Click (Exit) in the main menu.
•
The OLYMPUS Master program is closed.
Downloading images to save on your computer
Save images downloaded from the camera on your computer.
1
Click (Transfer Images) in the OLYMPUS
Master main menu.
•
The selection menu for the folders containing the files to be
copied is displayed.
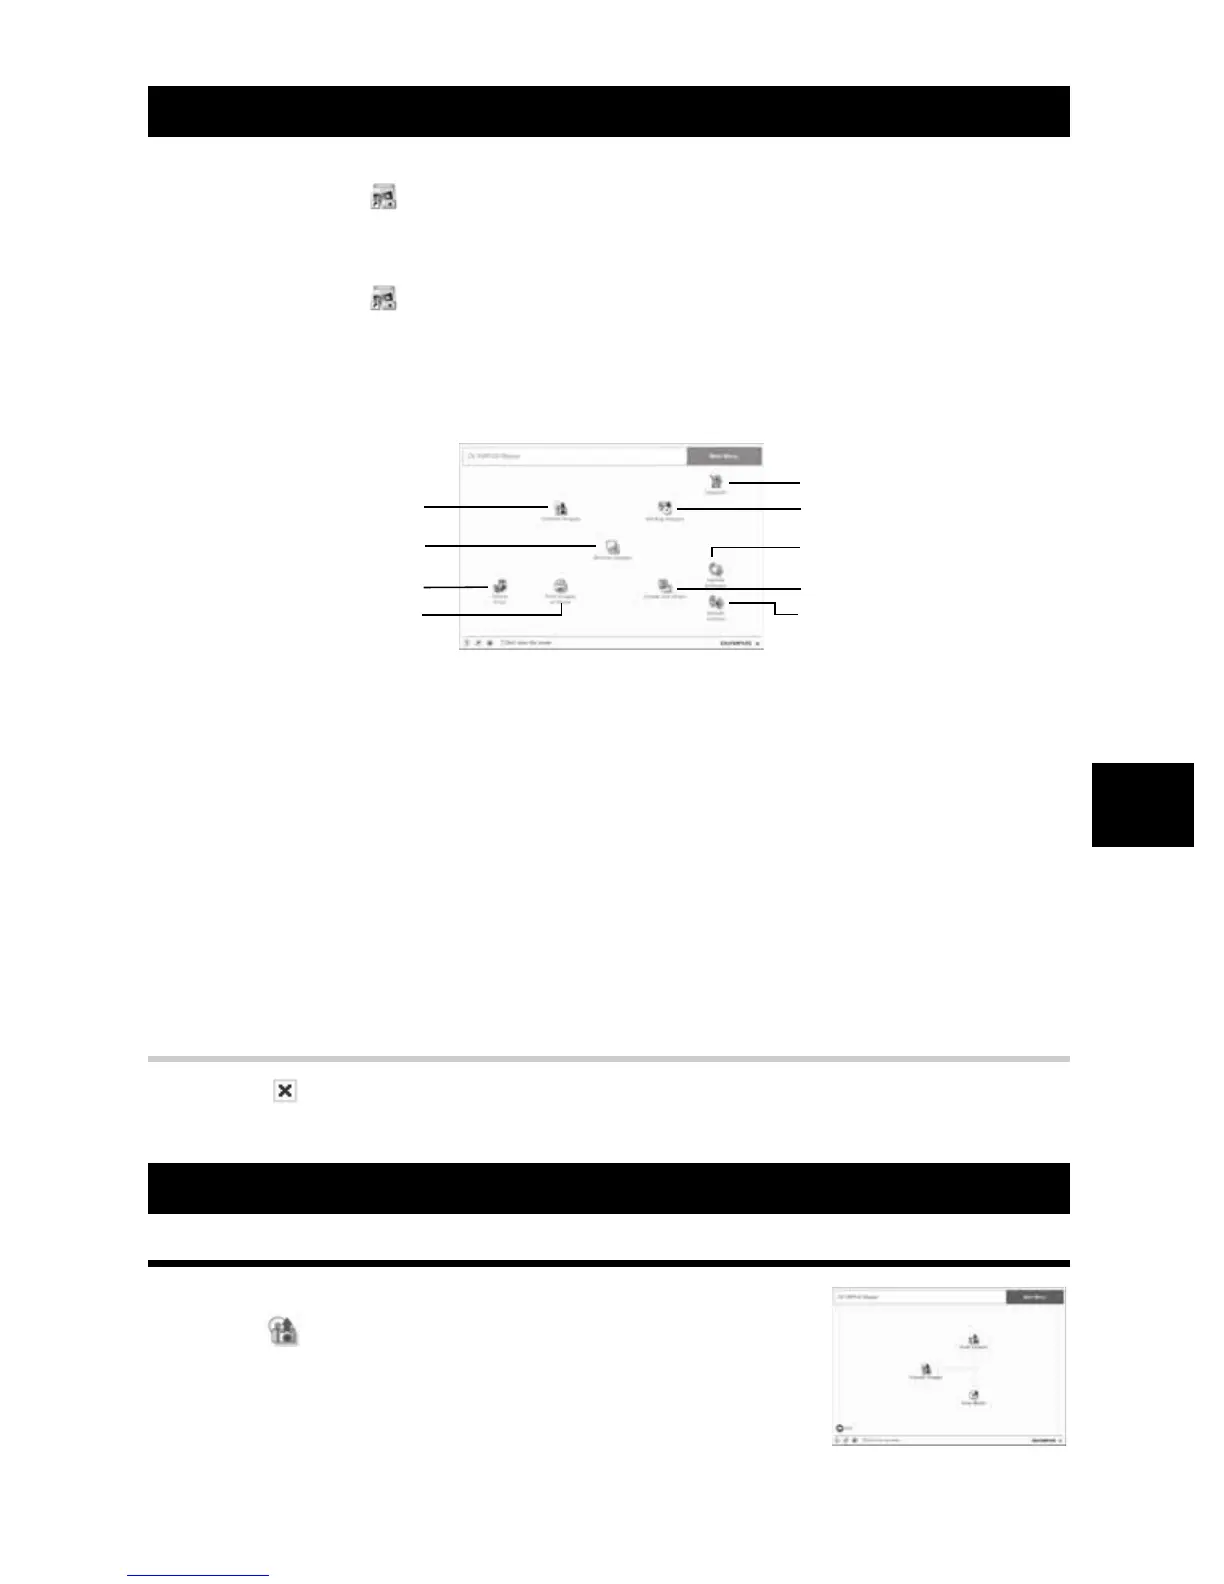
Starting OLYMPUS Master
1
[Transfer Images] button
Transfers images from the camera or
removable media.
2
[Browse Images] button
The Browse window is displayed.
3
[Online Print] button
The online print window is displayed.
4
[Print Images at Home] button
The print menu is displayed.
5
[Update Camera] button
Allows you to update your camera’s
firmware to the lastest version.
6
[Create and Share] button
The menus for enjoying images are
displayed.
7
[Update Software] button
Allows you to update the OLYMPUS Master
software to the lastest version.
8
[Backup Images] button
Backs up images onto removable media.
9
[Upgrade] button
The dialog box that allows upgrade to
OLYMPUS Master Plus is displayed.
Displaying the camera’s images on your computer
1
2
3
4
5
6
7
8
9