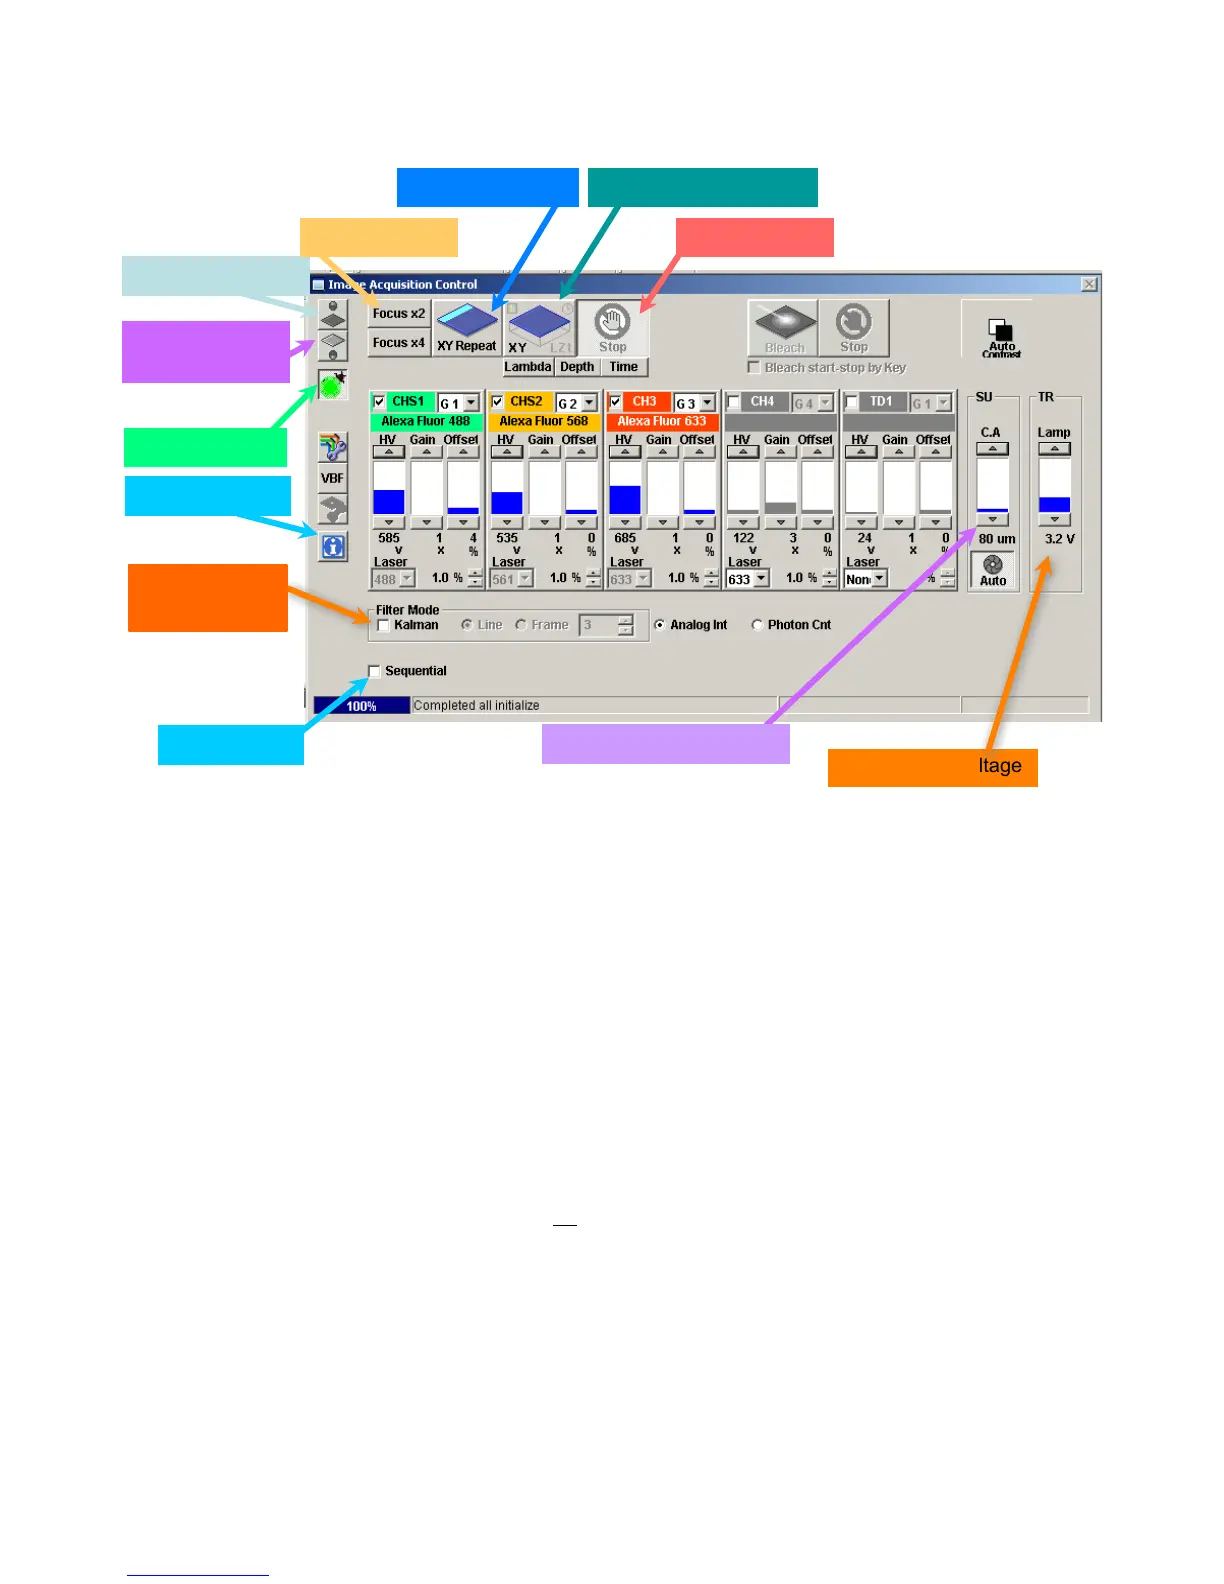
Figure 4. Image Acquisition Window – Basic controls for Finding the Image
2. Setting Up for Confocal Microscopy
This section covers basic settings for obtaining a confocal image.
2.1 Choosing the Dye
Each combination of fluorescent labels requires specific laser lines, dichroic mirrors and filters. These
are selected automatically when you choose the fluorophores from the list in the Dye List Window.
1. Open the Dye List Window, if it is not currently visible, Fig. 2.5;
a. click on Image Acquisition Control/Dye List button, Fig. 4.3, to open;
2. Selected Dyes – upper window displays the currently selected dyes
a. click on “All Clear” to remove all current selections
b. double-click on any selected dye to remove it
3. Scroll through the list of dyes in the lower window;
4. Select each desired fluorophore by double-clicking on the name;
a. if your particular dye does not appear in the list, contact facility manager, or choose one
with similar characteristics
b. dyes with conflicting optical requirements will generate an error message
5. Activate the settings by clicking on the “Apply” button, lower window;
4.1 Tungsten Lamp
4.2 Fluorescence
shutter
4.3 Dye List
4.5 Fast scan
4.6 XY Repeat
4.8 Stop scan
4.4 Tungsten Voltage
4.7 Acquisition scan
4.10 Confocal Aperture
4.9 Sequential
4.11 Kalman
Averaging
4.12 Information
Olympus Fluoview-1000 User’s Guide
V.M. Bloedel Hearing Research Center, Core for Communication Research
Center on Human Development and Disability, Digital Microscopy Center
May 11, 2011 11
 Loading...


