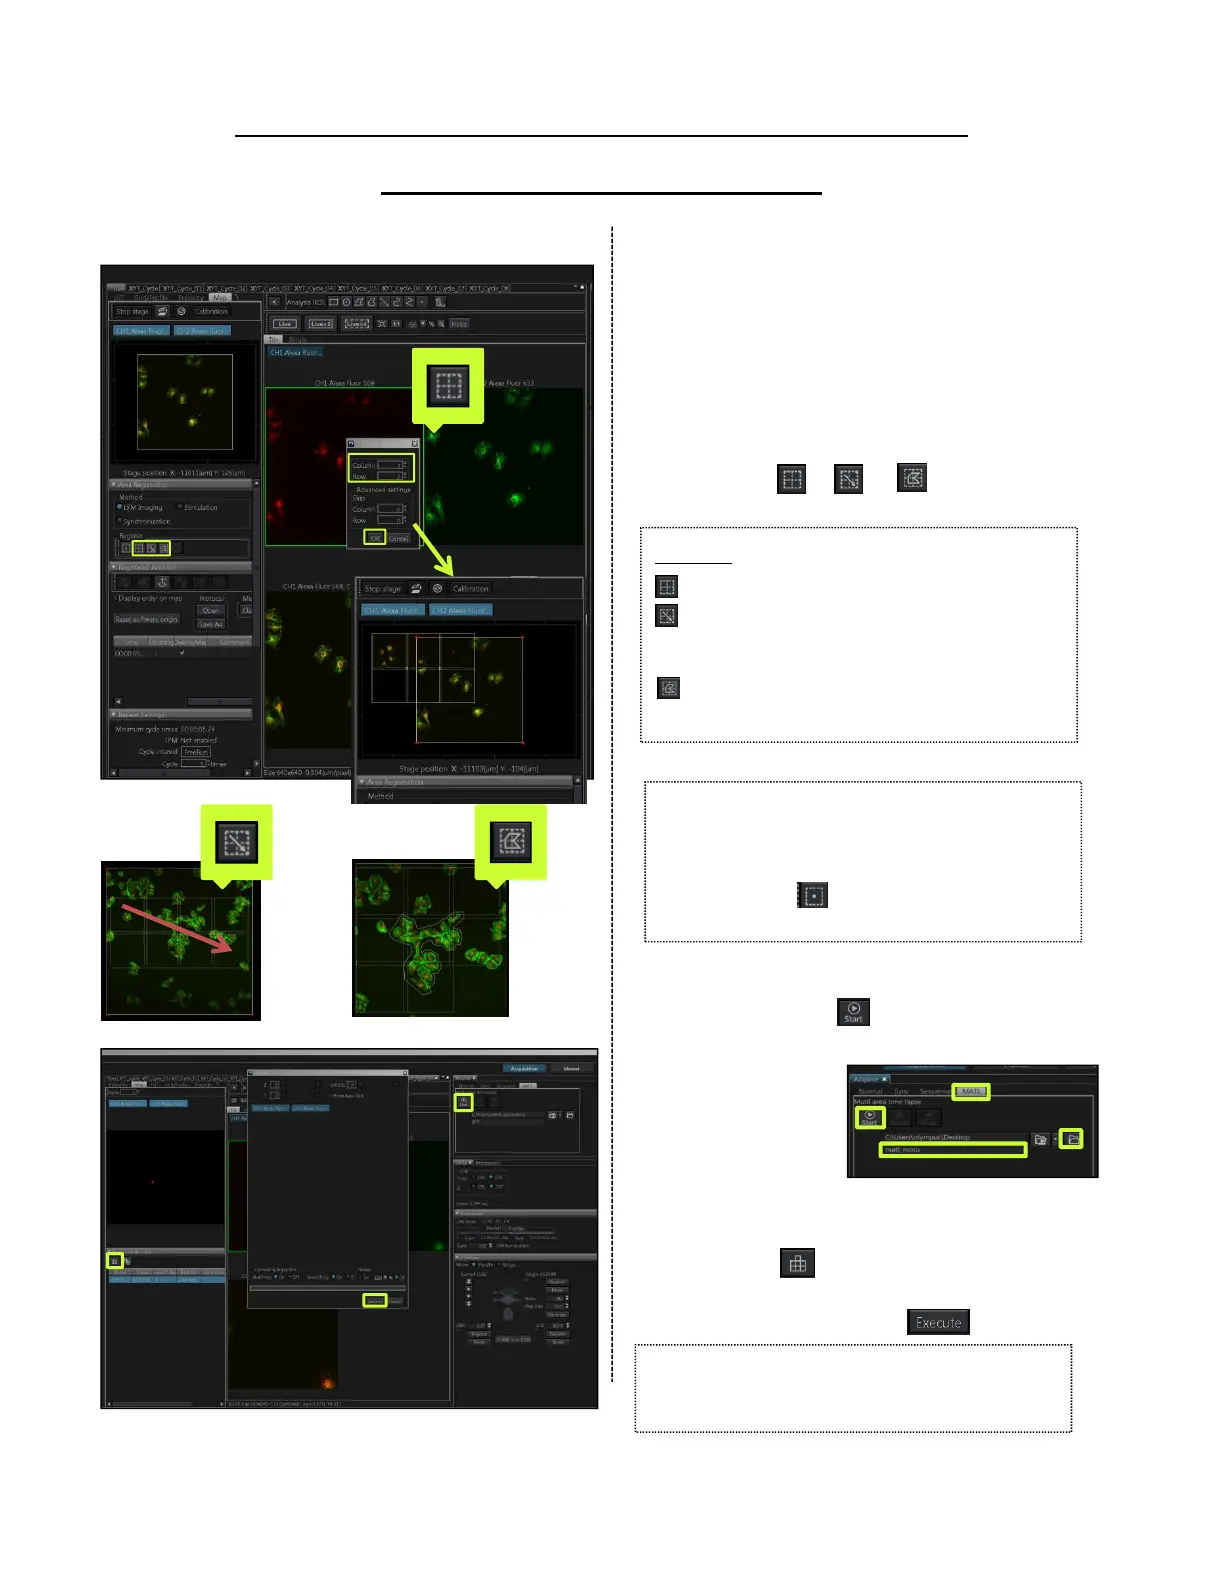
Acquiring the stitched image
using Map Image
① Refer to page 12, acquiring the
map image.
Define the area of acquisition
② Move the specimen to desired
position using the map image as
reference. Double-clicking on the
map, the motorized stage moves to
the position where double-clicked.
③ Press the or or button to
register the area.
④ Select [MATL] tab in [Acquire] Tool
Window. Press button to start
acquiring the image.
Processing to stitch
⑤ Select the image tab acquired and
press the button.
⑥ After the image is displayed in the
dialog box, press the button.
③
⑤
⑥
*If you ticked the [Stitching] in
[▼Registered Area List] before acquiring
the image, process to stitch automatically.
3 types
:Registering an arbitrary matrix area
:Registering a rectangular ROI in the
map image
display area.
:Registering a polygonal ROI in the
map image display area.
14
【Attention】
All acquiring conditions(XY position, focus
position, laser intensity, sensitivity, series
setting, and on. ) are registered when
you press the button. So, Register
after you finish adjusting all conditions.