3. Creating a new project
3. Creating a new project
Left-click the icon
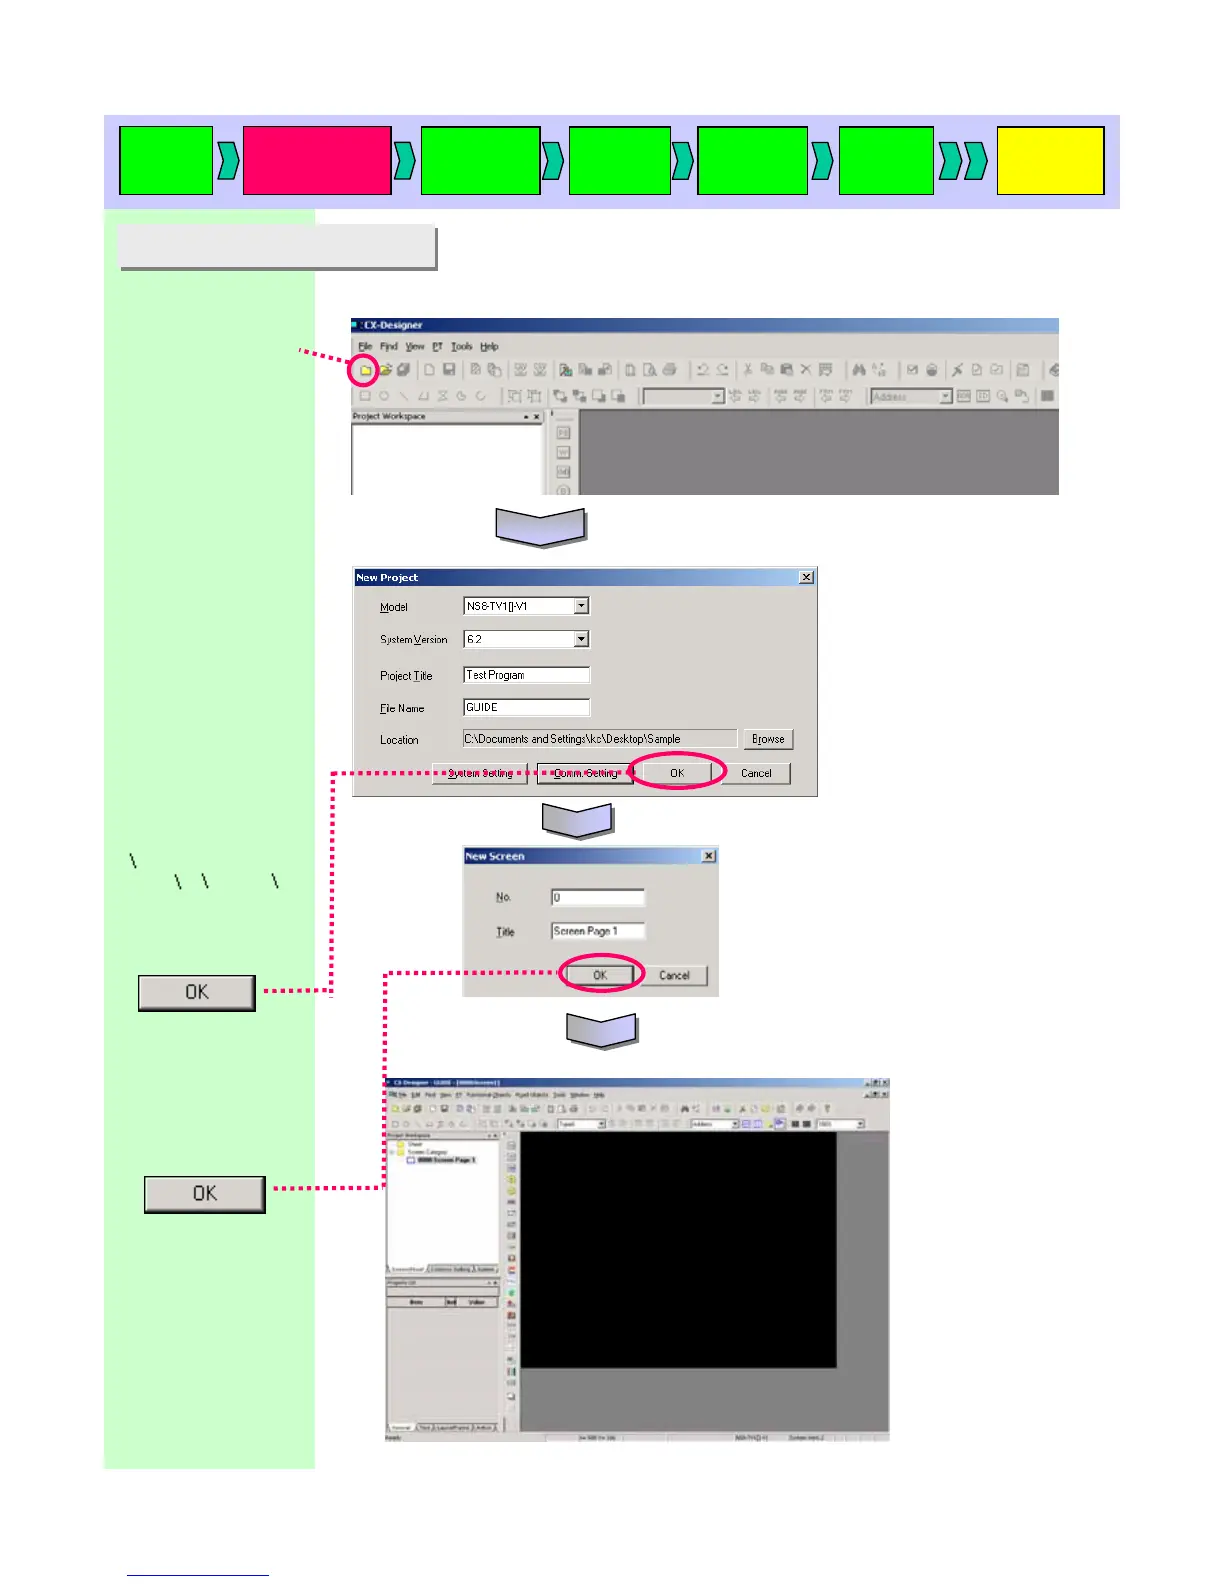
Click [New project] button on the CX-Designer.
Click
Enter a title name.
“Screen 1” is
entered here.
*System Ver.6.2 is used here.
Select [System Version]
according to yours
* Note the following points when
you enter the project name.
-A file name can be as long as
42 characters including extension
(.IPP).
-A file name may use any
number or letter, underscore(_),
and dollar mark($).
If project name is not entered
correctly( e.g. using wide size
characters etc…)
the error occurs when
transferring data.
Click
It is now ready to create a screen.
Start up
CX-D
Creating a
new project
Project
property
System
setting
Creating
a screen
Validation
Transferring
a project
Set as follow:
[Model name]
NS8-TS1[]-V1
[System Version]
System Ver.6.2 (* Note)
[Project Title]
Enter a title.
“Test Program” is
entered here.
[File Name]
Enter a file name.
“GUIDE” is entered here.
[Location]
Specifies a location
where the file is saved.
The file is saved in
[C¥Documents and
Settings¥kc¥Desktop¥Sam
ple] here.