1. Preparations and settings
1. Preparations and settings
Introduction
Introduction
Necessary Equipment
Necessary Equipment
Configuration &
Communication Settings
Configuration &
Communication Settings
Allocation Address
Allocation Address
Power 1 Running / Stopped00000.00
Power 2 Running / Stopped00000.01
Power 3 Running / Stopped00000.02
Power 4 Running / Stopped00000.03
Power 5 Running / Stopped00000.04
Power 6 Running / Stopped00000.05
DescriptionAllocation
Address
Alarm 6 Occurred / Released00001.05
Alarm 7 Occurred / Released00002.00
Alarm 8 Occurred / Released00002.01
Alarm 9 Occurred / Released00002.02
Alarm 10 Occurred / Released00002.03
Alarm 11 Occurred / Released00002.04
Alarm 12 Occurred / Released00002.05
Alarm 1 Occurred / Released00001.00
Alarm 2 Occurred / Released00001.01
Alarm 3 Occurred / Released00001.02
Alarm 4 Occurred / Released00001.03
Alarm 5 Occurred / Released00001.04
DescriptionAllocation Address
Present valueDM100
DescriptionAllocation
Address
The following PLC allocation addresses are used for sample screens shown in this manual.
This manual describes how to use the CX-Designer and its functions with a visual assistance in
creating sample screens.
Item
- CX-Designer
-NS Hardware
-PLC
- NS Hardware – PC Serial communication cable
- NS Hardware – PLC Serial communication cable
-PC
NS Hardware
- Serial Port A NT Link (1:N), No. of units: 0, Communication Speed: High-speed
Serial Port B Setting is not necessary
PLC
- Host Link Port Communication Speed: High-speed NT Link, Communication Mode: NT Link (1:N), NT Link Max. No. of units: 1
Model
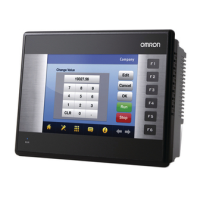
NS-CXDC1-V[]
- NS8-TV1[](B)-V1
- CS Series, CJ Series
- XW2Z-S002
- XW2Z-200T
- Widows PC on which CX-Designer performs
Serial
Port A
Serial
Port B
PLC
NS hardware
PC
COM Port
RS232C Port
Start up
CX-D
Creating a
new project
Project
property
System
setting
Creating
a screen
Validation
Transferring
a project