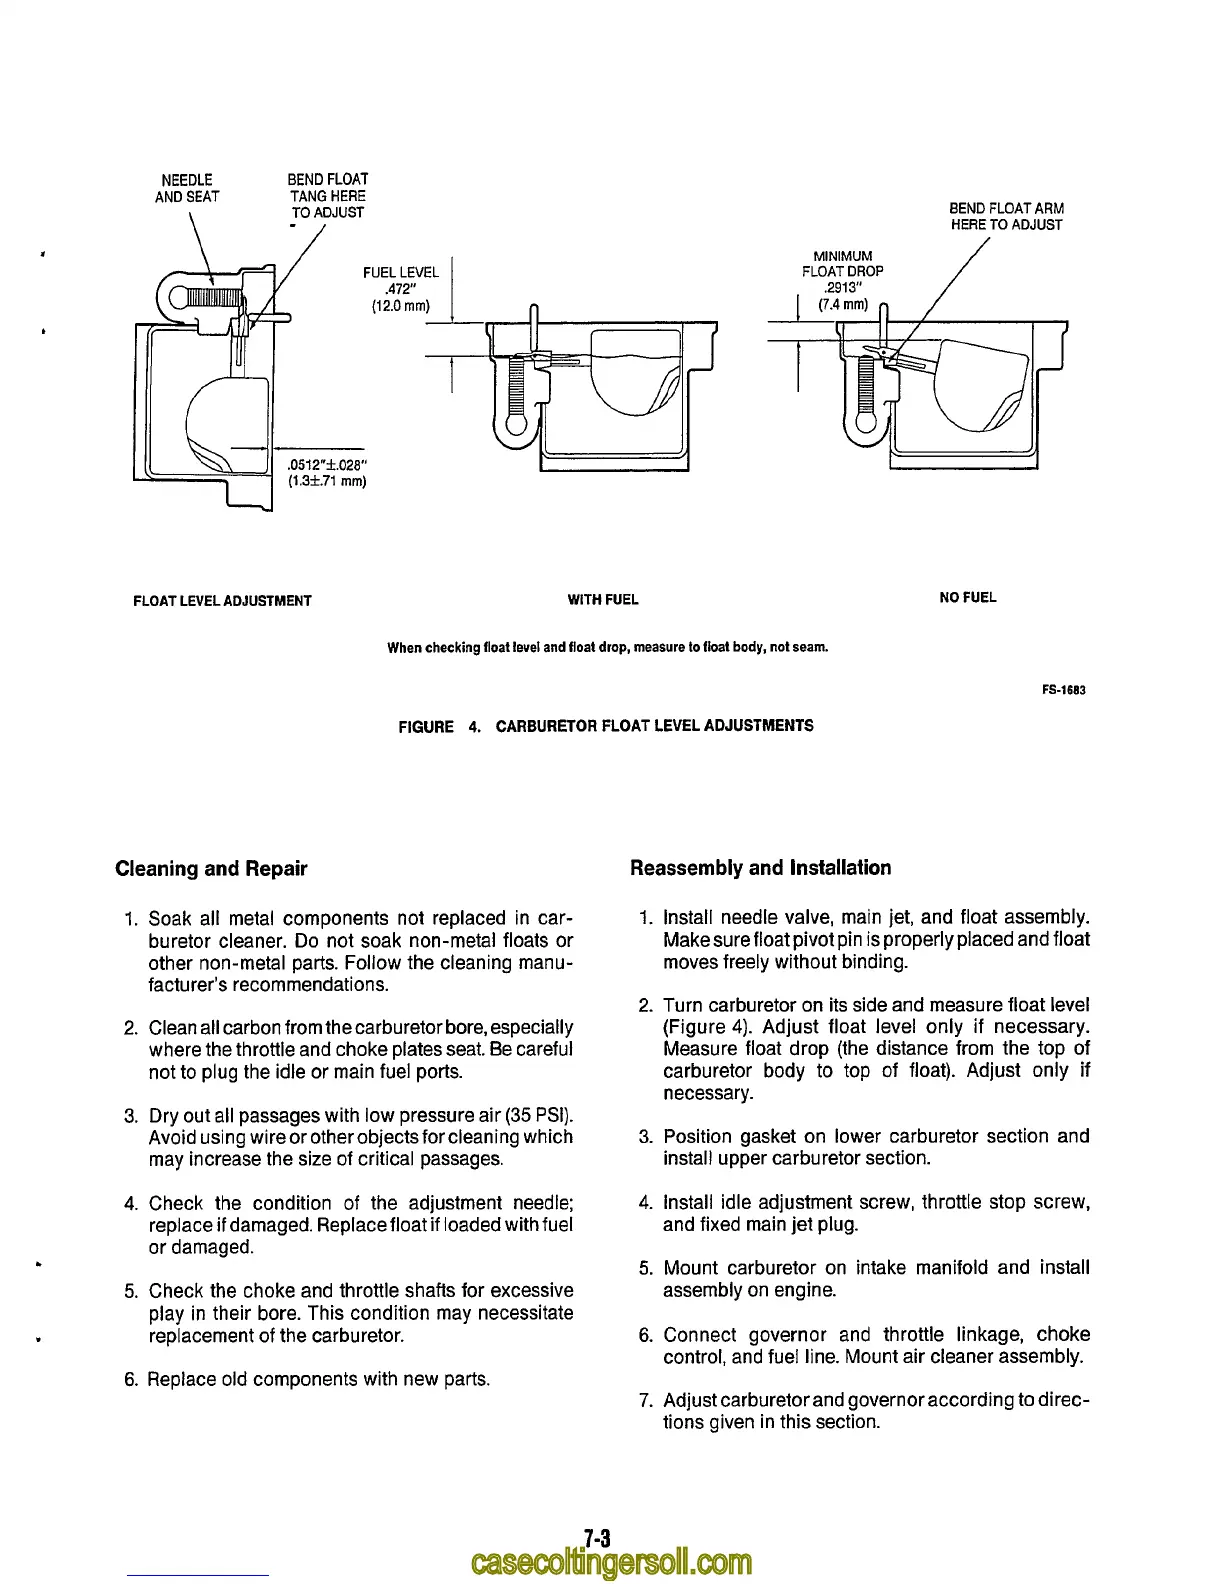
NEEDLE
BEND
FLOAT
AND
SEAT
TANG
HERE
TO
ADJUST
\
-/
BEND
FLOAT
ARM
HERE
TO
ADJUST
.
U
FLOAT LEVEL ADJUSTMENT
Cleaning and Repair
/
MINIMUM
FLOAT
DROP
2913"
WITH FUEL
When checking float level
and
float
drop,
measure
to
float
body,
not seam.
FIGURE
4.
CARBURETOR
FLOAT
LEVEL
ADJUSTMENTS
1.
Soak all metal components not replaced in car-
buretor cleaner.
Do
not soak non-metal floats or
other non-metal parts. Follow the cleaning manu-
facturer's recommendations.
2.
Clean all carbon from thecarburetor bore, especially
where the throttle and choke plates seat. Be careful
not
to
plug the idle
or
main fuel ports.
3.
Dry out all passages with low pressure air
(35
PSI).
Avoid using wire or other objects for cleaning which
may increase the size of critical passages.
4.
Check the condition of the adjustment needle;
replace
if
damaged. Replace float
if
loaded with fuel
or damaged.
5.
Check the choke and throttle shafts for excessive
play in their bore. This condition may necessitate
replacement
of
the carburetor.
6.
Replace old components with new parts.
Reassembly
and Installation
NO
FUEL
FS-1683
1.
Install needle valve, main jet, and float assembly.
Make sure float pivot pin is properly placed and float
moves freely without binding.
2.
Turn carburetor on its side and measure float level
(Figure
4).
Adjust float level only if necessary.
Measure float drop (the distance from the top of
carburetor body
to
top of float). Adjust only if
necessary.
3.
Position gasket on lower carburetor section and
install upper carburetor section.
4.
Install idle adjustment screw, throttle stop screw,
and fixed main
jet
plug.
5.
Mount carburetor on intake manifold and install
assembly on engine.
6.
Connect governor and throttle linkage, choke
control, and fuel line. Mount air cleaner assembly.
7.
Adjust carburetor and governor according to direc-
tions given in this section.
7-3