CYLINDER
HEADS
Remove the cylinder heads for carbon cleaning and
gasket change at intervals specified in the
Periodic
Maintenance Schedule
(located in the Operator's
Manual).
1,
Use a
1
/2
inch
(13
mm) socket wrench to remove
cylinder head bolts or nuts. Lift heads
off.
11
Torquing or removing cylinder
ACAUT'oN
heads when
hot
(above
700°F
137'
C])
will result in head damage. Allow heads
to
cool
lo
below
700°F
(37°C)
before torquing
or
removing.
2.
After removing heads, clean out all carbon deposits.
Be careful not to damage the outer sealing edges
where gaskets fit. The heads are made of aluminum
and can be damaged by careless handling.
3.
Use new head gaskets and clean both the heads
and the cylinder block thoroughly where
the
head
gaskets rest.
P216, P218, P220
Installation
1.
Place a head gasket on the cylinder block and align
the holes in the gasket with the holes in the cylinder
block. While holding the gasket against the cylinder
head, carefully install the cylinder head on the
engine.
Do
not attempt to slide the head bolts
through the gasket without the cylinder block behind
it or the gasket may tear.
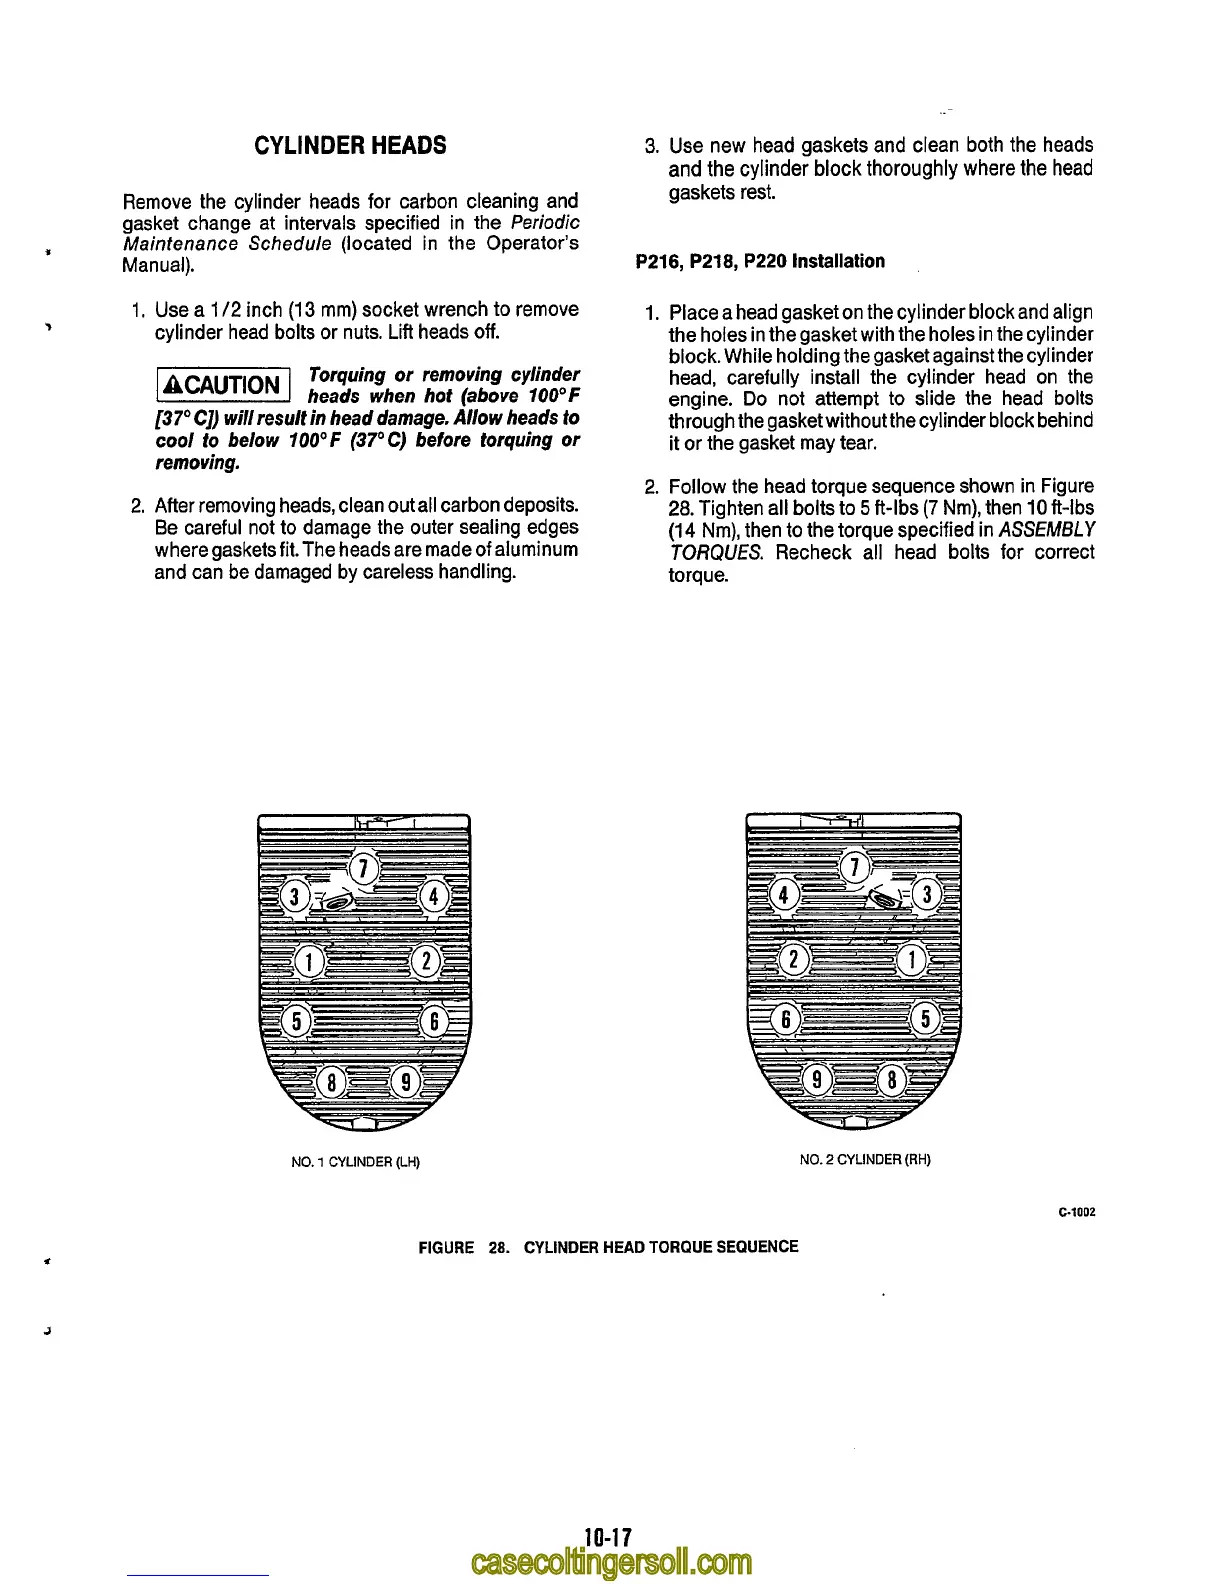
2.
Follow the head torque sequence shown in Figure
28.
Tighten all bolts to
5
ft-lbs
(7
Nm), then
10
ft-lbs
(14
Nm), then
to
the torque specified in
ASSEMBLY
TORQUES.
Recheck all head bolts
for
correct
torque.
NO.
1
CYLINDER
(LH)
FIGURE
28.
CYLINDER HEAD TORQUE SEQUENCE
NO.
2
CYLINDER
(RH)
c-1002
10-1
7