En-
12
Power On & Initial Setup
Wi-Fi connection settings
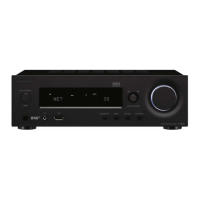
When you first turn the power on, the initial setup screen
is displayed automatically, allowing you to easily make
Wi-Fi connection settings.
To set, select the item with the cursors (a) on the remote
controller and press ENTER (b) to confirm. To return to
the previous display, press (c).
0 Turn PUSH TO ENTER on the main unit to the left and
right to select the item, then press the dial to confirm.
0 If you want to use the unit without setting up a
network, or want to set up the network at a later time,
press (c) on the remote controller while "Network
Setup" is displayed.
1. Press ENTER (b) when “Network Setup” is displayed.
2. To make Wi-Fi settings, select “Wi-Fi”. If you have
connected with an ethernet cable, select “Wired(Exit)”
with / (a) on the remote controller and press
ENTER (b).
3. If you selected “Wi-Fi”, select the setting method with /
(a) on the remote controller and press ENTER (b).
0 To redo the initial settings, press MENU on the remote
controller, select “Wi-Fi” in “Network” - “Connection”,
then select “Wi-Fi Setup”.
■ Scan Networks
From the list of SSID for access points such as wireless
LAN routers, select the required SSID and make the
settings.
1. Select the SSID of the access point you want to
connect with / (a) on the remote controller and
press ENTER (b).
2. Select “Password” or “Push Button” with / (a) on
the remote controller and press ENTER (b). If the
access point has an automatic connection button, by
selecting “Push Button” you can connect without
entering a password.
3. If you select “Password”, enter the password of the
access point. For details on how to enter text, refer to
“Entering text” (P28).
If you select “Push Button”, then after pressing and
holding the automatic setting button on the access
point for the required amount of time, press ENTER (b)
on the remote controller.
4. After “Check Network” is displayed, the information of
the display switches when the Wi-Fi settings are
complete.
0 If “Retry” appears on the display, press ENTER (b)
to retry the settings.
1 2
Network Setup
Scan Networks
iOS device
Input SSID
My SSID
Password
Push Button
SN29402579_R-N855_En_1608xx.book 12 ページ 2016年9月13日 火曜日 午前9時12分

 Loading...