Chapter 2: System Configuration
12
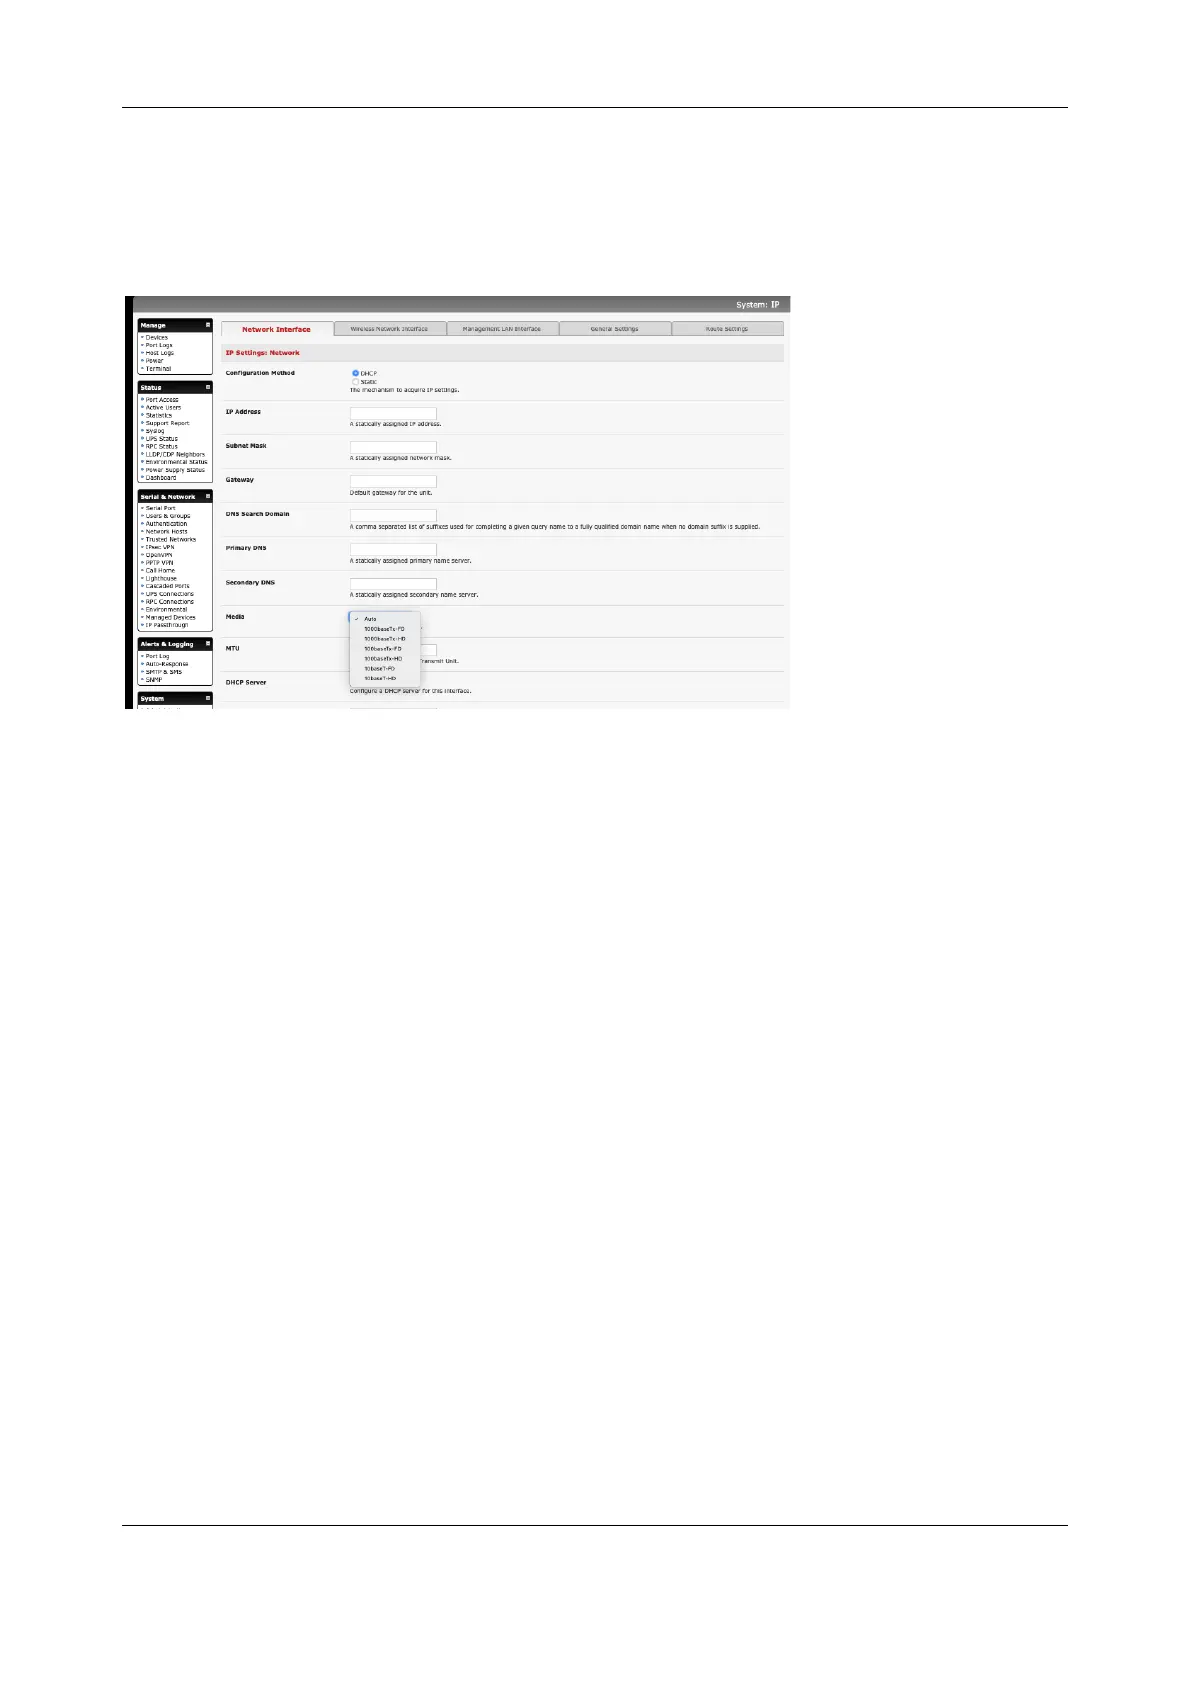
1. Click System > IP and click the Network Interface tab.
2. Choose either DHCP or Static for the Configuration Method.
If you choose Static, enter the IP Address, Subnet Mask, Gateway and DNS server details. This
selection disables the DHCP client.
3. The console server LAN port automatically detects the Ethernet connection speed. Use the
Media drop-down list to lock the Ethernet to 10 Mb/s or 100Mb/s and to Full Duplex or Half
Duplex.
If you encounter packet loss or poor network performance with the Auto setting, change the
Ethernet Media settings on the console server and the device it is connected to. In most cases,
change both to 100baseTx-FD (100 megabits, full duplex).
4. If you select DHCP, the console server will look for configuration details from a DHCP server.
This selection disables any static address. The console server MAC address can be found on a
label on the base plate.
5. You may enter a secondary address or comma-separated list of addresses in CIDR notation,
e.g. 192.168.1.1/24 as an IP Alias.
6. Click Apply
7. Reconnect the browser on the computer that is connected to the console server by entering
http://your new IP address.
If you change the console server IP address, you need to reconfigure your computer to have an IP
address in the same network range as the new console server address.
You can set the MTU on Ethernet interfaces. This is an advanced option to be used if your
deployment scenario doesn’t work with the default MTU of 1500 bytes.
To set the MTU, click System > IP and click the Network Interface tab. Scroll down to the MTU field
and enter the desired value. Valid values are from 1280 to 1500 for 100-megabit interfaces, and 1280
to 9100 for gigabit interfaces
If bridging or bonding is configured, the MTU set on the Network Interface page will be set on the
interfaces that are part of the bridge or the bond.
 Loading...