Install a Boot Drive
AppendixA • Servicing the Oracle Database Appliance Version 1 125
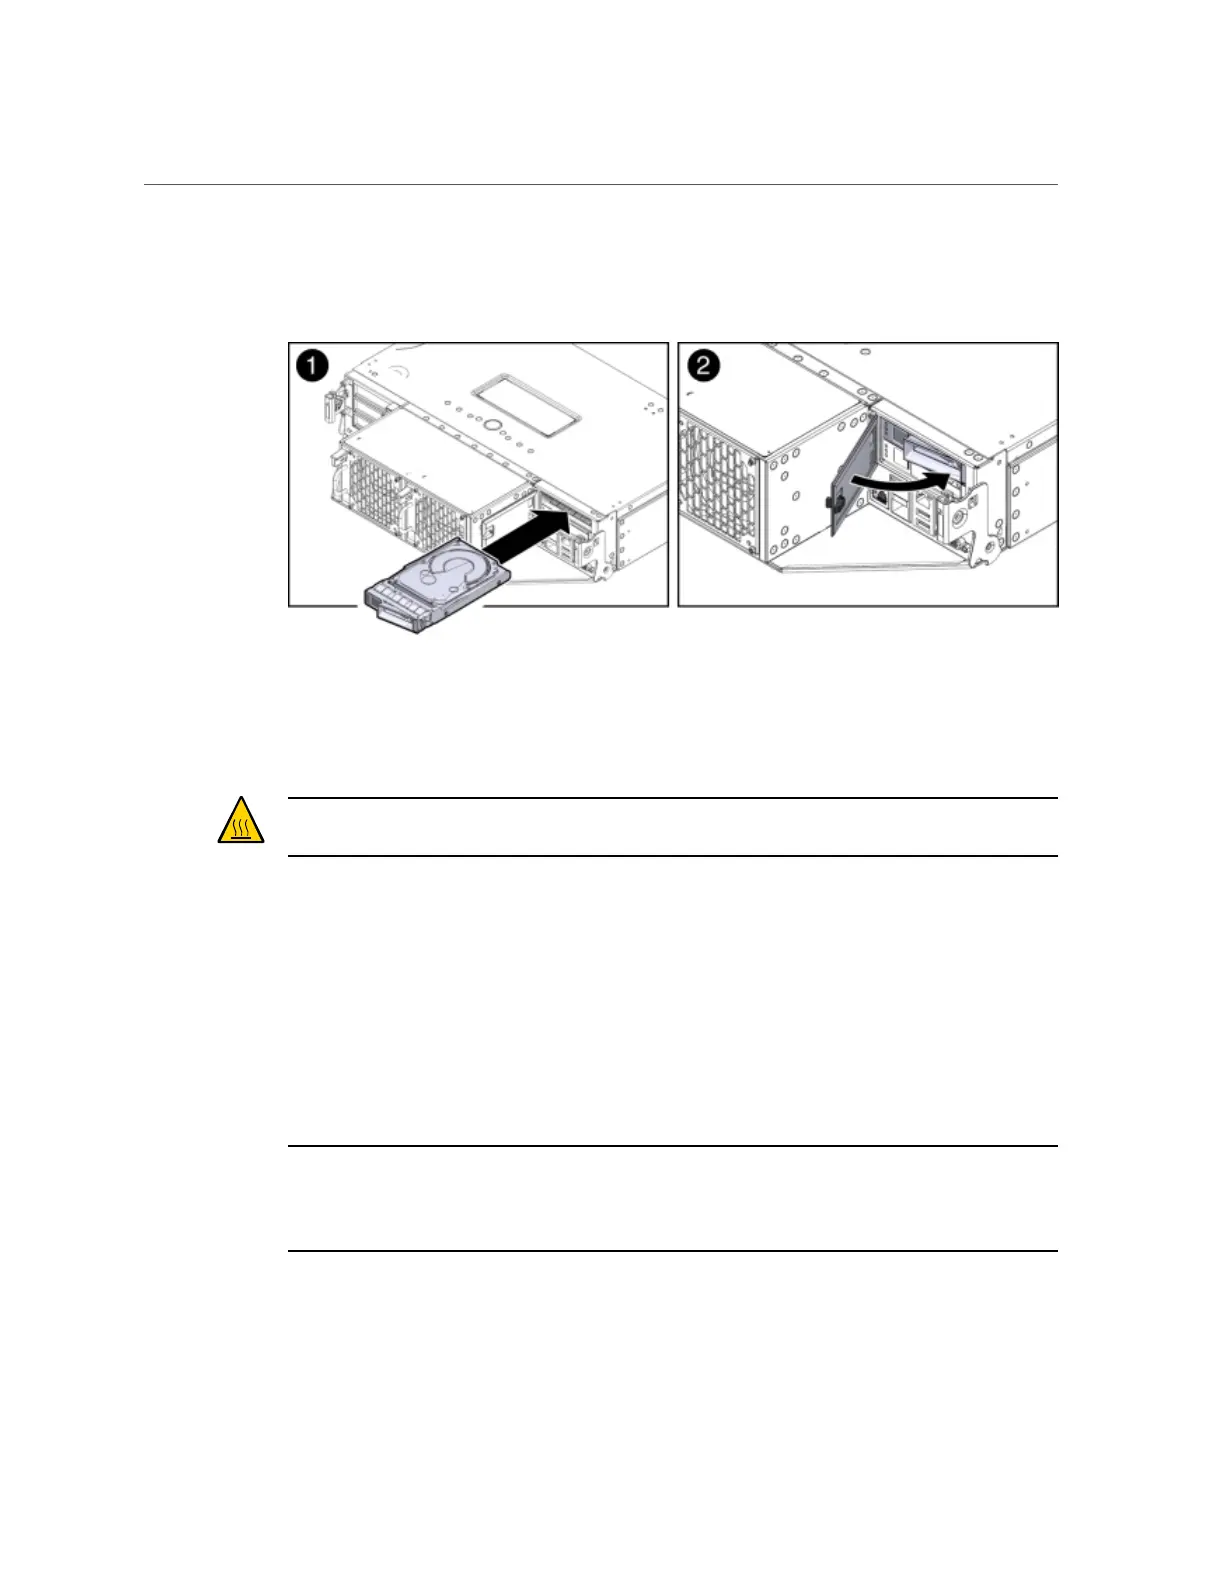
3.
Slide the drive into the drive slot until it is fully seated [1].
4.
Close the drive latch to lock the drive in place.
5.
Close the drive door and ensure that the door latch engages [2].
Caution - Equipment damage. Close the door after removing a boot drive to prevent
overheating due to improper airflow.
6.
Run the following command to ensure that the OS sees the replacement disk.
# lsscsi -v | grep ATA
[0:0:0:0]diskATA SEAGATE ST95001N n/a /dev/sda
[1:0:0:0]diskATA SEAGATE ST95001N n/a /dev/sdb
Servicing Fan Modules (CRU)
Note - Information in this appendix does NOT apply to Oracle Database Appliance X3-
2, Oracle Database Appliance X4-2, Oracle Database Appliance X5-2 or Oracle Database
Appliance X6 series. Refer to the preceding chapters in this document for information on
servicing those systems.
Each Oracle Database Appliance Version 1 server node contains two fan modules. Each fan
module contains a single, dual-motor, 80 mm, counter-rotating fan assembly that contains two
fans. Each fan module is hot-pluggable. For specific information about fan status LEDs, see
“Server Node Fan Indicators” on page 40.

 Loading...


