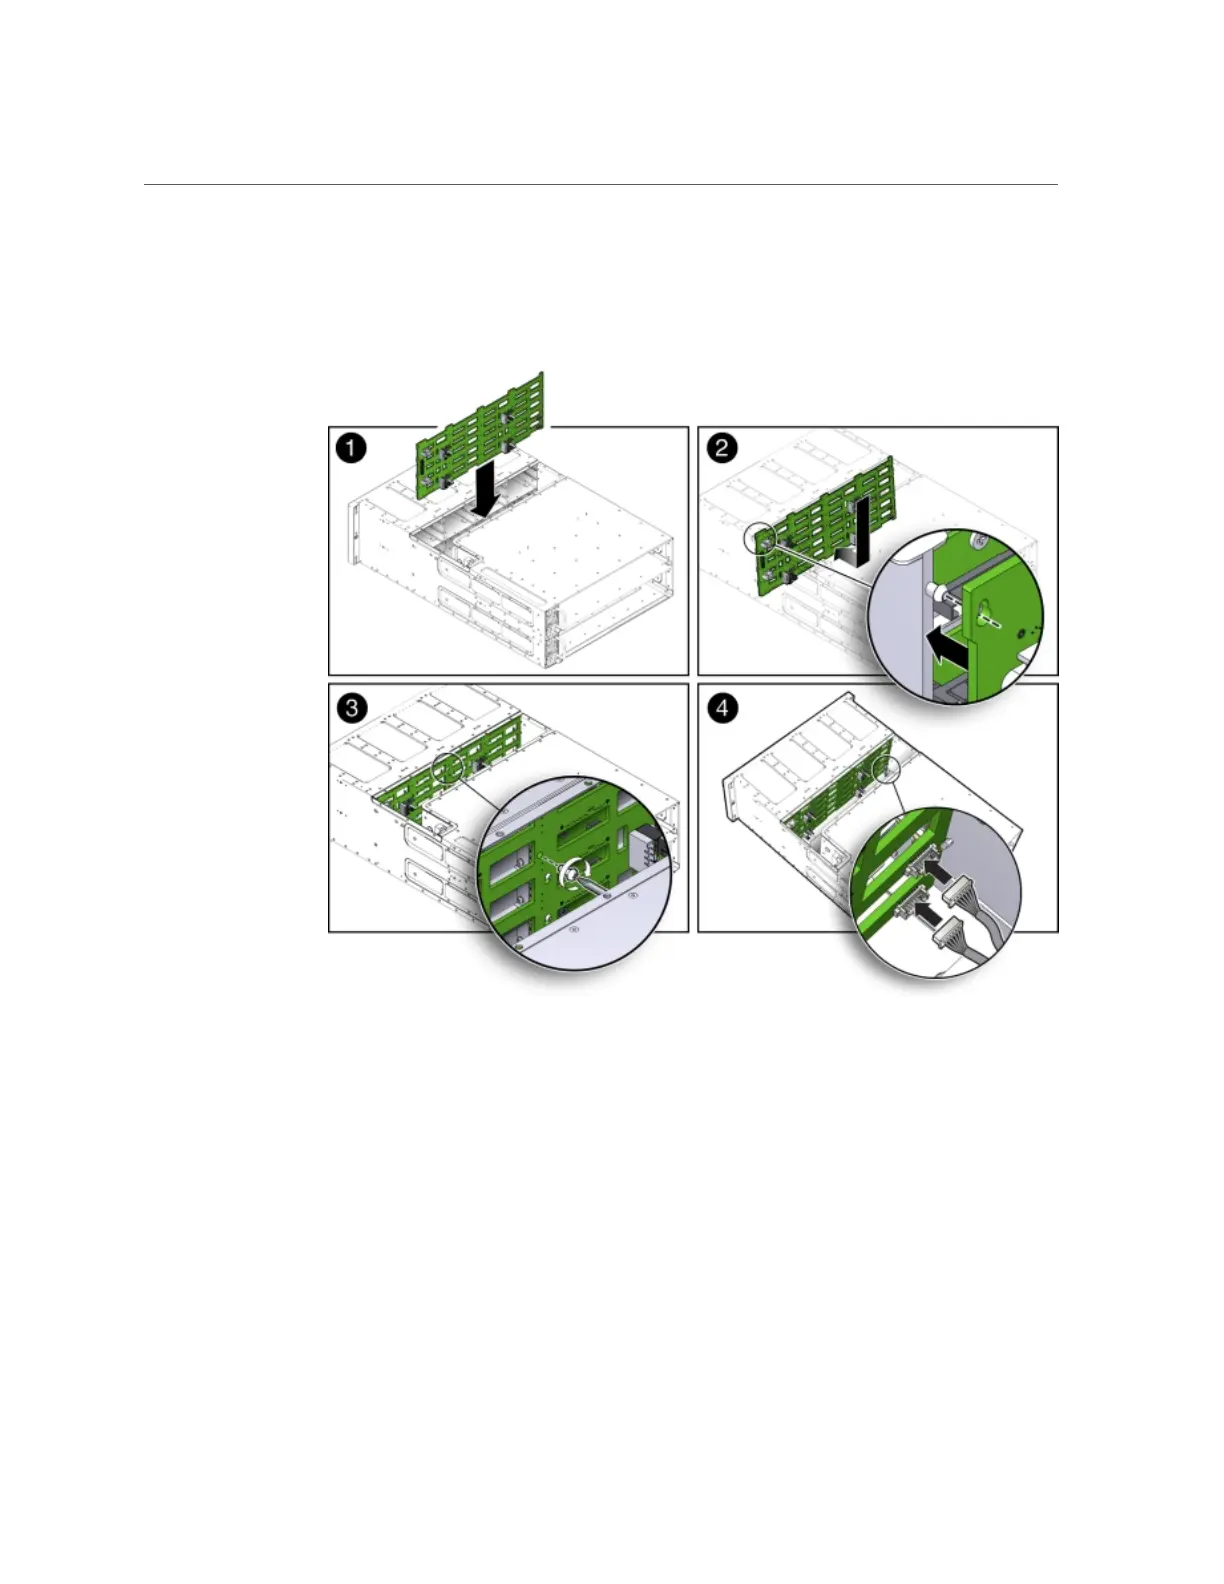
Install Disk Midplane Module
AppendixA • Servicing the Oracle Database Appliance Version 1 181
Ensure that the FIM connectors are properly connected. The lower connector on the disk
midplane is for SN0 and the upper connector is for SN1.
2.
Install the power distribution board into the system.
See “Install Power Distribution Board” on page 174.
3.
Position the side-wall cover into the chassis and tighten the two captive Phillips
screws to secure the side-wall cover to the chassis.
4.
Install the middle section of the system's top cover.
Install and tighten the Phillips screws that secure the middle section of the top cover to the
system chassis.
5.
Reinstall all of the front storage drives.
See “Install Storage Drive” on page 121.

 Loading...


