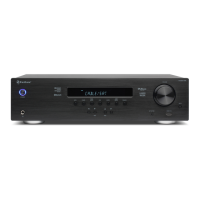
Model 976 7.1 Channel Preamp/Processor
37
Adjusting Channel Levels
To adjust channel levels using the internal
test tone generator:
1.
2.
3.
4.
Sit down in the chair you want the sound
optimized for, and turn on the SPL meter.
Note: The master volume control cannot be used
while adjusting channel levels. Set the volume to
-20dB before going into the OSD.
Press the “Test” button on the remote
control. The front panel display will show
TEST OFF. To enable the internal test tones,
press lup or down buttons (▲ or ▼) until
you see TEST ON and then press ENTER on
the remote.
The front panel display will show the rst chan-
nel to be adjusted along with the current level,
as seen above, and the test tone will start.
Press the up or down buttons (▲ or ▼) on
the remote to increase or decrease the trim
for the left channel.
Adjust until you see 75dB on the meter. For
RadioShack or Galaxy meters, make sure the
meter is set to the 70dB range.
Press the left or right buttons (◄ or ►) on
the remote to accept the channel level and
change to the next channel.
The Model 976 allows you to easily adjust
channel levels two ways: while listening to
source material during playback, or by using the
internal test tones.
Adjusting the channel levels with the internal
test tone can be accomplished by using either
the remote control and front panel display or
through the Model 976 setup menu and on-
screen display. To set levels with the test tone
using the on-screen display, see pages 28-29.
Adjusting the levels using source material is
only possible using the remote control and front
panel display because both audio and video
inputs are interrupted when the on-screen
display is in use.
As noted on page 28, it’s possible to “rough in”
the channel levels by ear, but better results are
possible by using a sound pressure level (SPL)
meter. You can use either a dedicated meter like
those sold under the RadioShack and Galaxy
brands, or if you have a smartphone, use an SPL
meter app. Search your iPhone’s App Store or
your Android’s Play Store for “SPL meter.” Most
are available for free or at low cost. Set the meter
to C-Weighting Slow.
5. Repeat the process for the remaining channels.
The test tone will stop when you cycle through
all of the channels or you press the TEST button
again.
1.
2.
3.
4.
5.
Start playing your source material.
Note: The master volume control cannot be used
while adjusting channel levels.
Press the “Test” button on the remote control.
The front panel display will show TEST OFF.
Press ENTER on the remote.
The front panel display will show the rst channel
to be adjusted along with the current level.
Press the up or down buttons (▲ or ▼) on the
remote to increase or decrease the trim for the
left channel.
Press the left or right buttons (◄ or ►) on the
remote to accept the channel level and change
to the next channel.
Repeat the process for the remaining channels.
Normal mode will resume when you cycle through
all of the channels or you press the TEST button
again.
To adjust channel levels during playback:
Measuring Sound Pressure Levels Adjusting channel levels of the
Model 976
Front Panel Display
Sound Pressure Level
(SPL) Meter
Use an SPL meter to
accurately measure the
di erence in sound levels
from each speaker in your
system.
Smartphone SPL
Meter App
If you have a smart-
phone, you can down-
load an SPL meter app.