Tel. 0039 030 6857073 - Fax 0039 030657079 info@palazzani.it - www.palazzani.it
Pag. 46OM3109_GB
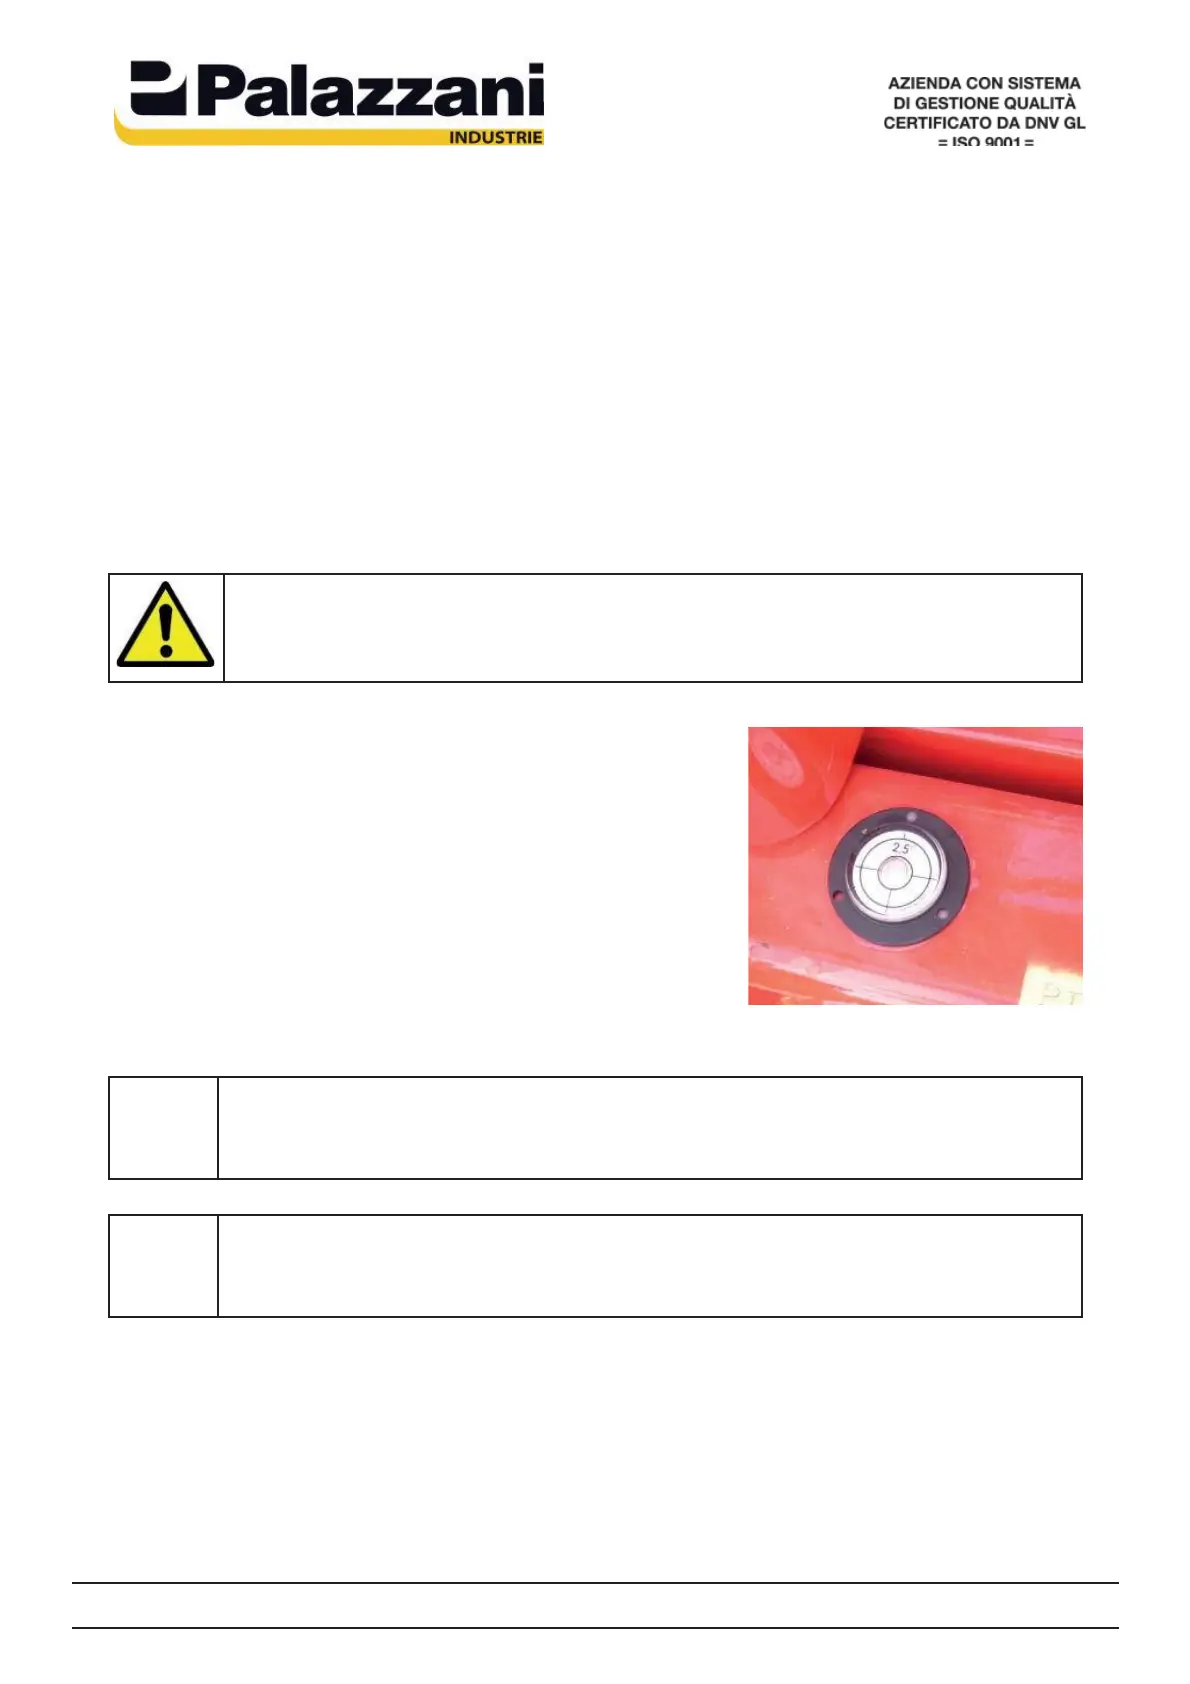
Fig. 3.8
Now it is possible to position the stabilisers on the ground acting as following:
• select the controls key part. 2 of fi g. 3.1 on the “stabilizers” symbol (right position)
• check the green lamp in the turntable, it must switched on, to confi rm that the boom
is in central, low and retracted position (Fig. 3.9).
• be sure that all stabilizers pins are correctly inserted (Fig. 3.7).
• set the selector n°10 di fi g. 3.3 on the needed set-up mode
• if the automatic stabilization is enabled, it is suffi cient to only activate the accelera-
tionlevel part. 1 of fi g. 3.4 towards the stabilizers lowering direction
. The stabilizers
start to lowering till the complete stabilization. Otherwise if the stabilization is in
manual mode use the joystick level 6 of fi g. 3.5, but this time the sabilizers must be
moved one by one using the other 4 joysticks on the control panel.
DANGER
It’s forbidden and very dangerous use the platforms with the spirit bubble
over 2° (Fig. 3.8)
Use wooden plates to make the ground more solid,
which must be wide enought to avoid dumping and
high no more than 20 cm.
It can be necessary to position the stabilisers on dif-
ferent height levels (i.e. on stairs, sidewalks, slopes,
etc.) and this is easy because the stabilisers can lower
independently.
!
ATTENTION
Always check the chassis fl atness, if you used the automatic stabilization
also.
!
ATTENTION
Always check that the plates are solidly positioned on the ground (it is dan-
gerous to put them on gutters, near scarps, on soft or water grounds, etc.)