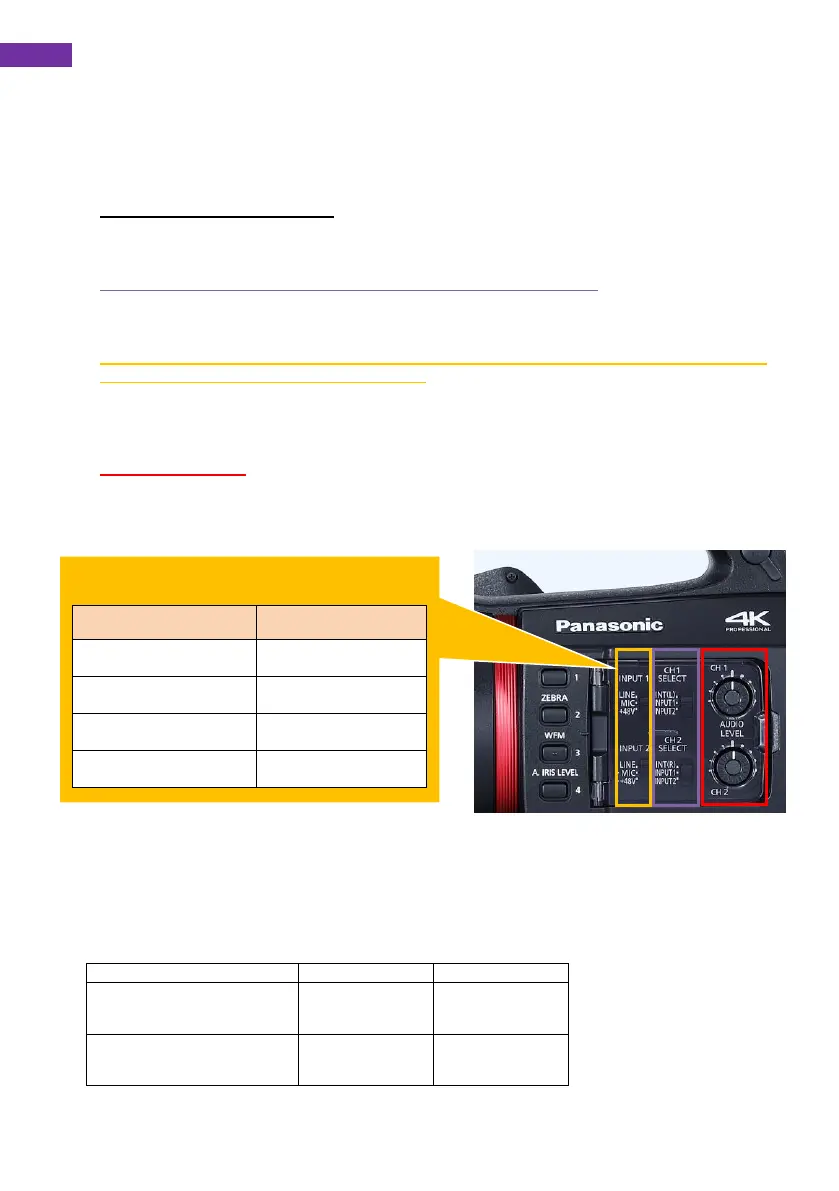
2-3. Audio setting
The AG-CX350 is equipped with a built-in stereo microphone and two external audio inputs. It also
supports 4-channel audio recording.
Setting audio
1. Connect external audio source
Connect microphone or external audio source to the XLR (AUDIO INPUT1, and INPUT2)
terminals when record without using built-in microphone.
2. [A] Select audio source with CH1 SELECT, CH2 SELECT switches
Set audio source of CH1 and CH2. Choose “INPUT1” when using audio source connected to
INPUT1 XLR terminal. Choose INT (L) or INT (R) when using built-in microphone.
3. [B] Set input level using INPUT1, INPUT2 switches (this selection is not available when
INT(L), INT(R) is selected as audio source).
Set audio level for LINE level, Microphone with +48V powered, and Microphone with no +48V
powered, using selectors in INPUT1 and INPUT2. Audio levels for LINE and MIC input can
also be set in MENU > AUDIO > INPUT SETTINGS.
4. [C] Set record level
Set audio record level using AUDIO LEVEL knob.
(This control is available when following menu item is set to “MANUAL”.
MENU > AUDIO > REC CH SETTINGS > CH1 LEVEL / CH2 LEVEL)
Setting Input level
(MENU>AUDIO>INPUT SETTINGS)
 Loading...