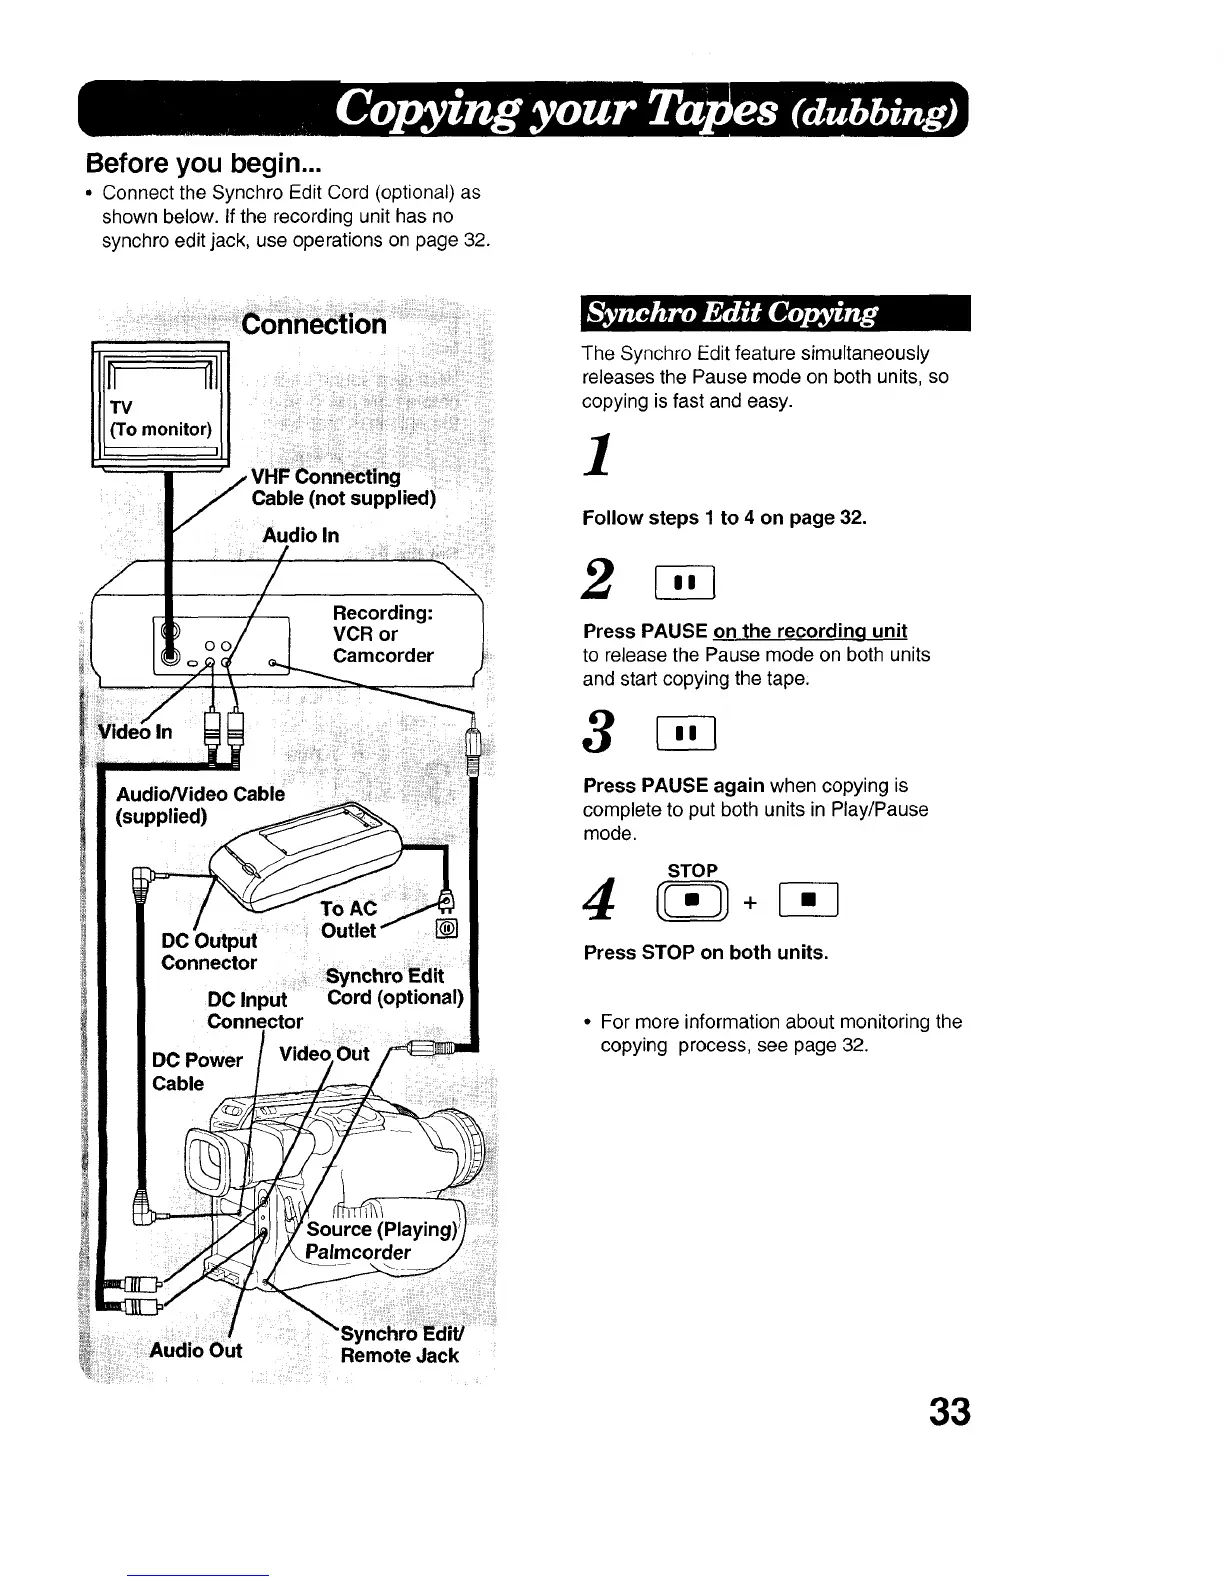
Before you begin...
• Connect the Synchro Edit Cord (optional) as
shown below. If the recording unit has no
synchro edit jack, use operations on page 32.
i] _i!_!!_!i_!_!!!_ii!_i_i_ili!!_iiiiii¸!_iii_i_!_i!_iiii!_!iiiii!ii_ii!iii!iiii
Cable (not supplied) :i:_
Audioln
iii I ,_;
Audio/Video Cable
(supplied)
To AC
DO Output .........ii: Outlet
Connector
DC Input Cord (optional)
Connector
DC Power
Cable
._ource(Pla
Palmcorder
Remote Jack
The Synchro Edit feature simultaneously
releases the Pause mode on both units, so
copying is fast and easy.
]
Follow steps 1 to 4 on page 32.
2
Press PAUSE on the recording unit
to release the Pause mode on both units
and start copying the tape:
Press PAUSE again when copying is
complete to put both unitsin Play/Pause
mode.
STOP
Press STOP on both units.
• For more informationabout monitoring the
copying process, see page 32.
33