ENGLISH - 29
Parts for ceiling mount (Optional)
This requires an optional ceiling mount bracket. Be sure to use the Projector Mount Bracket together with the ceiling mount
bracket for high ceilings or low ceilings.
Model No.: ET-PKL100H (for high ceilings), ET-PKL100S (for low ceilings), ET-PKL430B (Projector Mount Bracket)
f Use only the ceiling mount brackets specied for this projector.
f Refer to the Installation Instructions for the ceiling mount bracket when you install the bracket and the projector.
Attention
f To ensure projector performance and security, installation of the ceiling mount bracket must be carried out by your dealer or a qualied
technician.
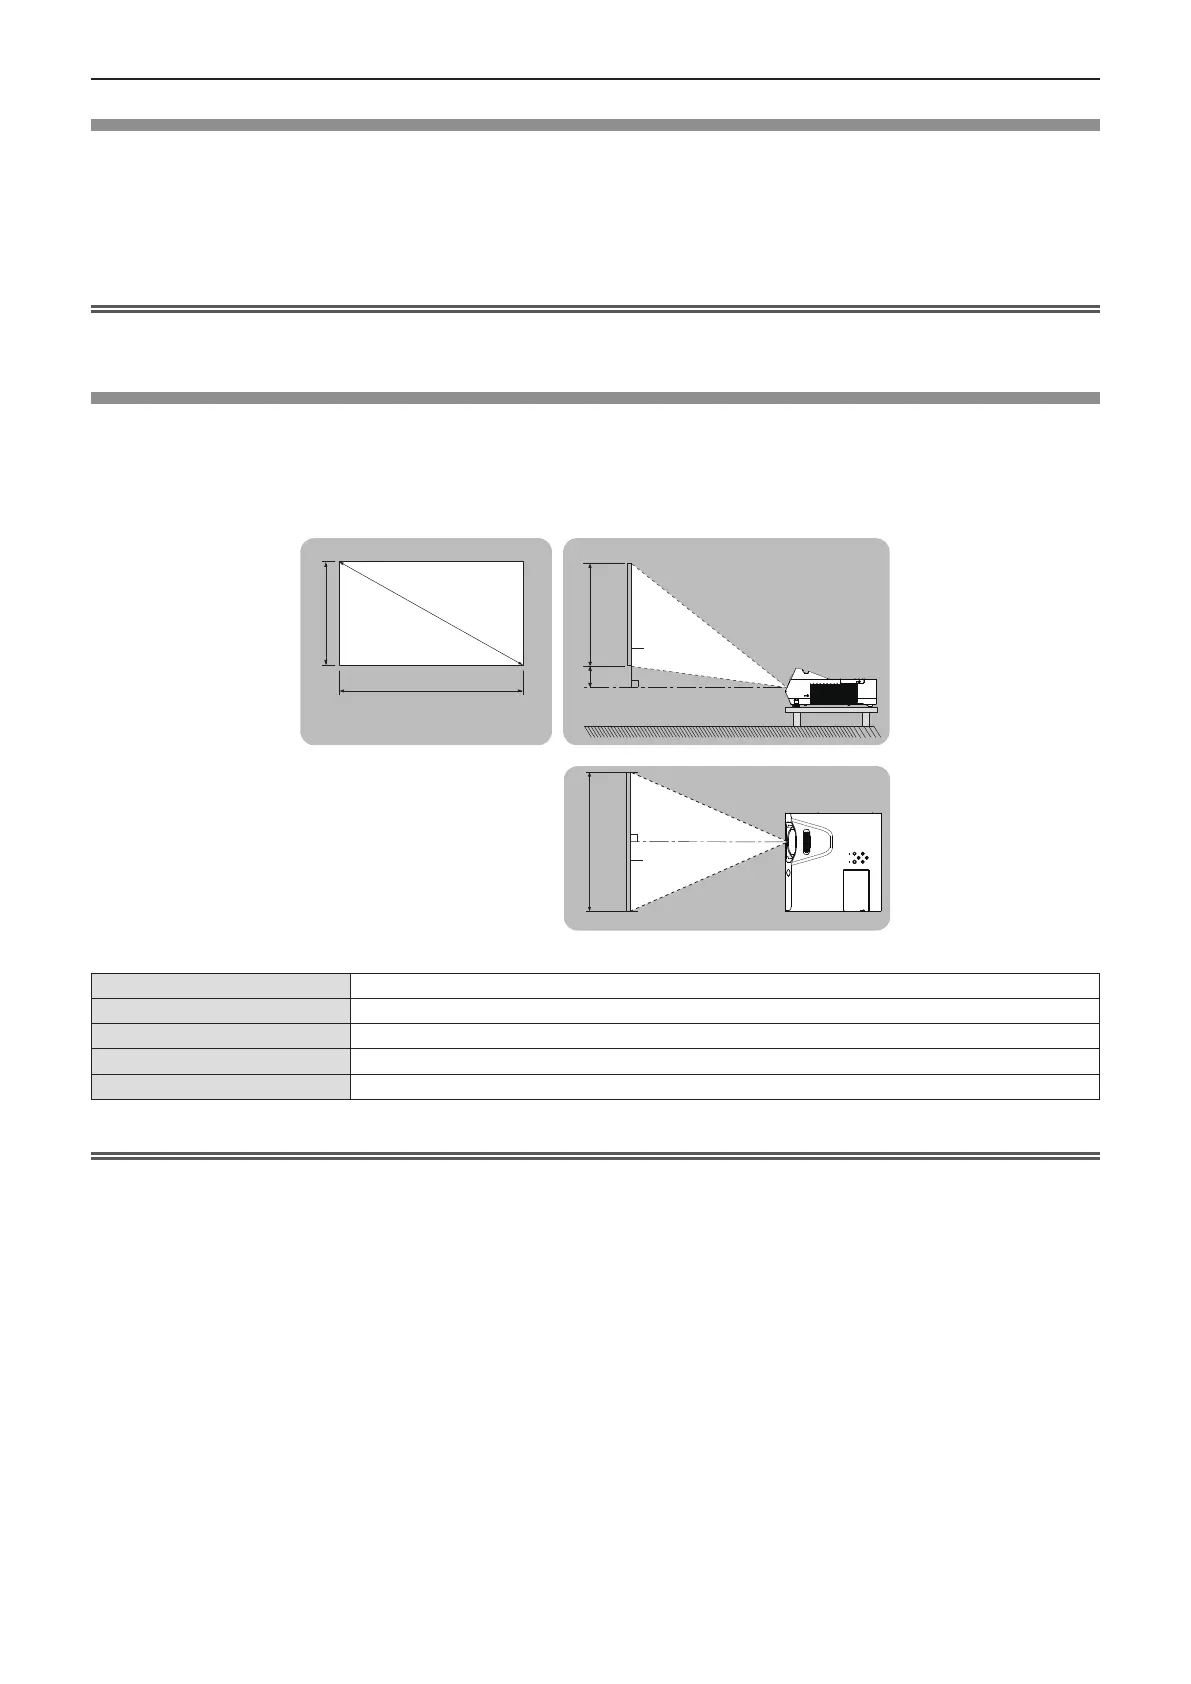
Screen size and throw distance
Refer to the screen size and projection distances to install the projector. The image position can be adjusted in
accordance with the screen position.
f Following illustration is prepared on the assumption that the projected image size and position have been
aligned to t full in the screen.
Projected image
SH
SW
SD
SH
Screen
L
Screen
L
SW H
L Projection distance
SH Image height
SW Image width
H Distance from the center of lens to the image lower end
SD Projected image size
Attention
f Before installing, please read “Precautions for use” (x page 15).
Chapter 2 Getting Started - Setting up