8.2. Service Mode Table
Below is the various special modes for checking:-
8.2.1. Service Mode Table 1
Item FL Display Key Operation
Mode Name Description Front Key
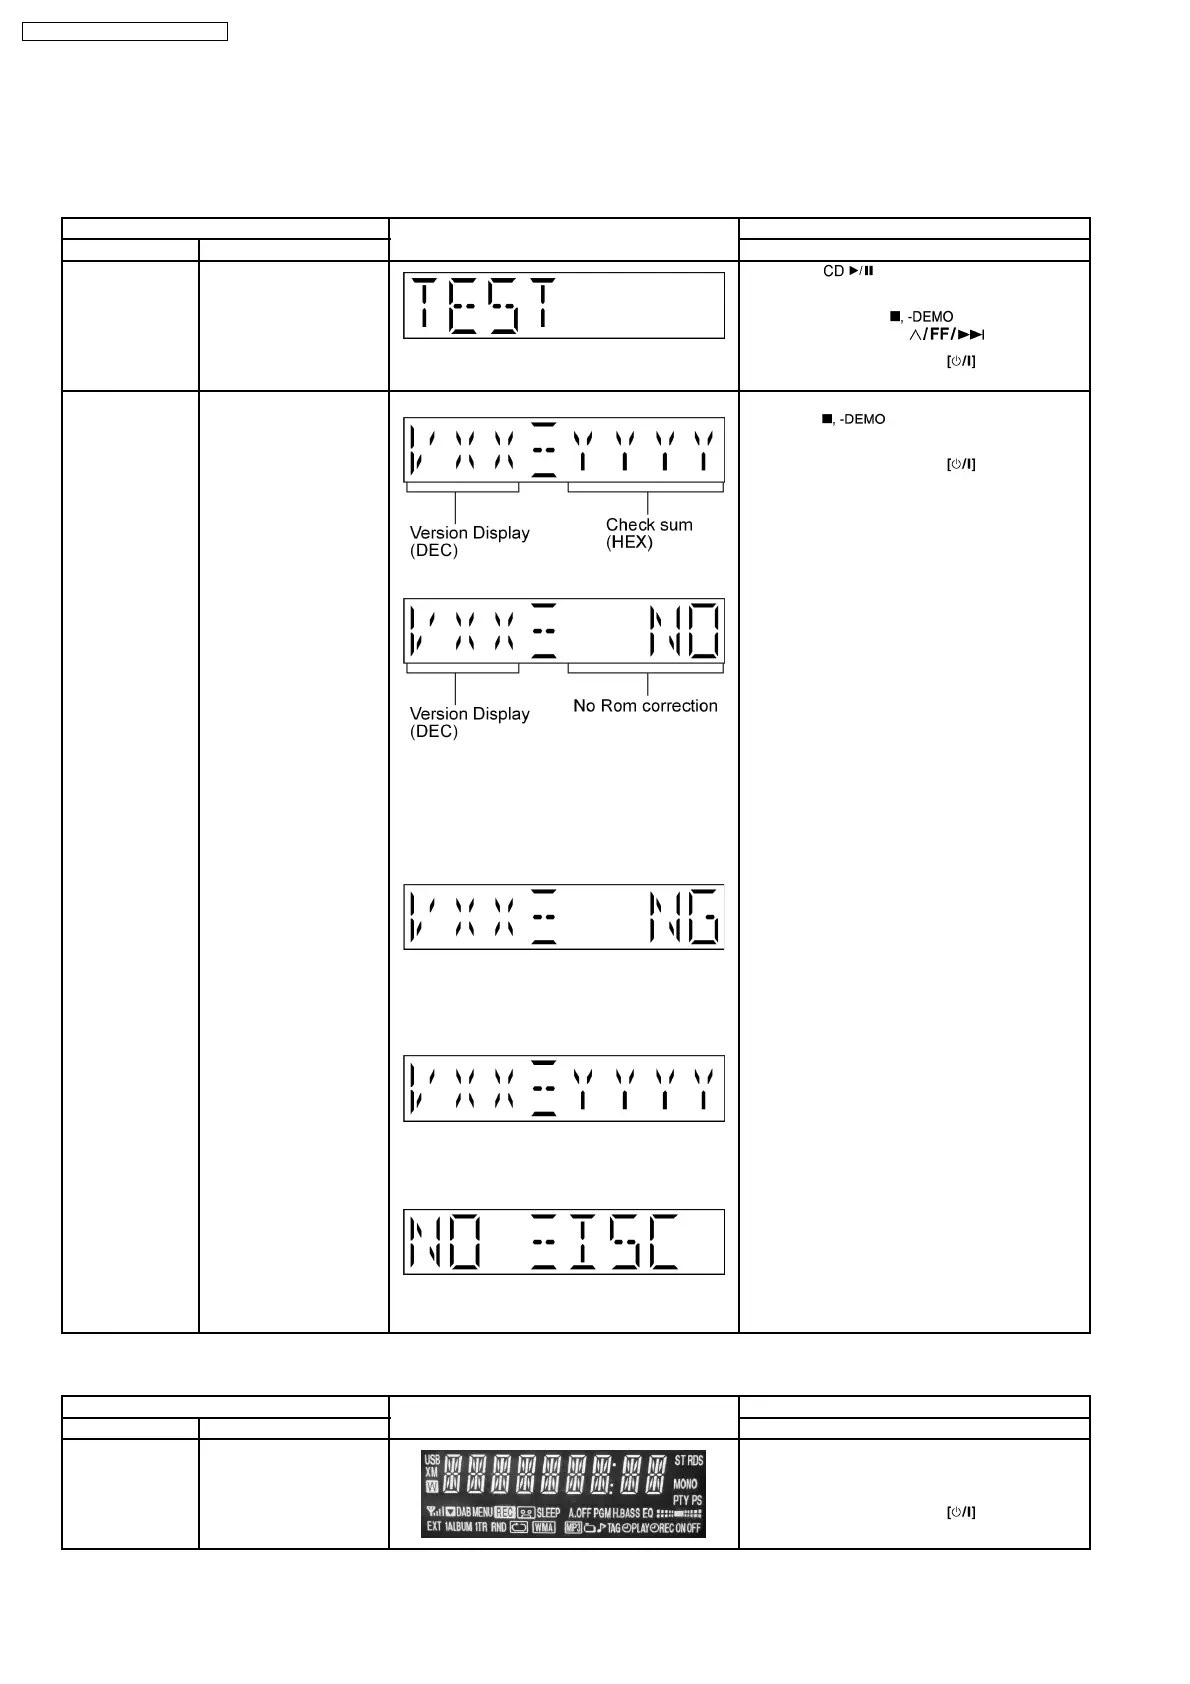
Self -Diagnostic
Mode
To enter into self
diagnostic checking for
main unit.
1. Select [ ] for CD mode (Ensure no
CD inserted).
2. Press and hold [
]button for 2
seconds follow by [
].
To exit Doctor Mode, press
button on
main unit or remote control.
Doctor Mode To enter into Doctor
Mode for checking of
various items and
displaying EEPROM and
firmware version.
(For more information,
refer to section 8.2.6)
Note: The micro-
processor version as
shown is an example. It
will be revise when there
is an updates.
FL Display sequence
Display 1 → 2
(Display 1)
checksum : (Condition 1)
(a) If there is NO EEPROM header string
OR
(b) If there is no EEPROM ( no data is
received by micro-processor) [NO] is
displayed.
checksum : (Condition 2)
If the version of the EEPROM does not
match or not working properly [NG] is
display.
checksum : (Condition 3)
If the EEPROM version matches, checksum
[YYYY] is displayed.
(Display 2)
The Check Sum of EEPROM and firmware
version will be display for 2 sec.
In any mode:
1. Press [
] button on main unit follow
by [4] and [7] on remote control.
To exit Doctor Mode, press
button on
main unit or remote control.
8.2.2. Service Mode Table 2
Item FL Display Key Operation
Mode Name Description Front Key
FL Display Test To check the FL
segments display (All
segments will light up)
In doctor mode:
1. Press [DIMMER] button on remote control.
To cancel, press [0] button on remote control.
To exit Doctor Mode, press
button on
main unit or remote control.
14
SA-PM4E / SA-PM4EB / SA-PM4EG