126
3
44.1
44a
44.2
96
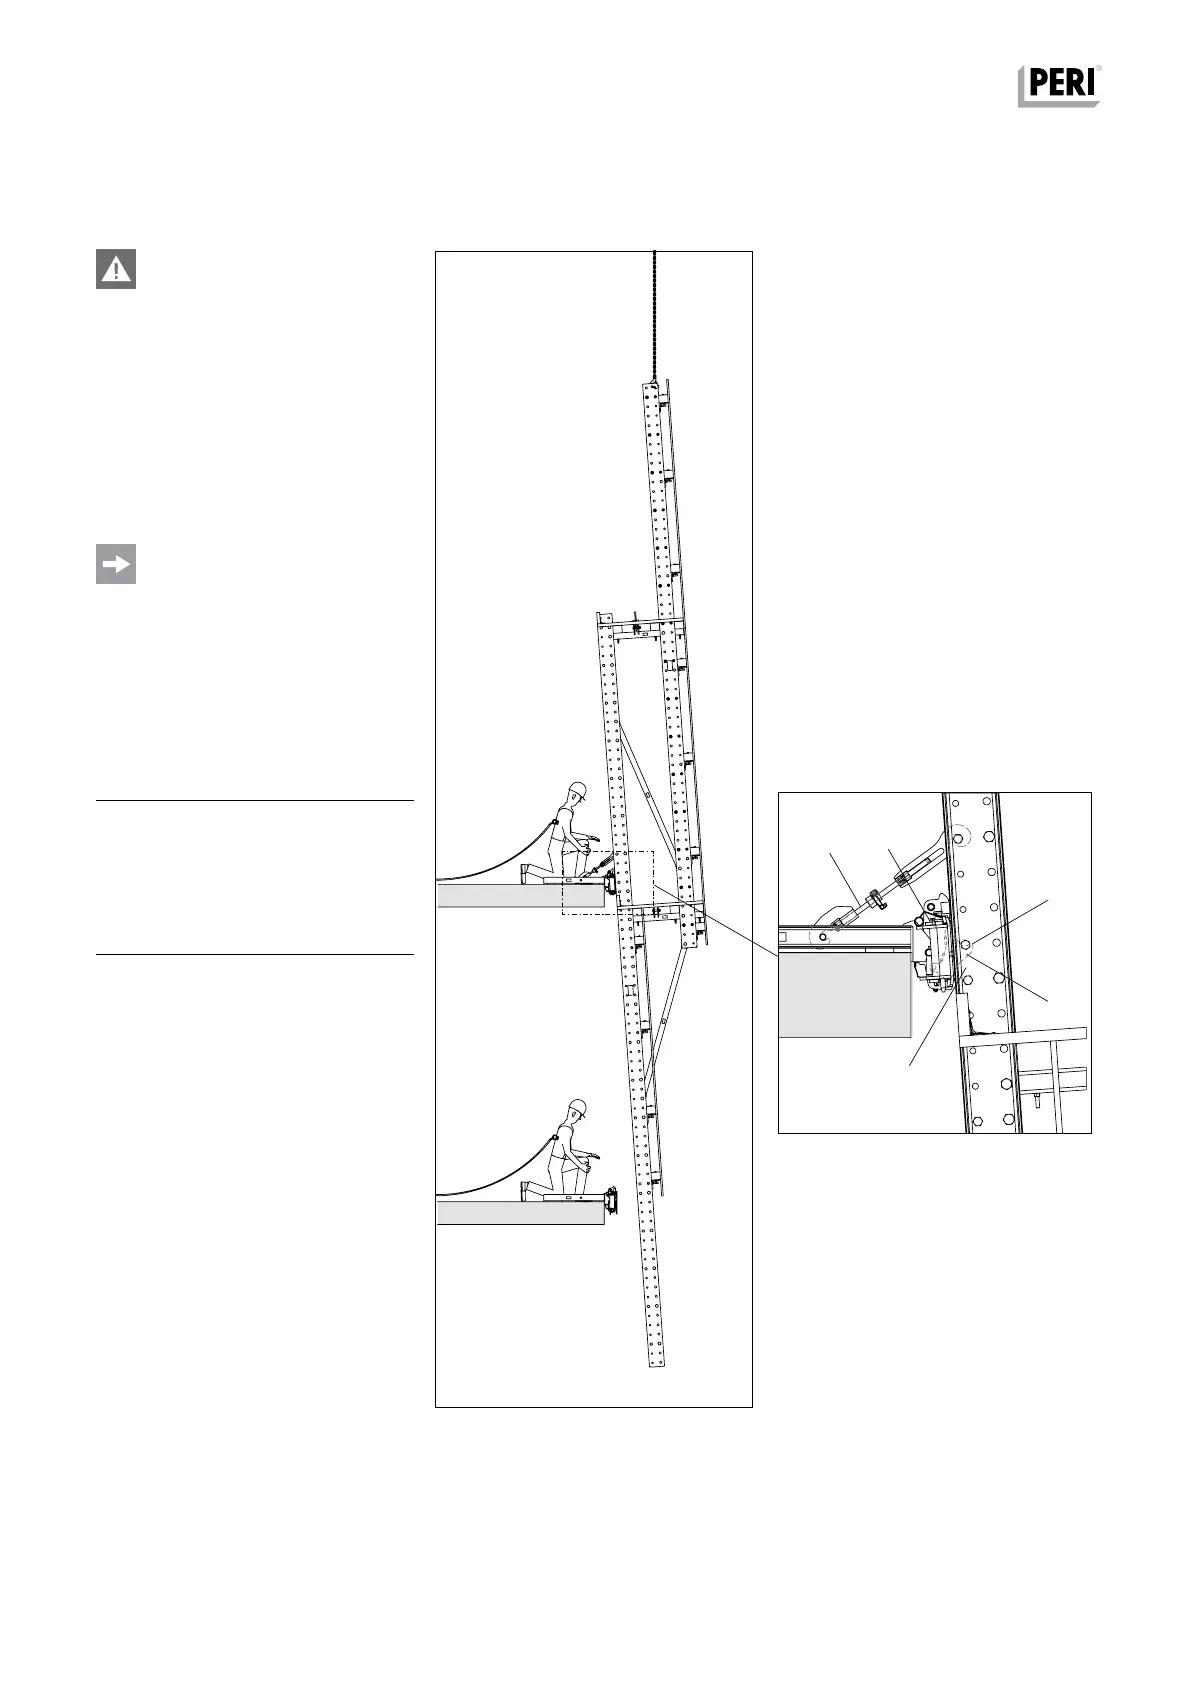
Warning
Parts of the body can get caught be-
tween the Climbing Rail and Slab Shoe
and become trapped. This can cause
serious injuries.
Do not take hold of anything be-
tween the Rail Guidance Shoes and
Climbing Rails.
Use the Guide-in Tool.
Guide the climbing enclosure with
ropes.
– Immediately place the correct Spac-
er (3) on the pawl (44.1) of the Climb-
ing Shoe.
– In order to facilitate threading
through, do not tighten the Anchor
Bolts (44.6) until the climbing enclo-
sure has been mounted.
Components
3 Spacer M20-82
44 Climbing Shoe RCS
44.1 Climbing Pawl
44.2 Guiding Skids
45 Slab Shoe RCS
126 Guide-in Tool RCS
Assembly
1. Position the Climbing Rail in front of
the open top Climbing Shoe (44a).
Use the Guide-in Tool (126).
(Fig. C4.04a)
2. Close the guiding skids (44.2) of the
top Climbing Shoe (44a) and secure,
see Section "Opening and Closing
the Rail Guidance Shoe" on Page 110.
3. Remove the Guide-In Tool (126).
4. Place the climbing enclosure with
Spacer (3) on the climbing pawl
(44.1). (Fig. C4.04b)
C4 Suspension on the Structure
Fig. C4.04a
Fig. C4.04
RCS P Climbing Protection Panel
Instructions for Assembly and Use – Standard Configuration
 Loading...