Explorer Mini Repairs - Control panel
4.9.2 Installing the control panel
The following tools are necessary for this task:
• Torque wrench.
• Allen socket, 3 mm.
• Allen socket, 4 mm.
• Allen socket, 5 mm.
• Needle-nose pliers.
• Wire hook.
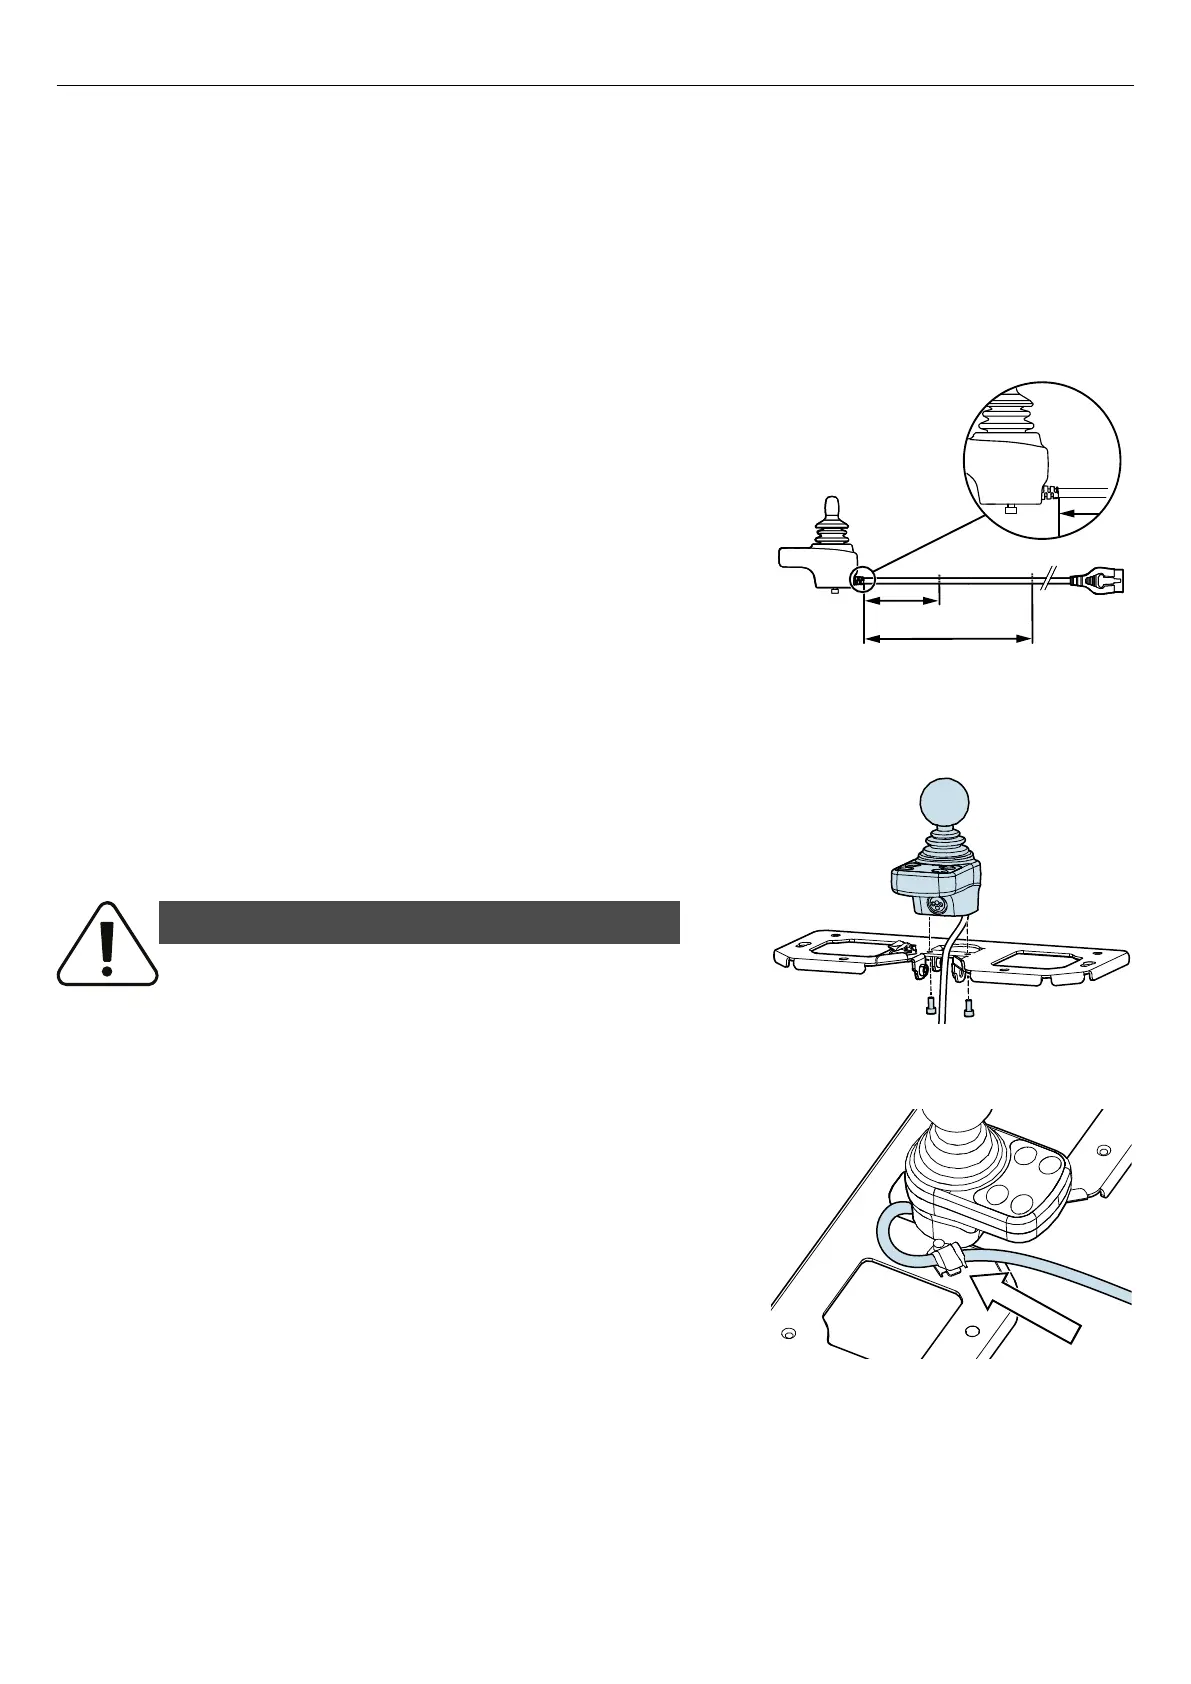
Figure 90. Measurement for correct positions of cable
holders.
1. Mark out the distance (A) from the control panel to the position of
the cable holder that attach the cable on the table bracket. Correct
distance is 4.3″.
2. Mark out the distance (B) from the control panel to the cable holder
that attach the cable to the column. Correct distance is 19.7″.
Figure 91. Attach the control panel to the table bracket.
3. Attach the control panel to the table bracket the with the two
screws. Make sure that the charger socket is facing the V-shaped
opening of the table bracket. Tightening torque: 2.1 lb. ft.
WARNING!
Use recommended tightening torque
Use the recommended tightening torque to reduce the risk of damage to the
wheelchair and to prevent causing injury to the user.
Figure 92. Attach the cable to the cable holder on the
table bracket.
4. Attach the cable to the cable holder on the table bracket. Make sure
that the measured and marked out distance, 4.3″, on the cable is in
the center of the cable holder. See step 1 for information on the
measurement.
47