Adjustment
13 - 22
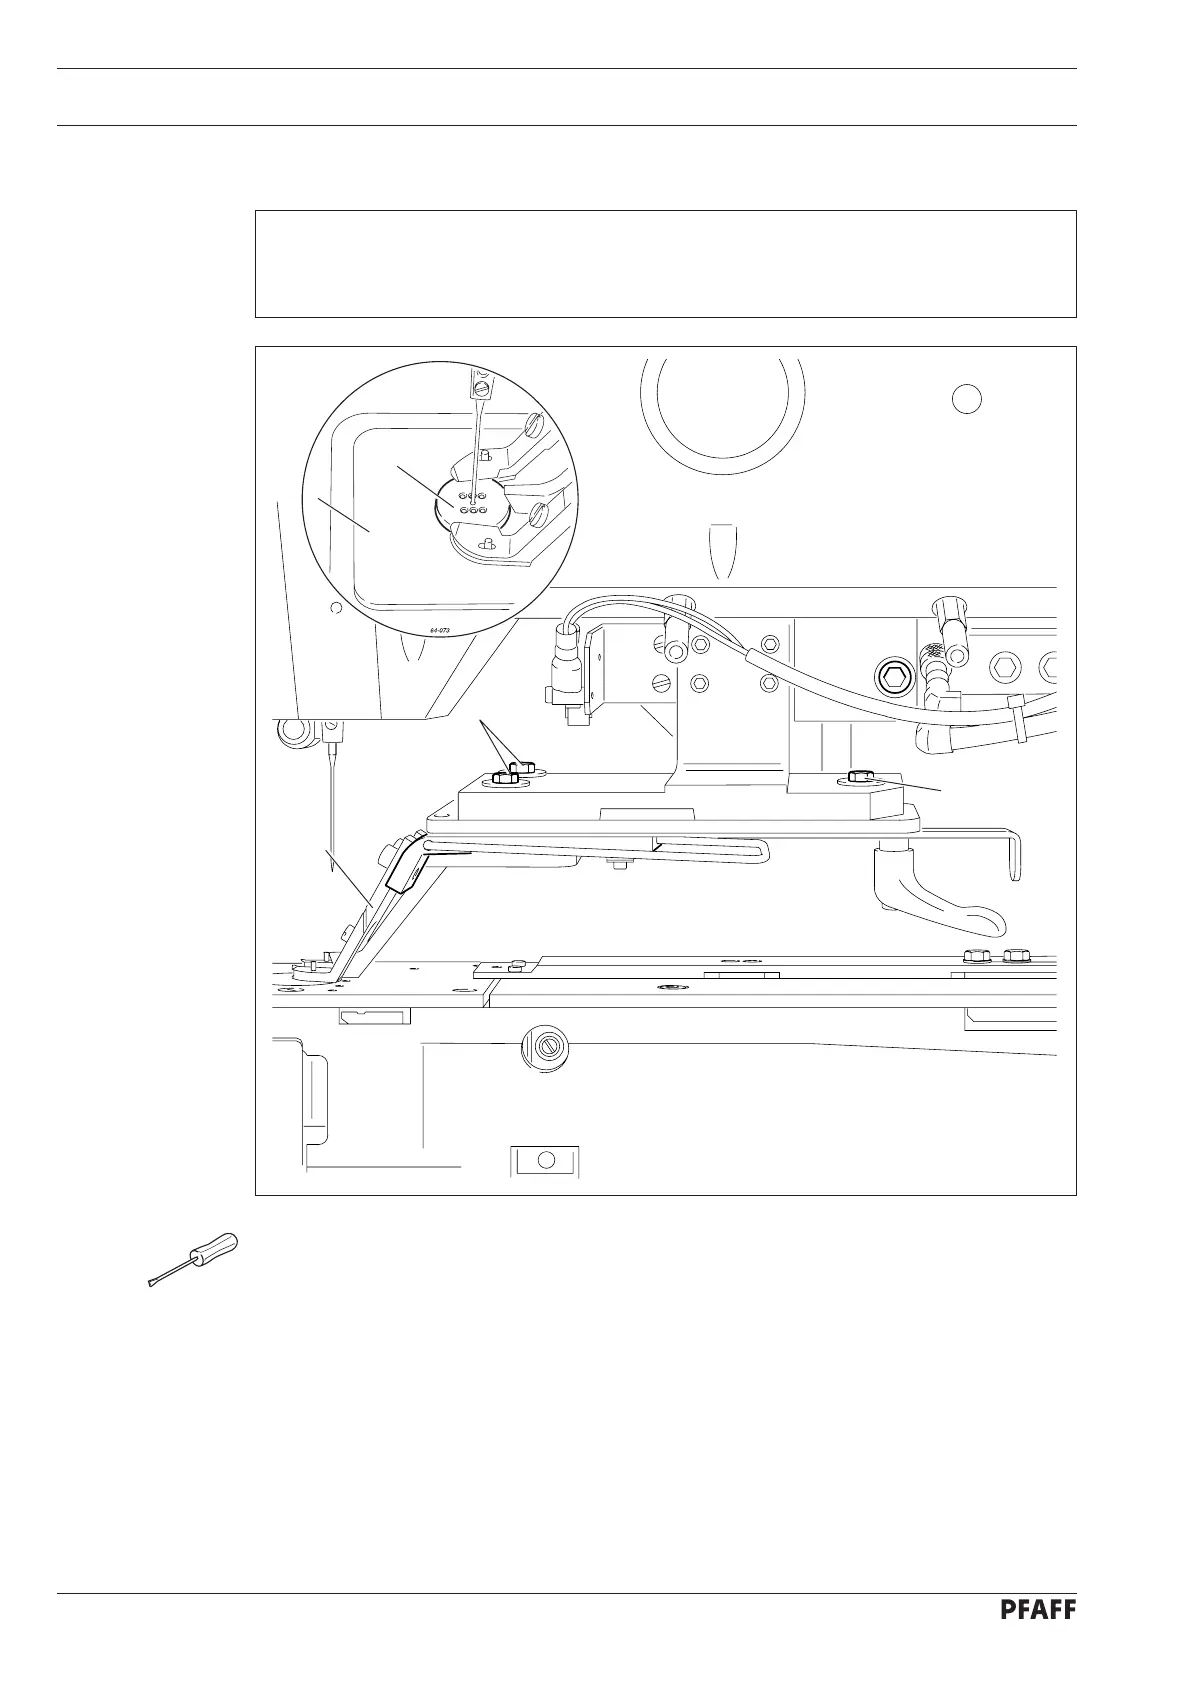
Fig. 13 - 20
3
4
4
2
1
13.22 Aligning the button clamp (only on subclass -1/..)
Requirement
After parameter "610" has been selected (with value 4, 5, 6, 7 and 8), the needle should
penetrate the centre of the respective hole of button gauge 2.
● Remove cloth plate 1.
● Switch on the machine and set parameter "610" at "4" (button gauge: centre).
● Insert and align button gauge 2 (part no. 61-111 635-66).
● Press down the button clamp by hand.
● Adjust button clamp 3 (screws 4) in accordance with the requirement.
● Check the remaining penetration positions of the needle in the respective hole of the
button gauge 1 with the values "5", "6", "7" and "8" of parameter "610" in accordance with
the requirement.
● Connect the machine to the pneumatic power supply and check the setting again.
● If necessary correct the position of the button clamp 3 (screws 4).
● Switch off the machine and disconnect it from the pneumatic power supply.
● Remove the button gauge and mount the cloth plate.

 Loading...