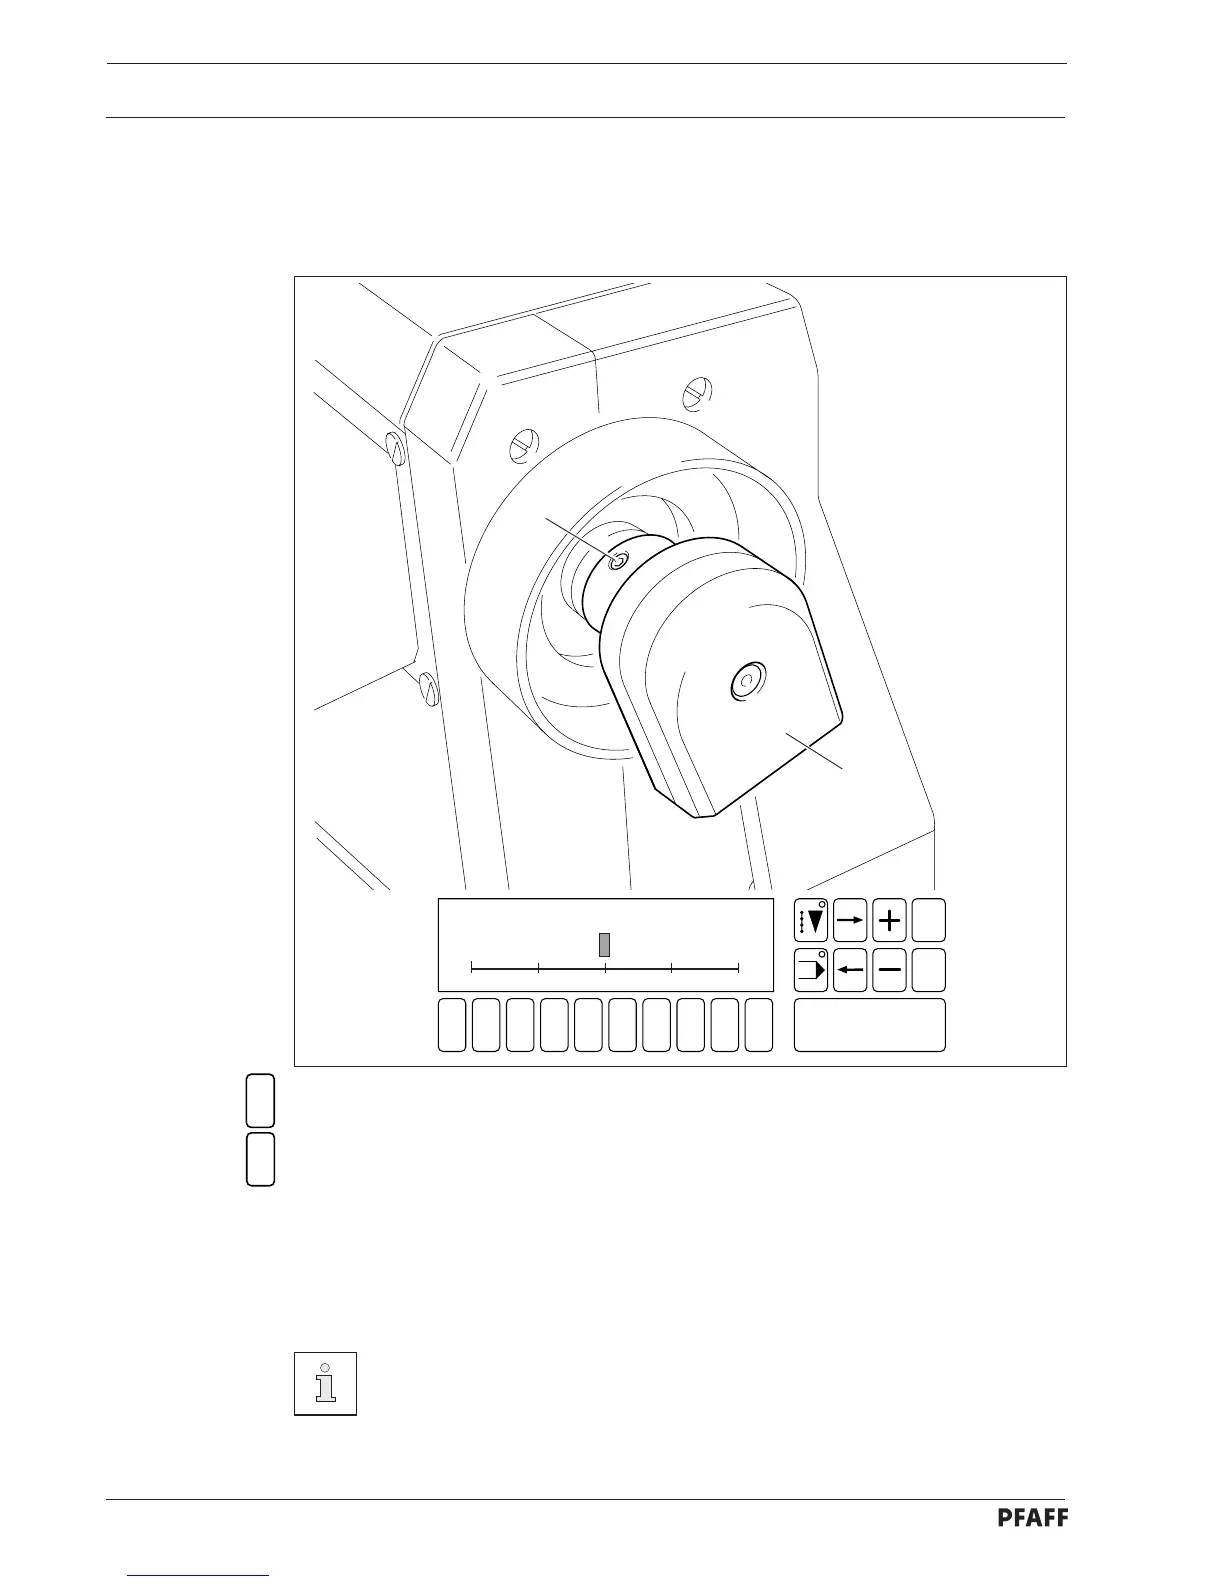
Adjustment
13 - 3
● Select the SEWING MOTOR function.
● Select the ADJUST SYNCHRONIZER function.
● Turn the balance wheel in sewing direction until the point of the descending needle is at
the top edge of the needle plate.
● With the needle in this position, turn synchronizer 2 until the cursor in the display
is at " 0 ".
● Tighten screws 1.
For other positioning options see the ADJUSTING POSITIONS function in
chapter 11.09 Summary of the service functions.
1
2
Fig. 13 - 01
2
1
1 2
3
4 5 6 7 9 0
Enter
8
Esc
Clear
REFERENCE
0 + 180- 180 - 90 + 90