Mechanical Instructions
EN 12 BJ2.4U/BJ2.5U LA4.
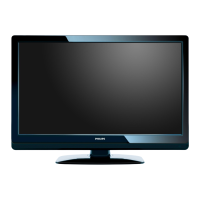
Figure 4-16 SSB lift -2-
1. Remove screws [3].
2. Place the SSB back in its original position.
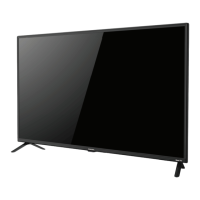
Figure 4-17 Subframe lift -1-
1. Unplug speakers.
2. Unplug two most right connectors [4] on the SSB.
3. Unplug connector 1M10 [5] on Platform Supply Panel that
leads to left AmbiLight Inverter Panel.
4. Unplug connector 1M59 [6] on SSB that leads to left
AmbiLight Inverter Panel.
5. Remove right vertical bracket as described in section
“AmbiLight Inverter Panel”.
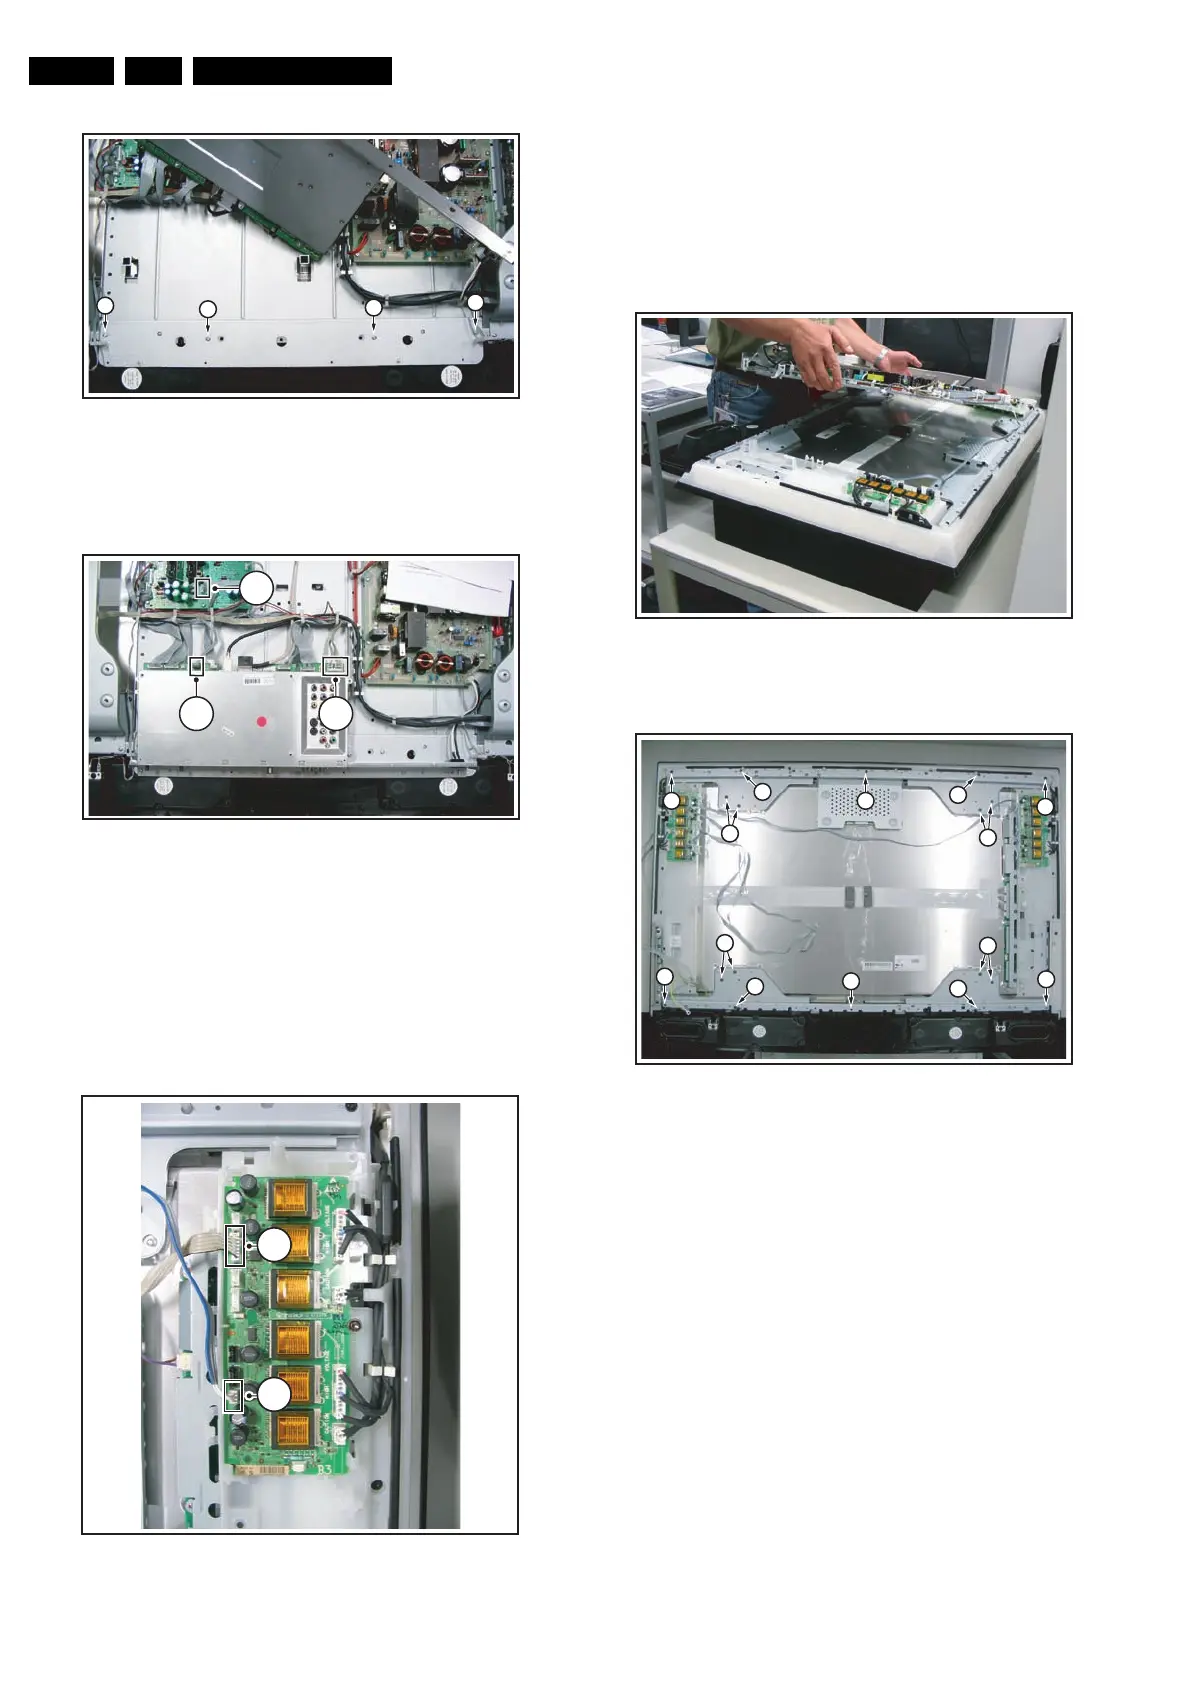
Figure 4-18 Subframe lift -2-
1. Pull Side I/O Panel / Memory Card Reader / USB
Connector downwards and place it in the centre of the set.
2. Mark connector [8] on right AmbiLight Inverter Panel to
avoid erroneous re-assembly. Unplug connector.
3. Unplug connectors [9].
4. Unplug LVDS connector from LCD Panel. Caution: this is
a very fragile connector!
5. Release horizontal cable that leads from left to right
AmbiLight Inverter Panel from its clamps.
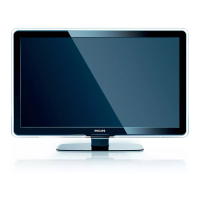
Figure 4-19 Subframe lift -3-
Figure 4-20 Subframe lift -4-
1. Carefully lift the subframe from the set.
2. Remove remaining left vertical bracket. During re-
assembly, reconnect the earth-cable.
3. Remove T15 tapping screws that hold horizontal brackets
[1].
4. Remove T10 parker screws [2].
5. Take out both horizontal brackets.
4.3.10 Speaker Compartment
See figure “Speaker Compartment” for details.
G_15910_019.eps
230606
3
3
3
3
G_15910_020.eps
230606
6
5
4
G_15910_021.eps
230606
8
9
G_15910_022.eps
230606
G_15910_023.eps
230606
2 2
2
1
1
1
1
2
2
2
2
2
2
2