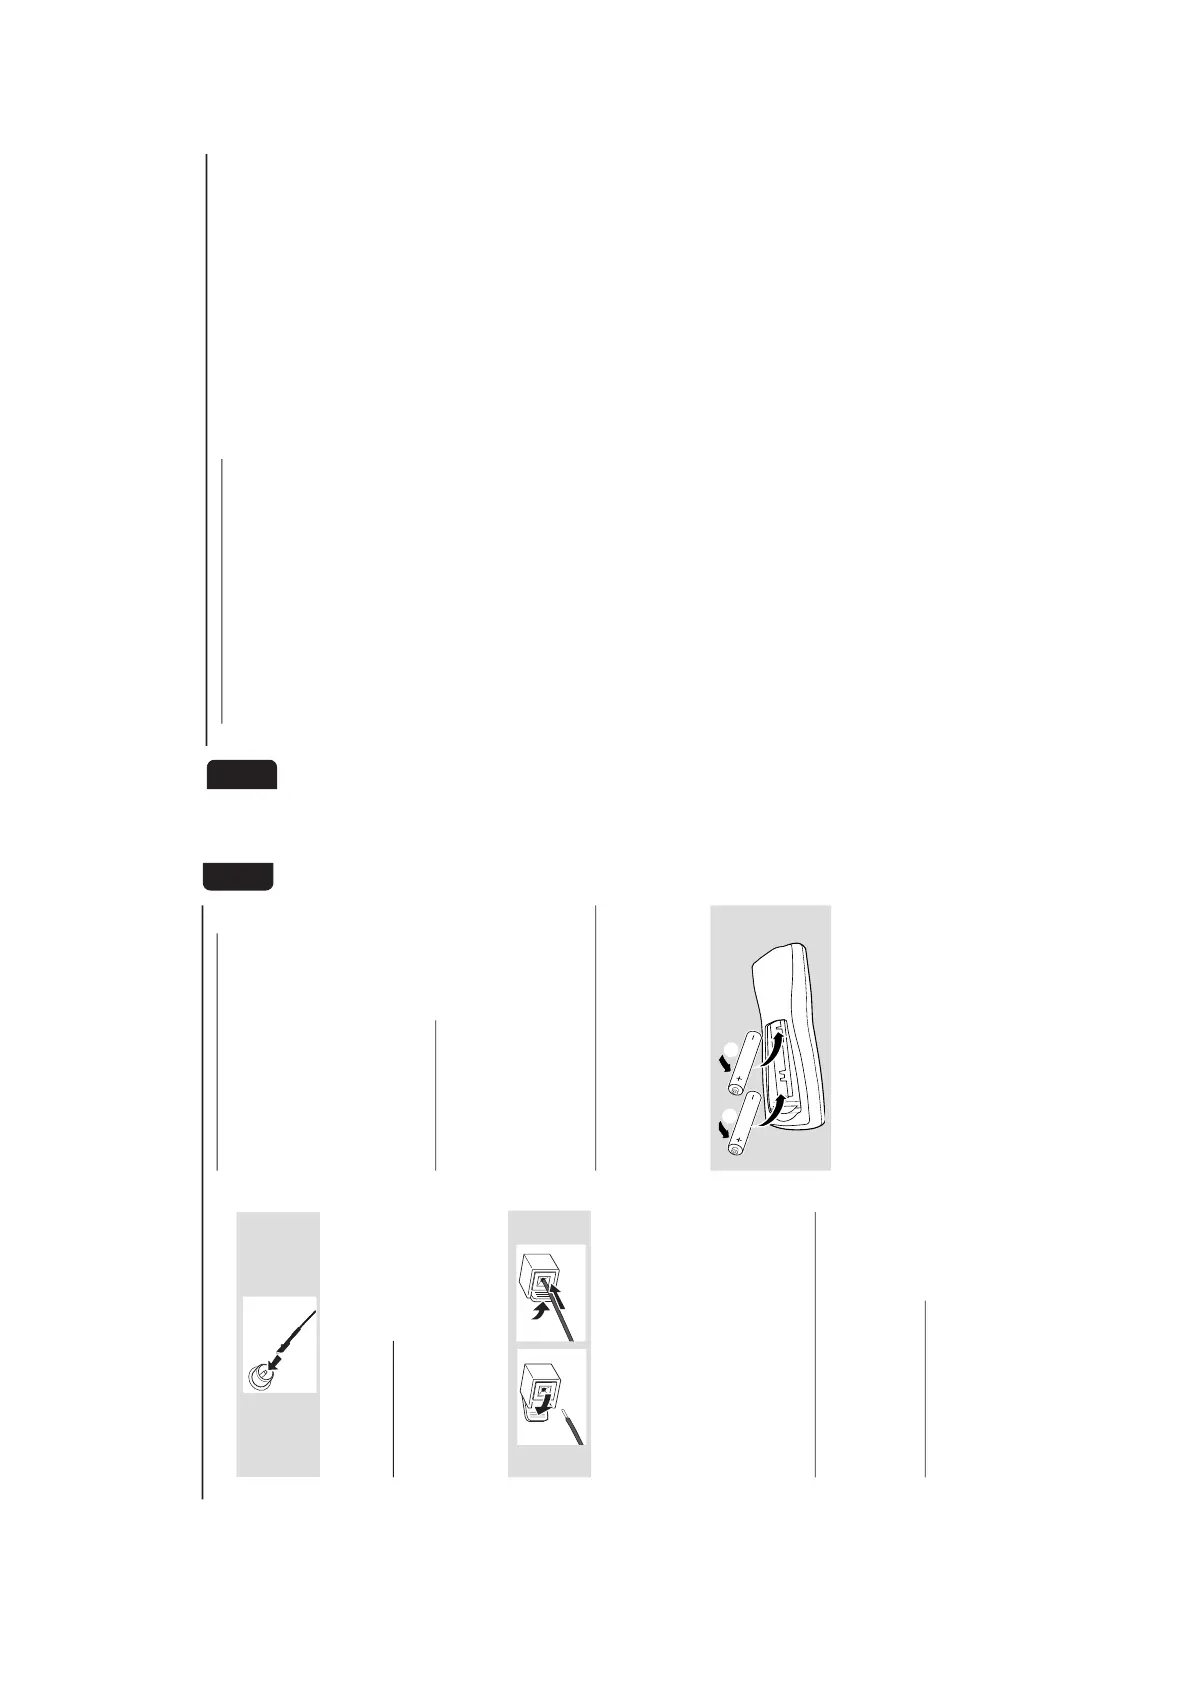
¶ Clip the stripped portion of the speaker wire as
shown.
Notes:
–For optimal sound performance, use the
supplied speakers.
– Do not connect more than one speaker to any
one pair of
+
/
-
speaker terminals.
– Do not connect speakers with an impedance
lower than the speakers supplied. Please refer to
the SPECIFICATIONS section of this manual.
Optional Connections
The optional equipment and connecting cords
are not supplied. Refer to the operating
instructions of the connected equipment for
details.
Subwoofer Out Connection
Connect the subwoofer to the SUBWOOFER
OUT terminal. The subwoofer reproduces just
the low bass sound effect (explosions or the
rumble of spaceships, for example).
Connecting other equipment to your
system
Connect the audio left and right OUT terminals
of a TV, VCR, Laser Disc player, DVD player or
CD Recorder to the AUX/CDR IN terminals.
Note:
– If you are connecting equipment with a
monaural output (a single audio out terminal),
connect it to the AUX/CDR IN left terminal.
Alternatively, you can use a “single to double” cinch
cable (still be mono sound).
Digital Out Connection
Connect this digital output when recording on
any audio equipment with digital input (CD
Recorder, Digital Audio Tape [DAT] deck, Digital
to Analogue Converter and Digital Signal
Processor, for example). Use a cinch cable to
connect the DIGITAL OUT terminal to the
digital input terminal of the equipment.
Inserting batteries into the
Remote Control
Insert two batteries (Type R06 or AA) into the
remote control with the correct polarity as
indicated by the + and - symbols inside the
battery compar tment.
10
English
Controls
(main system’s illustration on page 3)
Controls on the system and
remote control
1
STANDBY ON
yy
yy
y
– to switch the system on or to Standby mode.
2
ECO POWER
– to switch the system on or to Eco Power
Standby mode.
3 iR
– infrared sensor for remote control.
4 # OPEN
– to open the tape deck door.
5 PHONES
– to connect headphones.
6 PROG (PROGRAM)
for CD ................. to programme disc tracks.
for TUNER ........ to programme preset radio
stations.
for CLOCK ....... to select 12- or 24-hour clock
mode.
7 BASS/TREBLE
– to select BASS or TREBLE sound feature.
BASS/TREBLE +/- (on the remote control)
– to increase or decrease the low or high tone
level for the respective BASS or TREBLE sound
feature selected.
8
wOOx (for model MC-70 only)
– (on the system only) to select the next wOOx
level or switch off wOOx sound effect.
– (on the remote control only) to switch on or off
the wOOx sound effect.
wOOx LEVEL
– (on the remote control only) to select desired
wOOx level : WOOX 1, WOOX 2 or
WOOX 3.
9 VOL (VOLUME +/-)
– to increase or decrease the volume.
– (on the system only) to increase or decrease the
low or high tone level for the respective BASS or
TREBLE sound feature selected.
0 0 REC
– to start recording on a tape.
! SOURCE – to select the following:
3CDC (CD 123)
– to select disc tray 1, 2 or 3.
TUNER
– to select waveband : FM, MW or LW.
TAPE
– to select tape mode.
AUX / CDR
– to select a connected external source :
CDR or AUX (auxiliary) mode.
@ Mode Selection
PLAY PAUSE ÉÅ
for CD ................. to start or interrupt playback.
for TAPE .............. to start playback.
for PLUG & PLAY…(on the system only) to
initiate and start plug & play
mode.
STOP/DEMO STOP Ç
for CD ................. to stop playback or to clear a
programme.
for TUNER ........ to stop programming.
................................. (on the system only) to delete the
preset radio station.
for TAPE .............. to stop playback or recording.
for DEMO ......... (on the system only) to activate/
deactivate the demonstration.
for CLOCK ....... to exit clock setting or cancel
timer.
for PLUG & PLAY…(on the system only) to exit
plug & play mode.
PREV / NEXT íë(PRESET 43)
for CD ................. to skip to the beginning of the
current, previous, or next track.
for TUNER ........ to select a preset radio station.
for TAPE .............. to select tape side (back or
front).
for CLOCK ....... to set the minute.
SEARCH / TUNE àá
for CD ................. to search backward/forward.
for TUNER ......... to tune to a lower or higher radio
frequency.
for TAPE .............. to rewind or fast forward.
for CLOCK ....... to set the hour.
# OPEN•CLOSE (DISC 1/DISC 2/DISC 3)
– to open or close the individual disc tray : DISC 1,
DISC 2 or DISC 3
$ DISC TRAYS
%
DISPLAY SCREEN
– to view the current status of the system.
^ MUTE
– to interrupt or resume sound reproduction.
& CD DIRECT 1/2/3
– to select a disc tray for playback.
* IS (INCREDIBLE SURROUND)
– to activate or deactivate the surround sound
effect.