PAGE 4-8
1097626, V
ER. 03
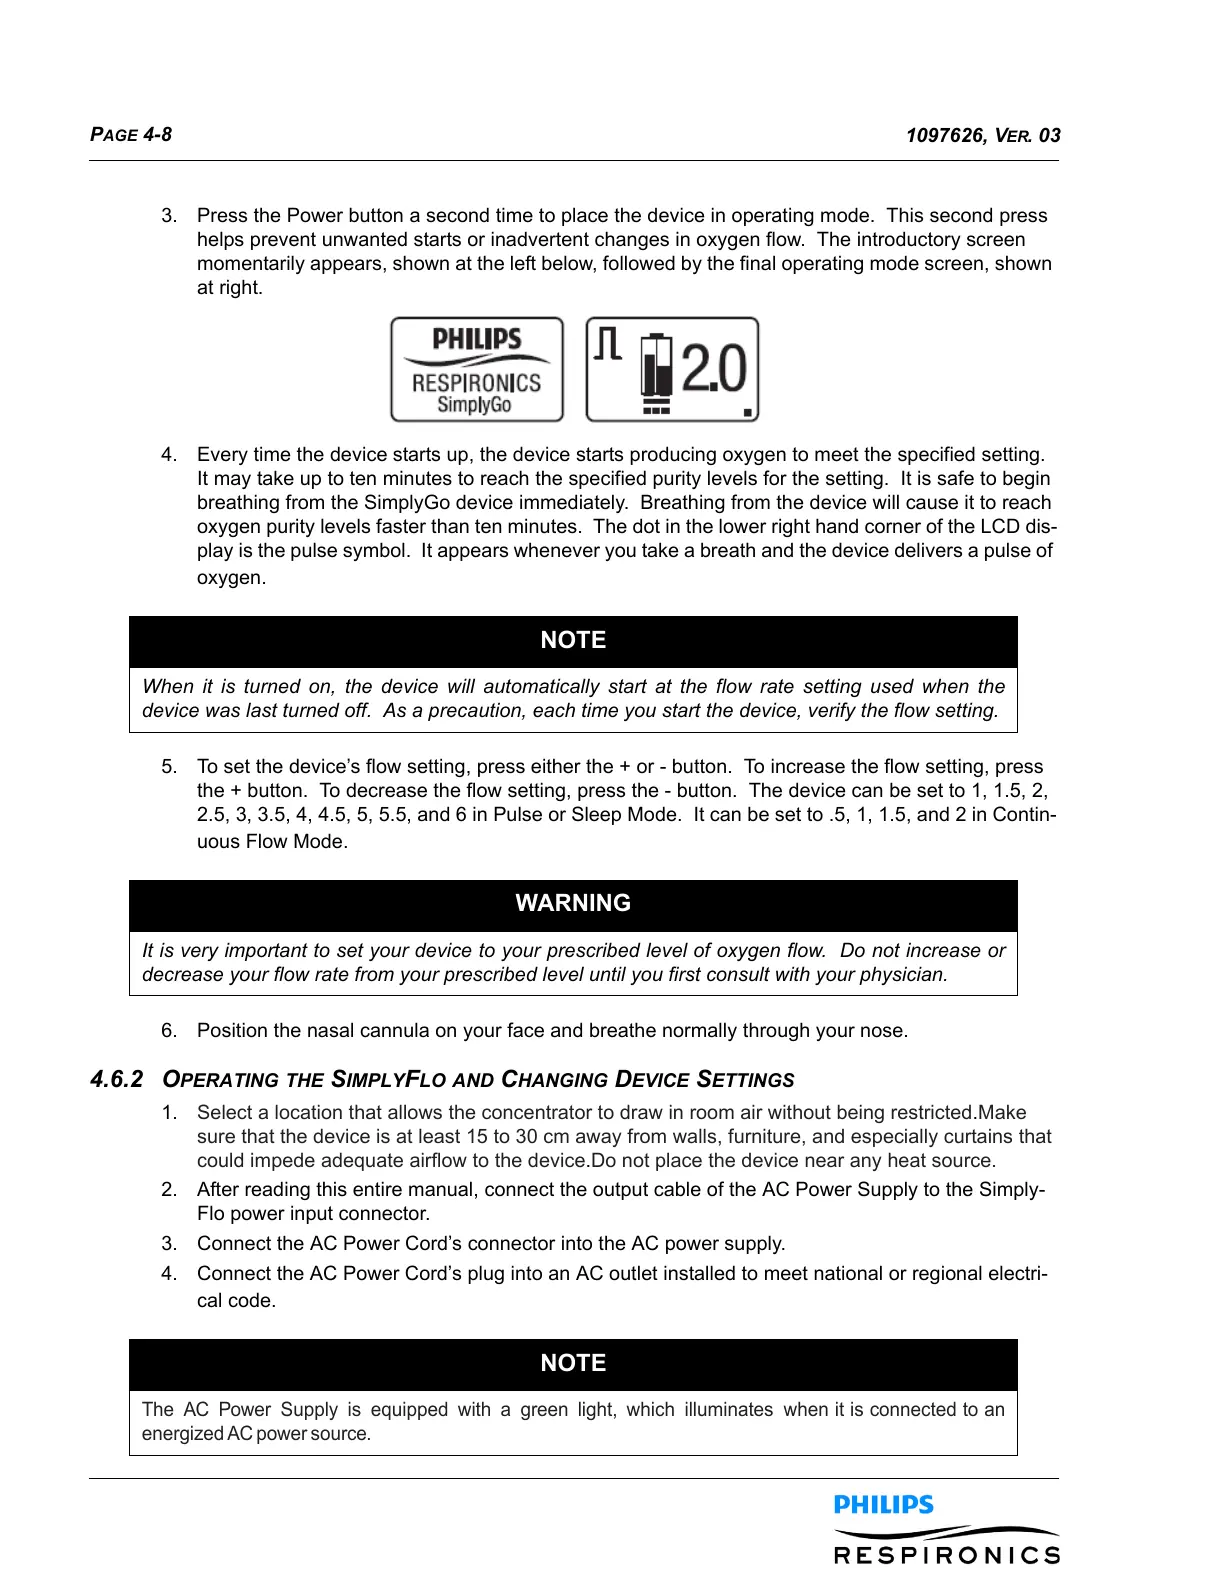
3. Press the Power button a second time to place the device in operating mode. This second press
helps prevent unwanted starts or inadvertent changes in oxygen flow. The introductory screen
momentarily appears, shown at the left below, followed by the final operating mode screen, shown
at right.
4. Every time the device starts up, the device starts producing oxygen to meet the specified setting.
It may take up to ten minutes to reach the specified purity levels for the setting. It is safe to begin
breathing from the SimplyGo device immediately. Breathing from the device will cause it to reach
oxygen purity levels faster than ten minutes. The dot in the lower right hand corner of the LCD dis-
play is the pulse symbol. It appears whenever you take a breath and the device delivers a pulse of
oxygen.
5. To set the device’s flow setting, press either the + or - button. To increase the flow setting, press
the + button. To decrease the flow setting, press the - button. The device can be set to 1, 1.5, 2,
2.5, 3, 3.5, 4, 4.5, 5, 5.5, and 6 in Pulse or Sleep Mode. It can be set to .5, 1, 1.5, and 2 in Contin-
uous Flow Mode.
6. Position the nasal cannula on your face and breathe normally through your nose.
4.6.2 OPERATING THE SIMPLYFLO AND CHANGING DEVICE SETTINGS
1. Select a location that allows the concentrator to draw in room air without being restricted.Make
sure that the device is at least 15 to 30 cm away from walls, furniture, and especially curtains that
could impede adequate airflow to the device.Do not place the device near any heat source.
2. After reading this entire manual, connect the output cable of the AC Power Supply to the Simply-
Flo power input connector.
3. Connect the AC Power Cord’s connector into the AC power supply.
4. Connect the AC Power Cord’s plug into an AC outlet installed to meet national or regional electri-
cal code.
NOTE
When it is turned on, the device will automatically start at the flow rate setting used when the
device was last turned off. As a precaution, each time you start the device, verify the flow setting.
WARNING
It is very important to set your device to your prescribed level of oxygen flow. Do not increase or
decrease your flow rate from your prescribed level until you first consult with your physician.
NOTE
The AC Power Supply is equipped with a green light, which illuminates
when it is connected to an
energized AC power source.
 Loading...