PicoQuant GmbH HydraHarp 400 Software V. 3.0.0.1
5.3.4. Running a basic TTTR Mode Measurement
A TTTR mode measurement (T2 or T3 mode) will typically be started after all control panel settings have been
tested in normal interactive histogramming mode (oscilloscope or integration). The acquisition time
(measurement time) and the file for saving the data are the only parameters that can be set separately.
A typical approach to set up a TTTR mode measurement would be by first starting oscilloscope mode with an
acquisition time of e.g. 1 second. Then all control panel settings should be optimized to reliably obtain the
expected data.
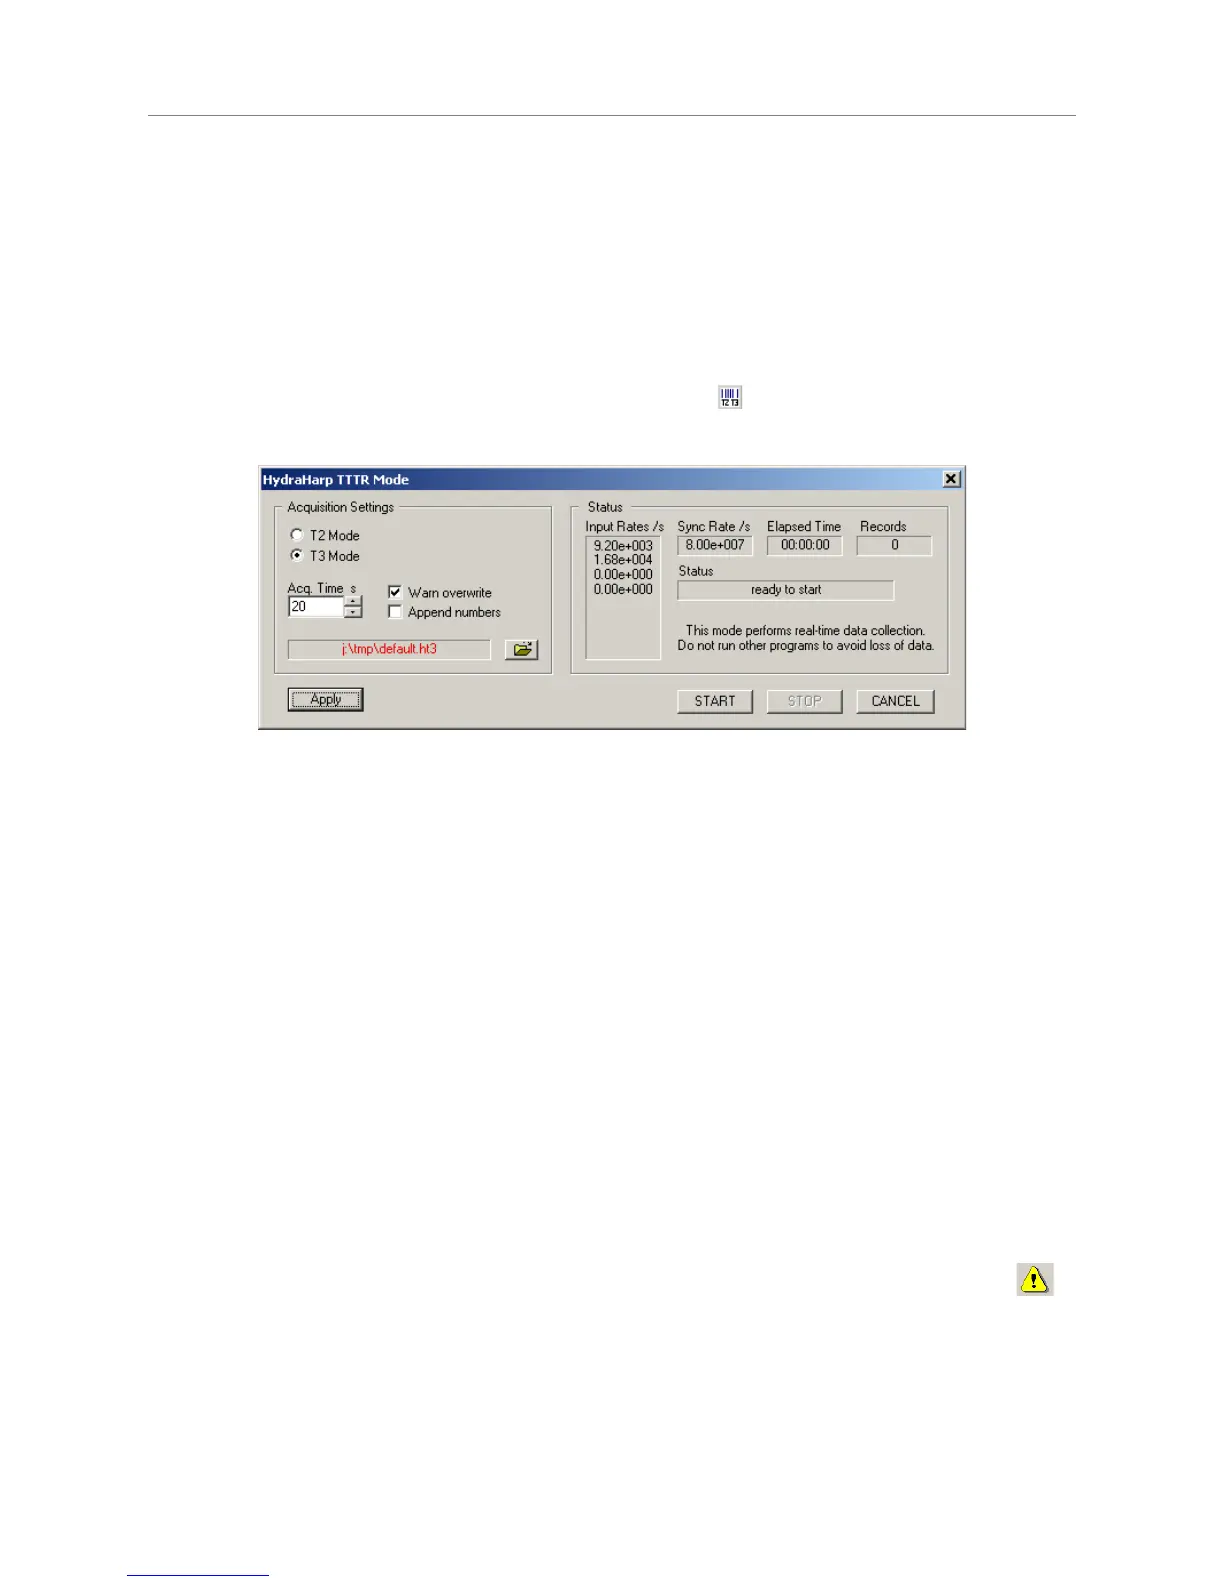
Once all settings are satisfactory, click the “TTTR Mode“ button on the toolbar. This will bring up the
“TTTR Mode“ dialog.
The dialog section Acquisition Settings is for the selection of the measurement mode (T2 / T3), an overall
acquisition time and a file name. Note that switching between T2 and T3 mode takes some time because the
hardware must be reconfigured. Normally such a switching should not occur often because the two modes
usually require a very different experiment setup.
The section Acquisition Settings also has two tick boxes for the handling of existing files. You can turn on a
warning and / or automatically have numbers appended to the file name, so that you can conveniently perform
series of measurements. The file name is shown in red if the file already exists. The button with the file icon will
open a standard Windows file dialog. You can select an existing file or choose a new name. The HydraHarp
TTTR mode files (starting from software version 3.0) have the file name extension .ptu. For maximum count
rate throughput you should choose a file destination on a fast local hard disk as outlined above. Network drives
are often too slow.
The dialog section Status shows elapsed time, the count rates and the number of collected records. Below
these figures there is a status line showing what is currently happening. Further below there are buttons for
Start, Stop and Cancel. Start and Stop control the actual TTTR measurement run. Cancel is for leaving the
TTTR mode dialog.
The TTTR mode measurement will start as soon as you click the Start button. You will then be able to watch
the progress of your measurement in the status boxes. The leftmost status box shows the elapsed
measurement time. The two boxes in the center show the count rates. The rightmost box will show the number
of events that have been recorded. Note that this includes overflow and marker records. Therefore, the number
of records will be somewhat larger than the true photon counts. The overflow and marker records will be
removed by the data analysis / processing software.
Next to the status line you may see a warning icon. When the TTTR mode dialog is running it
continuously collects information about the input signals and the current acquisition settings. If these
settings together with the input rates indicate possible errors, the software will activate the warning
icon. The warning icon can be clicked to display a list of current warnings together with a brief
explanation of each warning (see also section 8.1). In order to fix wrong settings you may have to
close the TTTR mode dialog and return to the control panel.
Page 32