Power Meter Bulletin No. 3020IM9503R6/98
Chapter 7—Display Operation December 1998
52 1998 Square D All Rights Reserved
SETTING UP THE POWER METER
To set up the power meter, follow these steps:
1. Press the Mode button until “Mode: Setup” is displayed on the screen.
2. Press the Select button. At the “Enter Password“ prompt, press the up
arrow button once to enter the default password 0 (if you have set up a
different password, use that instead).
3. Press Select until the desired setup parameter is displayed. Change the
value using the up and down arrow buttons.
4.
Repeat step 3 until all desired changes are made. Table 7-2 below shows setup
parameters, the factory default for each, and the allowable range of values.
5. After making all desired changes, press the Mode button. The display reads
“Save Changes? NO.”
6. To reject changes, press the Select button once.
7. To accept changes, press an arrow button to change from “NO” to “YES.”
Then press the Select button.
8. The power meter accepts the setup changes and restarts.
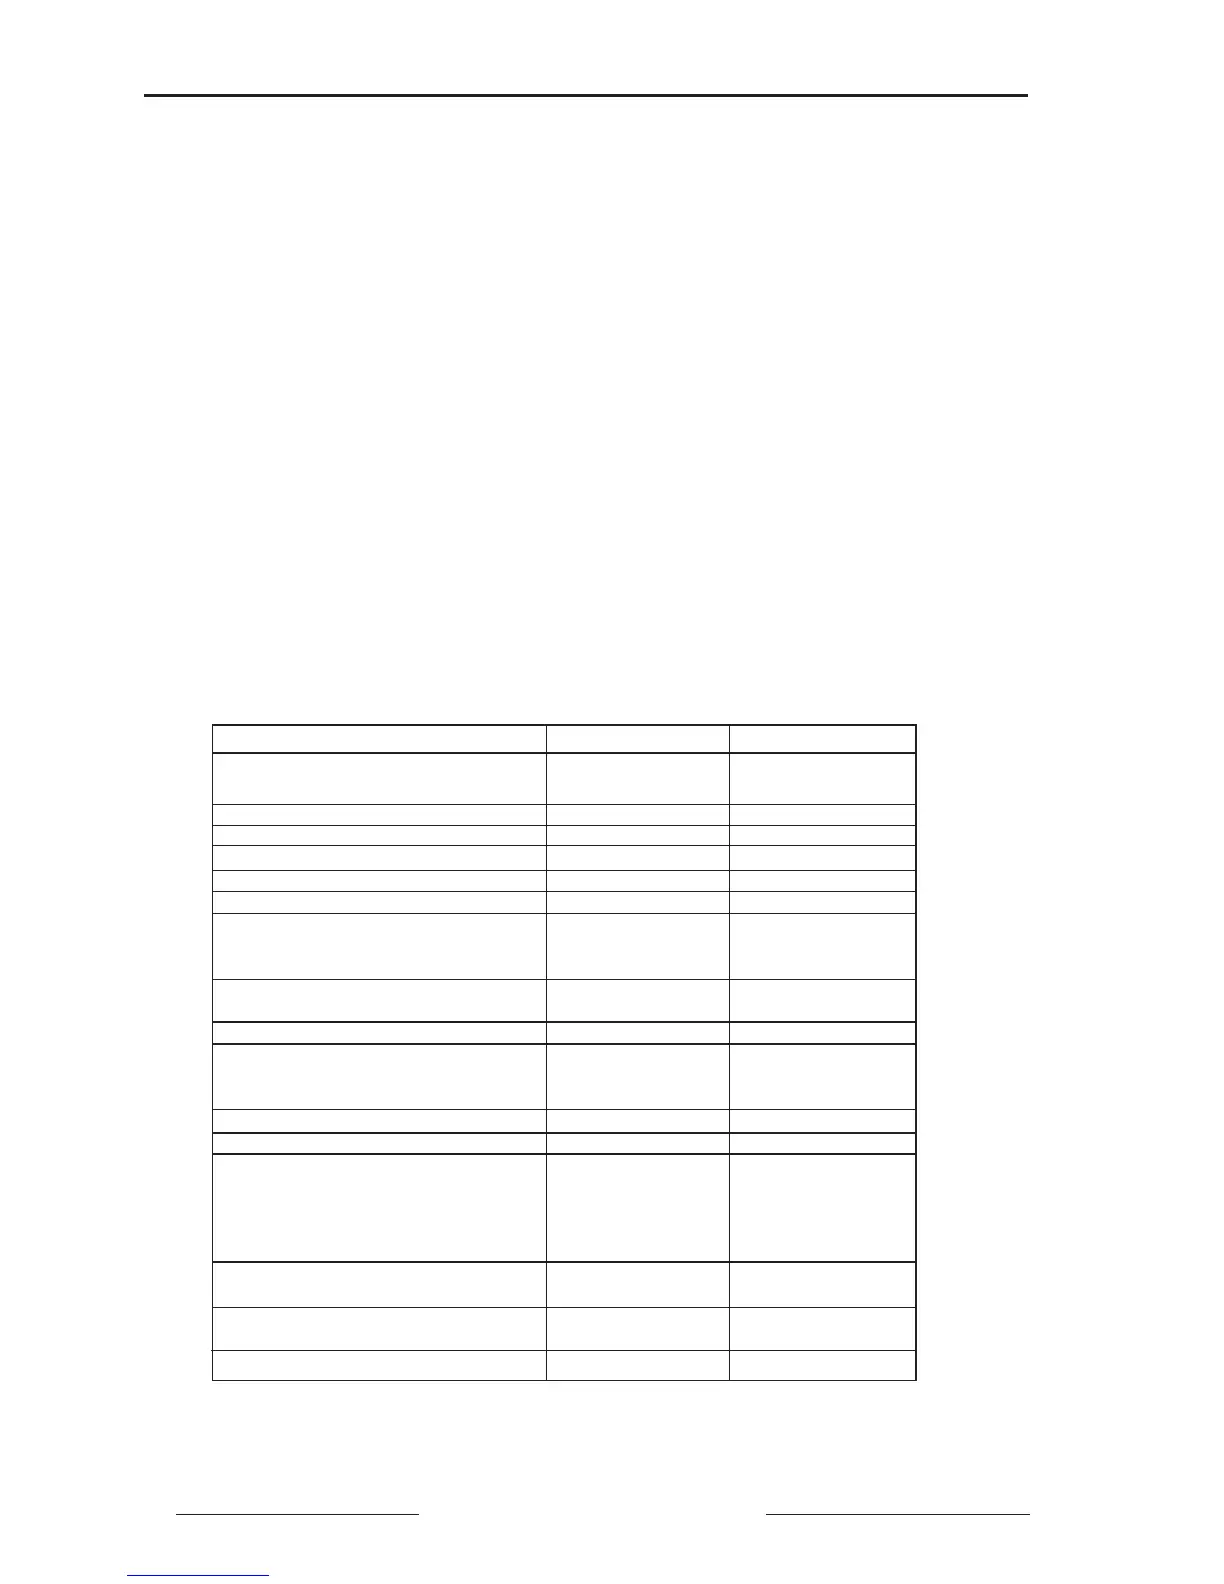
Table 7-2
Factory Defaults for Power Meter Setup Parameters
Parameter Allowed Values Default
Protocol POWERLOGIC, POWERLOGIC
Modbus, or JBus
Network Address 0 to 199 1
Baud Rate 1200–19200 9600
Parity even, none even
CT Primary (3-Phase) 1 to 32,767 5
CT Secondary 1, 5 5
Voltage Range ➀ 208/120 V, 208/120 V
480/277 V,
600/347 V
PT Primary
3-Phase 1 to 1,700,000 120
PT Secondary 100, 110, 115, 120 120
System Type 40, 4-wire; 40, 4-wire
31, 3-wire (3 CT);
30, 3-wire (2 CT)
Frequency (Nominal) 50, 60 Hz 60 Hz
Demand Interval (Power) ➁ 1 to 60 min. 15
KYZ Mode kWH, kWH
KYZ Disabled ➂,
kVAH,
kVARH
Alarm Mode ➃
Pulse Constant
(WH/Pulse Output [KVARH, KVAH]) 0 to 327.67 kWH 0
THD ➁ THD (United States) THD (United States)
thd (European)
Password (Master and Reset) 0 to 9998 0
➀ See note on voltage range selection, page 50.
➁ PM-620 and PM-650.
➂ PM-600 and PM-620.
➃ PM-650 only.