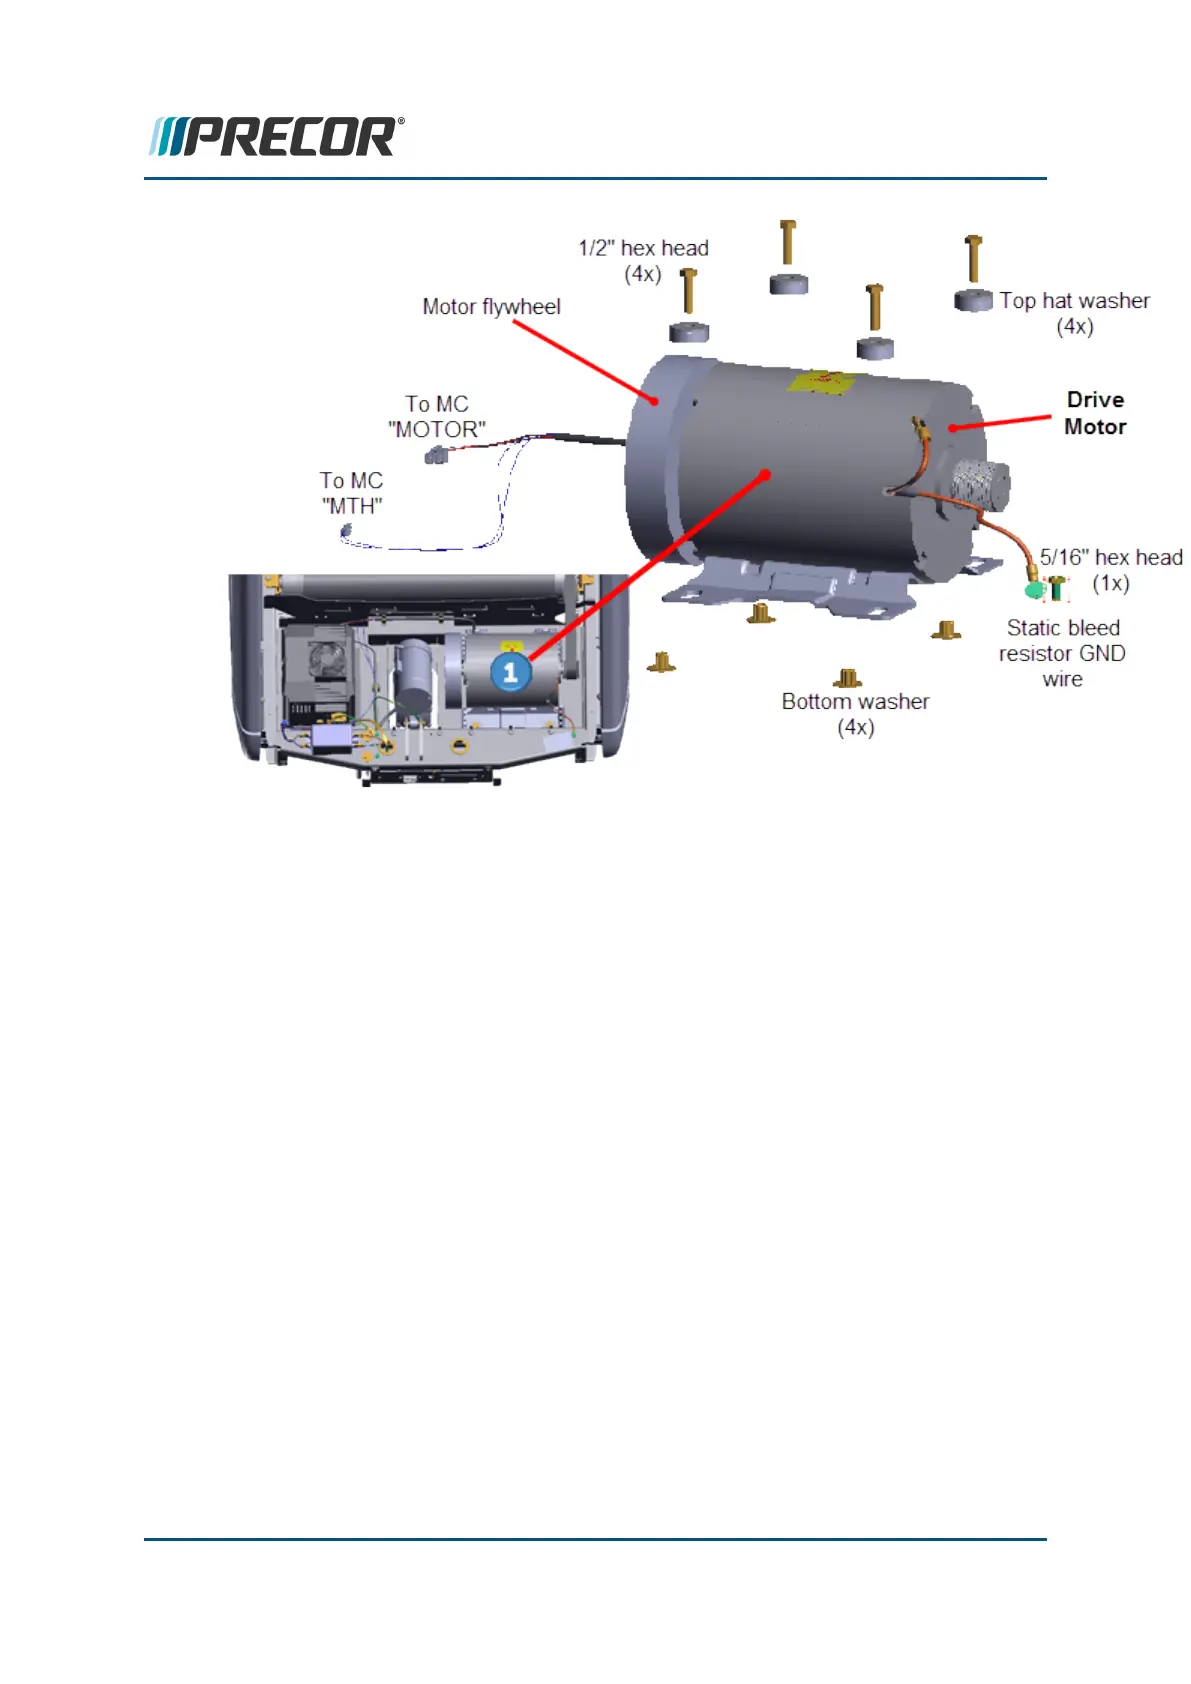
7. Remove the four 1/2" hex head bolts, plastic top hat washers, and bottom washers
fastener hardware. Remove the drive motor. Retain part(s) and/or fastener(s) for install-
ation.
Installation Instructions
1. Install the replacement Drive Motor into the motor isolation tray and secure using the
four 1/2" hex fasteners, plastic top hat washers, and bottom washers fastener hard-
ware.
a. If you made a motor base install reference mark prior to removal, adjust the Drive
Motor base position to the motor base install reference mark and fully tighten the
four 1/2" hex head fasteners
b. If you did not make a motor base install reference mark prior to removal, position
the motor base to the rear tab stops (minimum belt tension position) and fully
tighten the four 1/2" hex head fasteners.
Contact Precor Customer Support at support@precor.com or 800.786.8404 with
any questions.
Page 127
6 Replacement Procedures
Drive Motor Replacement

 Loading...