1. Remove the hood cover, see "Hood Cover Replacement" on page72.
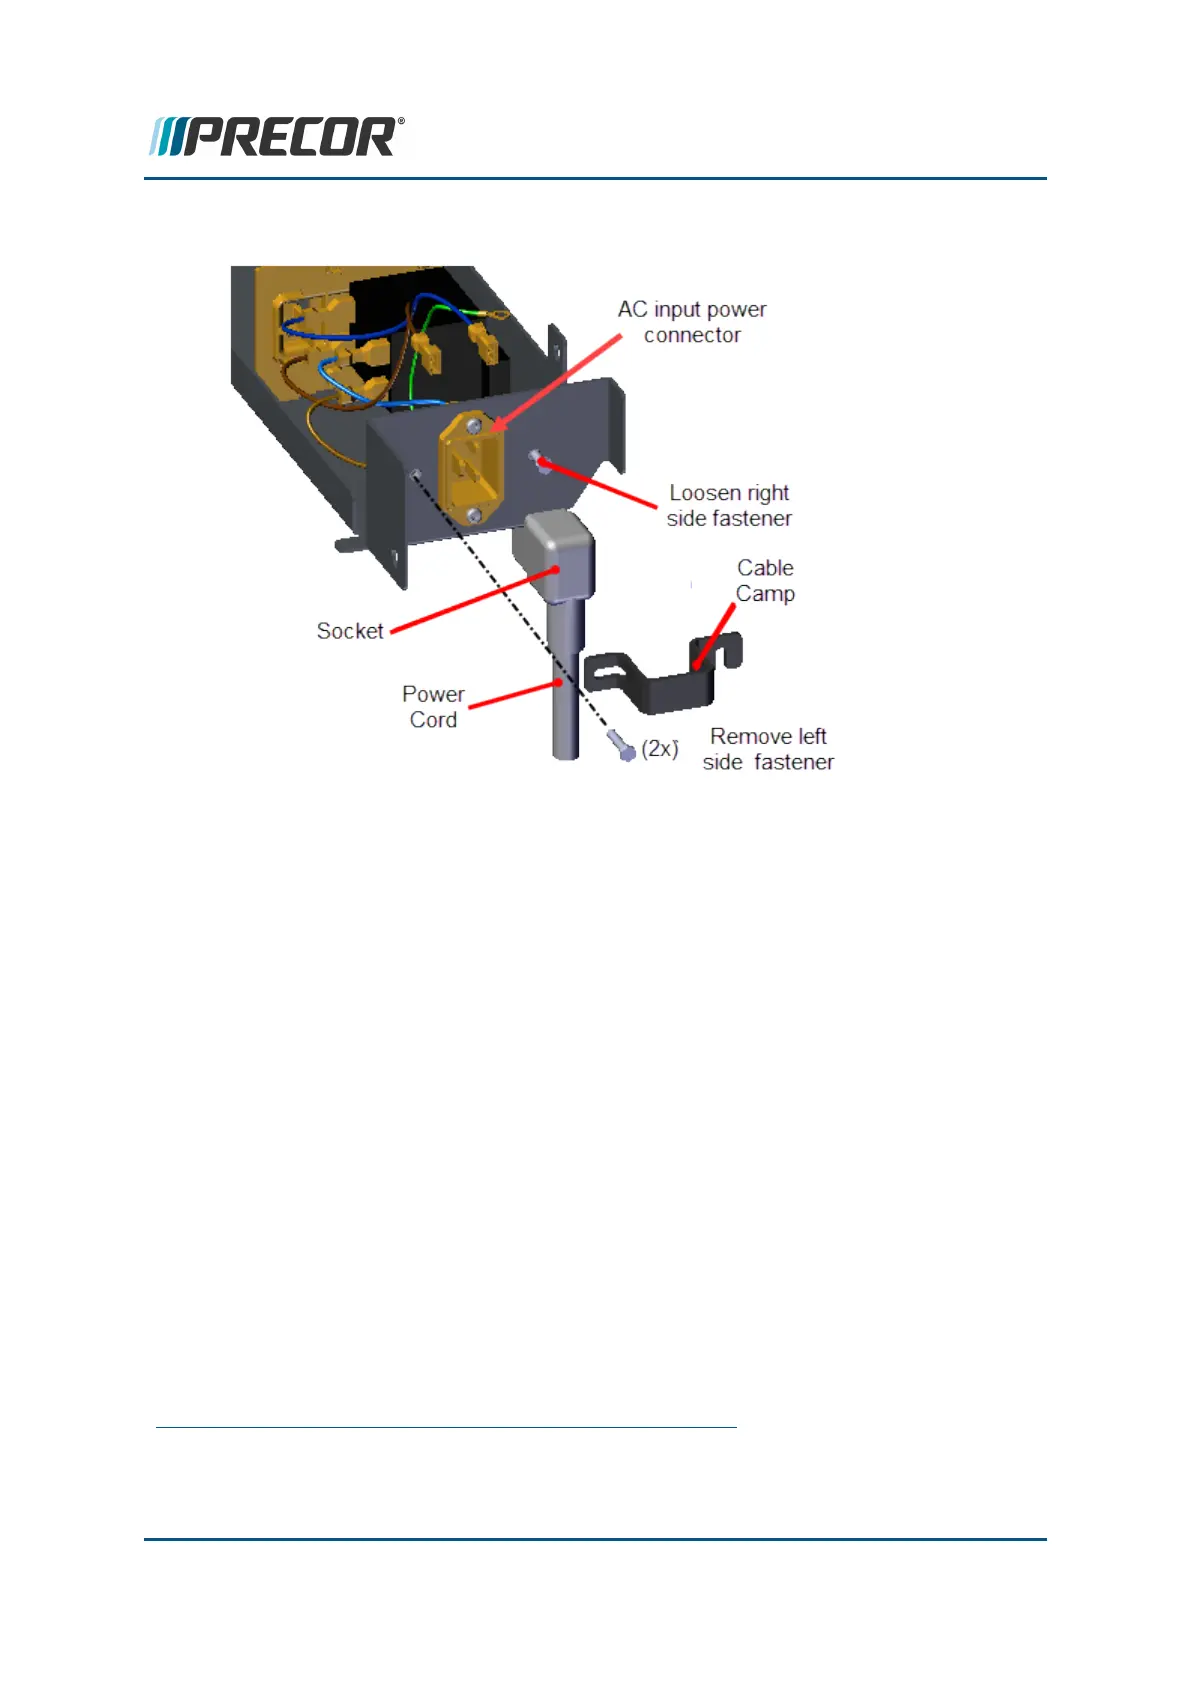
2. Use a 1/4" socket to loosen the right side power cord cable clamp fastener. Then loosen
the inner cable clamp fastener until the clamp can be slide over the power cord socket.
3. Then disconnect and remove the power cord. In some cases the inner clamp fastener
may need to be completely removed. Retain part(s) and/or fastener(s) for installation.
Installation Instructions
1. Connect the replacement power cord socket into the Power Entry Assembly AC
1
input
power connector.
2. Position power cord cable clamp over the power cord socket and fully tighten the clamp
fasteners.
3. Reinstall the hood cover, see "Hood Cover Replacement" on page72.
4. Connect the power cord and switch the ON/OFF circuit breaker ON.
5. Do the Operation Verification tests (see "Operation Verification" on page19) and return
to service.
1
Alternating Current: electric current which periodically reverses direction between positive
and negative polarity.
Contact Precor Customer Support at support@precor.com or 800.786.8404 with
any questions.
Page 90
6 Replacement Procedures
Power Cord Replacement

 Loading...