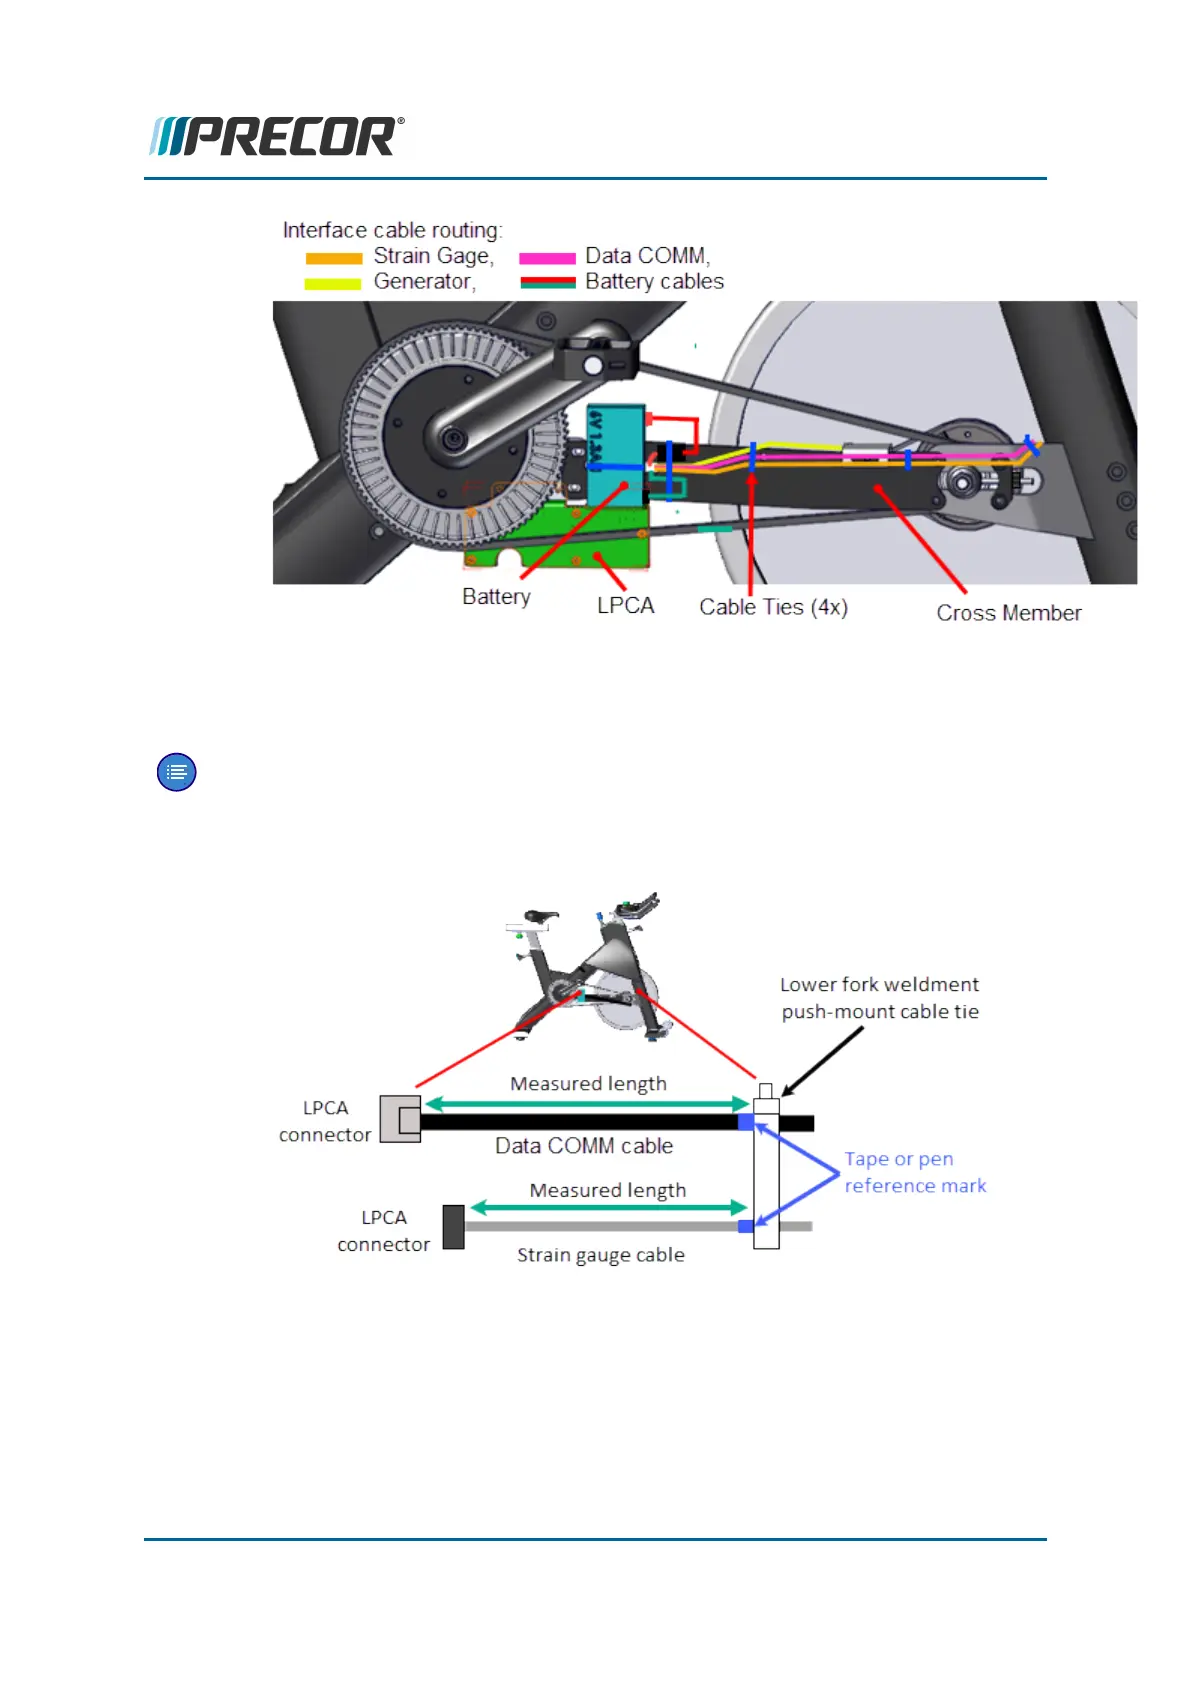
3. Disconnect the Data COMM, Strain Gauge, Battery, and Generator cables. Use a pen
or tape to mark the Data COM and Strain Gauge cables at the lower fork push mount
cable tie.
Note:Alternatively you can measure and record the Data COMM cable and Strain
Gauge cable lengths from the LPCA connectors to the right fork lower push-mount
cable tie. The reference marks (or measured cable lengths) will be used during the
installation process.
1. Remove the flywheel, see "Drive Belt, Generator Belt, and Flywheel Replacement" on
page85.
2. Carefully cut and remove the upper and lower push mount cable ties (2x) that secure
the strain gauge and Data Comm cables to the inside of the right fork frame weld-
ment. Discard the push mount cable ties.
Contact Precor Customer Support at support@precor.com or 800.786.8404 with
any questions.
Page 60
5 Replacement Procedures
Brake Caliper Assembly Replacement