2-12
Installing the Access Point
Installation Procedures
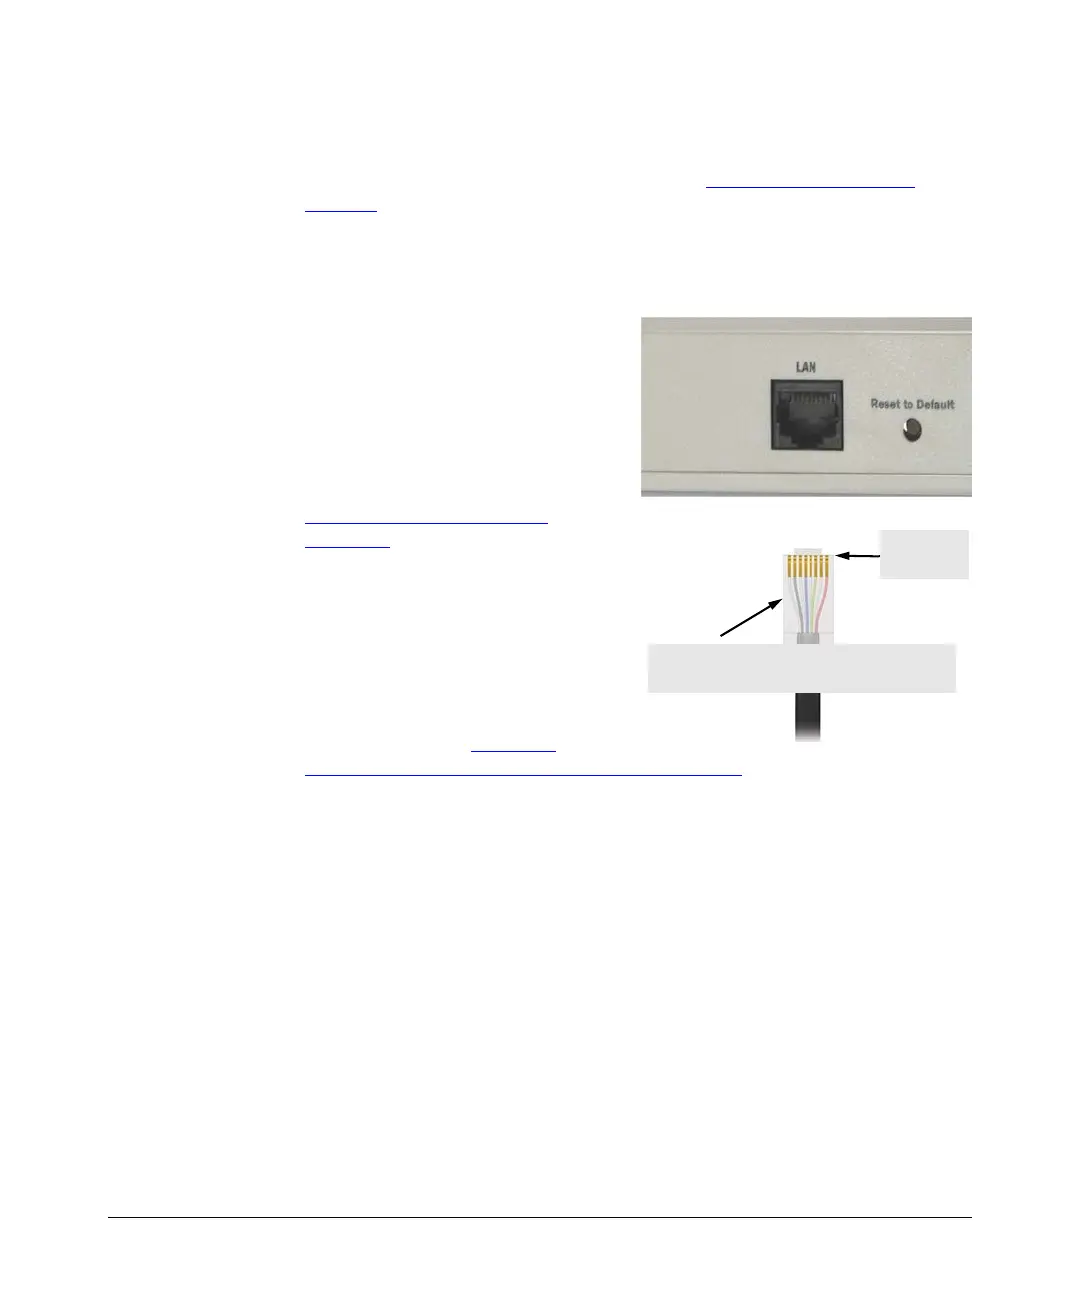
Step 6. Connect the Network Cable
Connect the network cable, described under ““Cabling Infrastructure” on
page 2-7
, from the network device or your patch panel to the LAN port on the
access point.
Using the RJ-45 Connectors
To connect:
Push the RJ-45 plug into the LAN port
until the tab on the plug clicks into
place. When power is on, one of the
two LAN LEDs should turn on to
confirm a valid network connection.
If neither LAN LED turns on, see
“
Diagnosing with the LEDs” in
Chapter 5
.
Congratulations! You have
completed installing your access
point. You are now ready to start
configuring your access point
settings.
Please continue to Chapter 3
,
“
Getting Started With Access Point Configuration” for an introduction of the
Web interface and a summary of essential configuration tasks that you should
perform.
RJ-45
connector
Category 5 cable for 10/100 Mbps ports (UTP)
Maximum distance: 100 meters