PRS 500 E
Instructions for use
5069-0-8002
PROTEC GmbH & Co. KG, In den Dorfwiesen 14, 71720 Oberstenfeld, Germany 25 von 47
4
Handling / Operation
4.1 Requirements before and during Operation
It must be ensured that the principles of radiation protection are always observed (see chapter 2.1.6).
It must be ensured that the surfaces in contact with patients (e.g. X-ray system table, cover image
receptor stand) are disinfected before the X-ray examination of each patient (see chapter 5.3.2).
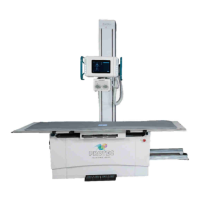
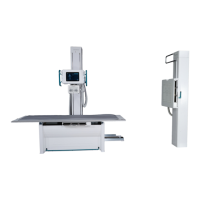
4.2 Operation with the radiographic system
4.2.1 Operation at the X-ray system table
4.2.1.1 Position of patients on the tabletop
•
Adjust the height of the tabletop so the patient can mount it easily
•
Mounting and dismounting of patients
o Push the tabletop to the side (left or right)
o Push the Bucky to the opposite site.
o Center the tabletop as much as possible (back/front).
•
The patient should mount/ dismount the tabletop in the mid.
4.2.1.2 Setting the X-ray unit on the mid moving Bucky, Grid entity
• Press the button 2 (Figure operating unit) off the brake for the longitudinal motion of the tube
stand.
• The handles on both sides of the control arm include..
• Moving the X-ray unit in the longitudinal direction of the Bucky table so unit the moving grid snaps
into the safety coupling.
4.2.1.3 Inserting a cassette into the cassette tray
• A film cassette may be placed into the cassette tray, when the X-ray tube assembly is positioned
(see item 4.2.1.2 ).
• Pull out the cassette tray by its handle from the Bucky unit until it hits the forward stop.
• The cassette clamps center the cassette transversely within the cassette tray. Rotate its latch
counter clockwise to unlock it.
• Open the cassette clamps far enough to insert a cassette of the desired size.
• At table Bucky insert the cassette, with its transverse centerline aligned with the notch in the
cassette clamps or by engaging the cassette positioner in the size of the cassette corresponding
detent (13 cm, 18 cm, 24 cm, 30 cm, 35 cm, 40 cm or 43 cm), push the cartridge to the cassette
positioner.
• Push the cassette clamps against the cassette, and rotate the latch into the locked position.
• Push the cassette tray fully into the Bucky unit.
4.2.1.4 Adjusting the focus-film distance (FFD)
• Set the X-ray unit with a tape measure at the collimator or the display on the tube to the desired
focus-film distance (FFD).
• Press the button 7 (Figure operating unit) off the brake to adjust the height of the X-ray unit.
4.2.1.5 Adjusting the light resp. X-ray field
• Press the collimator light switch (button 9, figure collimator) to turn on the collimator light, and
view the opening of the collimator shutter in both axes relative to the cassette size scales.
• Several FFD scale (adjuster 1 and 7, figure collimator) are provided to indicate the correct settings
of the collimator adjustment controls for the collimator shutters for several cassette sizes so that
the light beam and the X-ray filed can be limited to the desired cassette size in both axes. Adjust
cassette size as required using the collimator adjustment controls. Reduce shutter openings to
objects size for better image quality.