Part Replacement Replacing the Height Ultrasound Sensor
CubiScan 125 Service Manual 28
Replacing the Height Ultrasound
Sensor
This section describes how to replace the height
ultrasound sensor.
Items Needed
• 11/32'' nut driver
• 5/32'' Allen wrench
• Replacement sensor
Complete the following steps to replace the height
ultrasound sensor.
1. Power the CubiScan 125 off.
2. Unplug the sensor cable that attaches at the back of
the sensor.
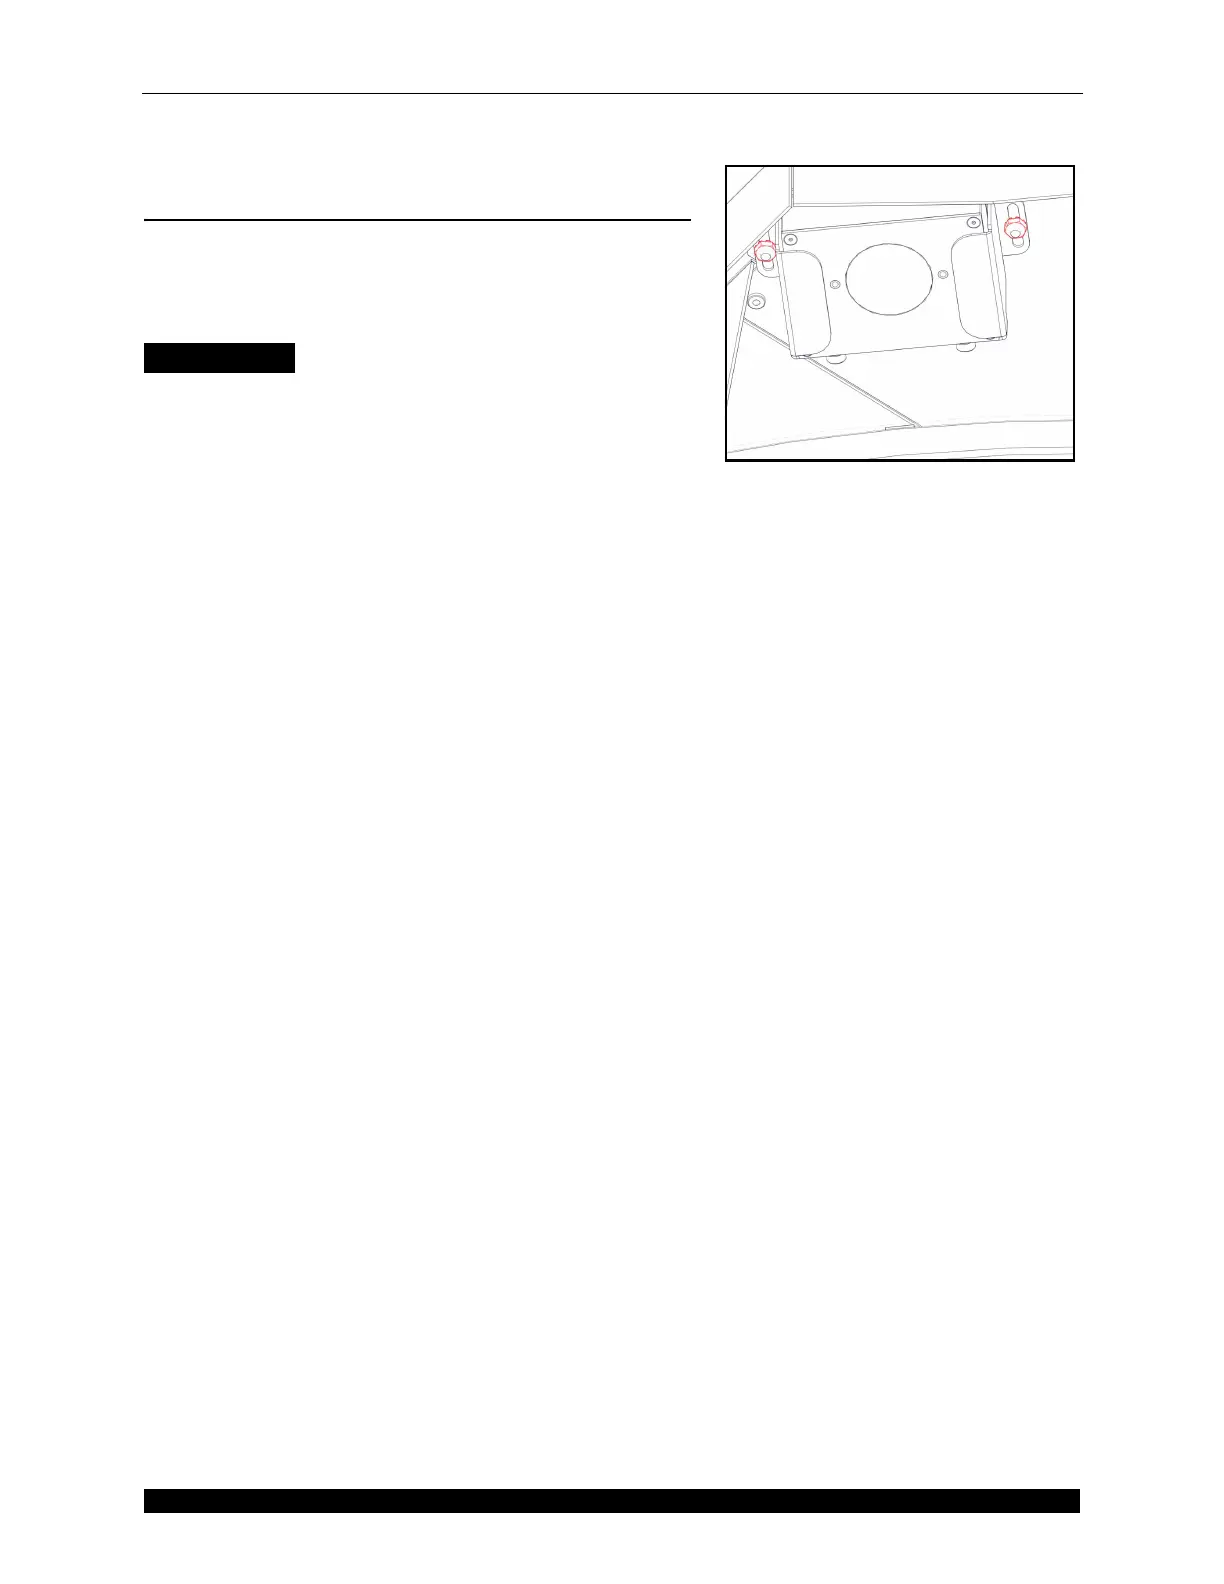
3. Using the 11/32'' nut driver, remove the two nuts
holding the height sensor bracket in place. See
Figure 21. Remove the bracket.
4. Use the 5/32'' Allen wrench to remove the two
screws holding the sensor in place. These screws are
located at the back of the sensor.
5. Replace the damaged ultrasound sensor with the
replacement ultrasound sensor and secure it using
the screws from step 4.
6. Replace the height sensor bracket and secure it using
the nuts from step 3.
7. Plug the sensor cable back in.
8. Power the CubiScan 125 on.
9. When you have successfully replaced the sensor, you
will need to recalibrate the ultrasound sensors. To
calibrate, you will need the 12'' x 5'' x 3.6'' calibration
cube. On the CubiScan 125 touchscreen, go to Menu
> Calibrate > XDCR. You will be guided through the
calibration process.
Figure 21
Height Sensor Screws

 Loading...