Part Replacement Replacing the Encoder
CubiScan 125 Service Manual 35
Items Needed
•3/8'' ratchet
• Phillips screwdriver
•.05 Allen wrench
•Zip tie cutters
• Replacement encoder
•Zip ties
Complete the following steps to replace the encoder
cable.
1. Power off the CubiScan 125.
2. Carefully remove the glass platform and place it in a
safe location.
3. Using the 3/8'' ratchet, remove the three bolts
holding the encoder cover in place. These bolts are
indicated in Figure 34. Remove the encoder cover
and set it aside.
4. Using the Phillips screwdriver, loosen the screws
holding the encoder cable cover in place. These
screws are located on the back of the frame (the same
side as the serial label) and are shown in Figure 35.
When the screws are loose, slide the encoder cable
cover out and set it aside.
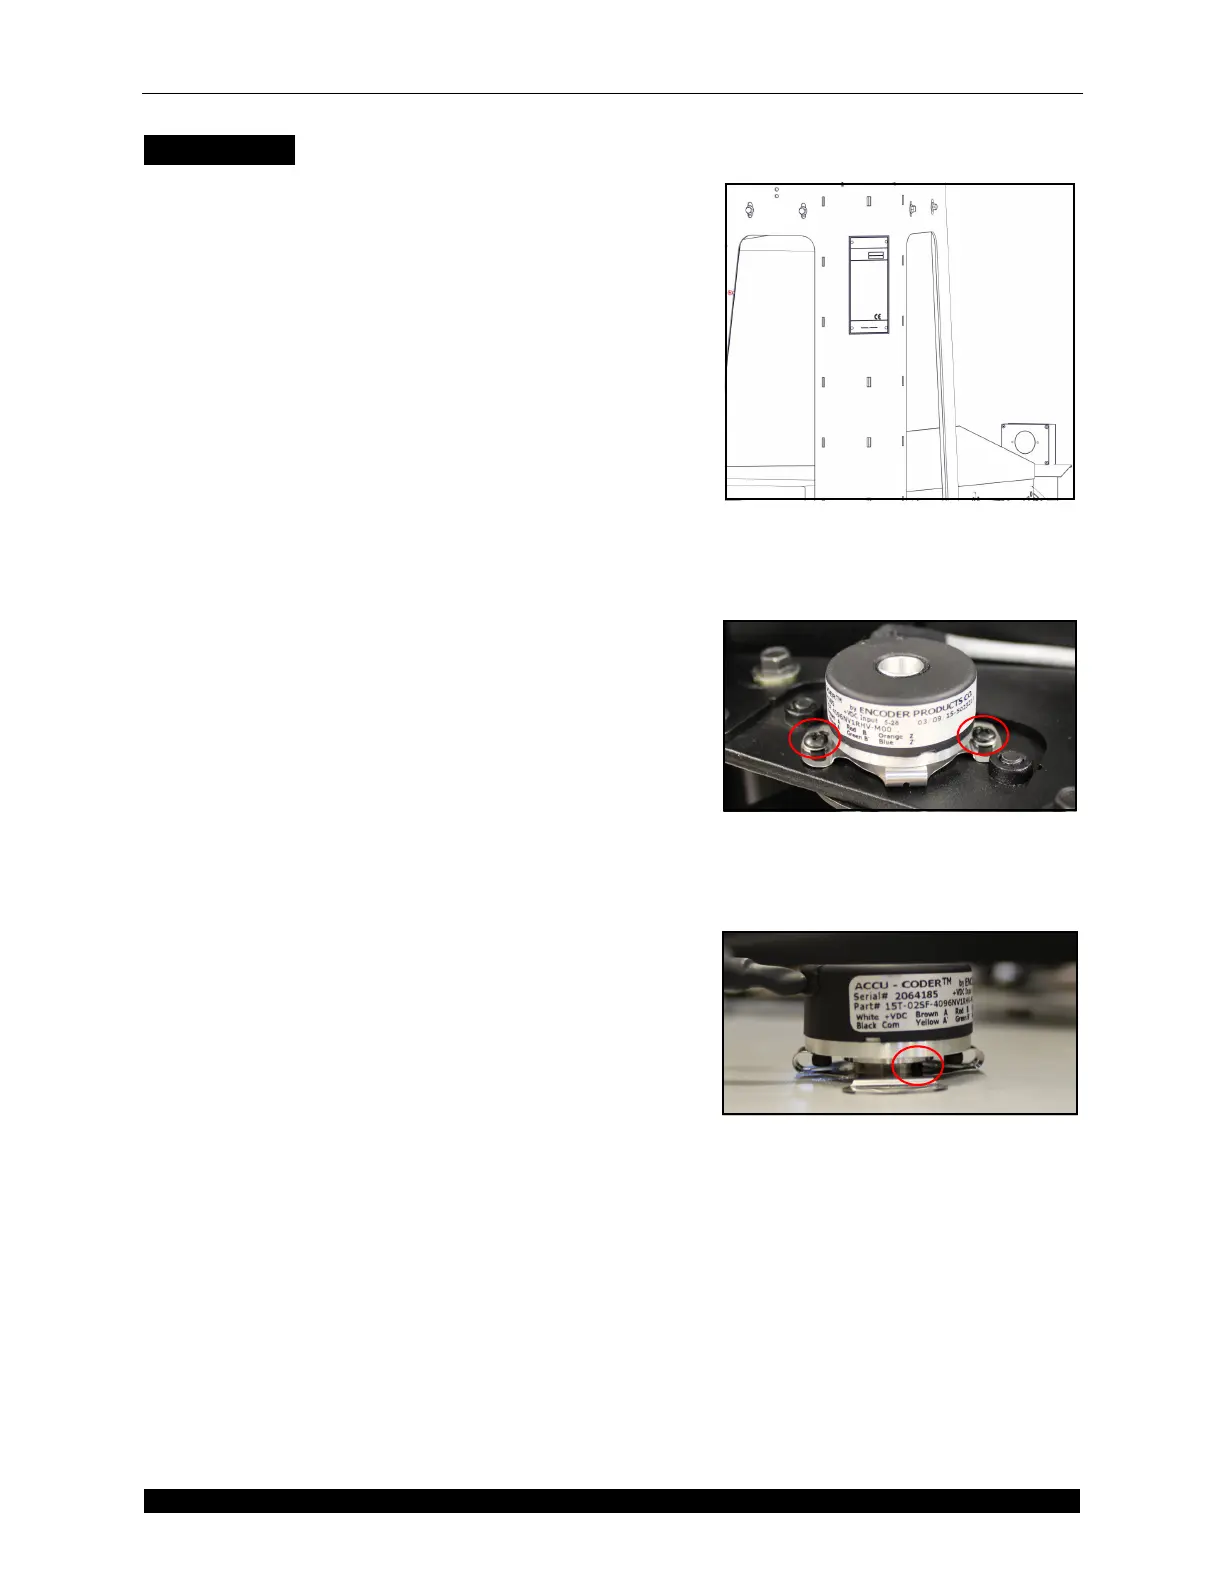
5. Using the Phillips screwdriver, remove the two
screws holding the encoder in place. These screws
are indicated in Figure 36.
6. Using the 0.05 Allen wrench, loosen the two encoder
set screws. Refer to Figure 37. Do not loosen these
screws too much or they will fall inside the encoder
and be difficult to recover.
7. Follow the encoder cable and cut all eight zip ties
holding it in place. You may want to take pictures of
how the cable was routed so that you can duplicate
this process later.
8. Unplug the encoder cable from the controller and
discard it.
9. Put the replacement encoder in place and secure it
by tightening the set screws from step 6.
10. Replace the screws from step 5 and tighten them.
Figure 35
Encoder Cable Cover Screws
Figure 36
Encoder Screws
Figure 37
Encoder Set Screws
 Loading...
