Part Replacement Replacing the Proximity Sensor
CubiScan 125 Service Manual 36
11. Route the encoder cable to the controller using the
route observed in step 7. Plug the cable into the
controller.
12. Replace the zip ties that were cut in step 7. Take up
the encoder cable slack under the encoder cable
cover.
13. Slide the encoder cable cover back into place and
tighten the screws from step 4.
14. Replace the encoder cover and secure it using the
bolts from step 3.
15. Replace the glass platform.
16. Power the CubiScan 125 back on.
Replacing the Proximity Sensor
This section describes how to replace the proximity
sensor.
Items Needed
• Phillips screwdriver
•Zip tie cutters
• Replacement proximity sensor
•Zip ties
Complete the following steps to replace the proximity
sensor.
1. Power the CubiScan 125 off.
2. Move the gate to the left side of the CubiScan 125.
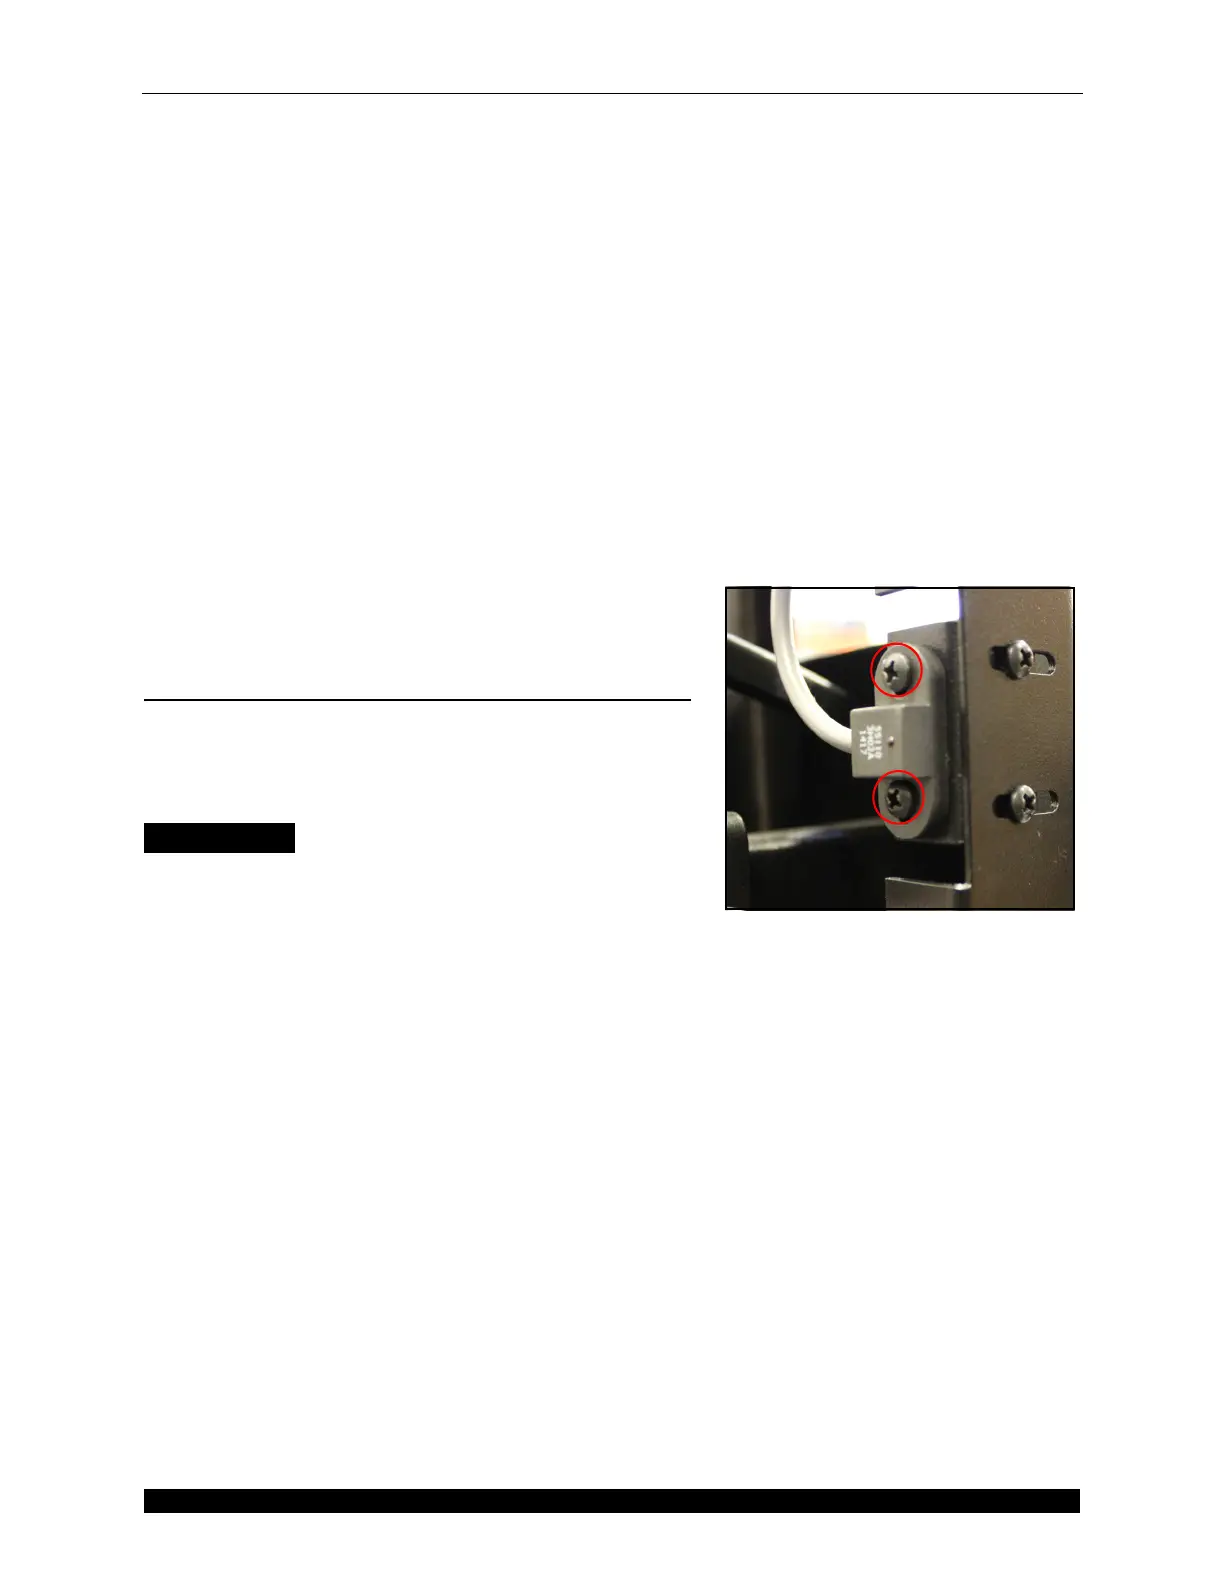
3. Using the Phillips screwdriver, remove the two
screws indicated in Figure 38.
4. Unplug the sensor cable from the controller.
5. Cut the five zip ties holding the proximity sensor
cable in place and unroute the cable from the frame.
When you are finished, discard the damaged
proximity sensor.
Figure 38
Proximity Sensor Screws
 Loading...
