Part Replacement Replacing the Controller Box
CubiScan 125 Service Manual 37
6. Locate the replacement proximity sensor and screw
it into place using the screws from step 3.
7. Thread the sensor cable through the CubiScan 125
frame, duplicating the process from step 5.
8. Plug the cable into the controller, and zip tie the
cable in place, taking up any slack as needed.
9. Power the CubiScan 125 back on.
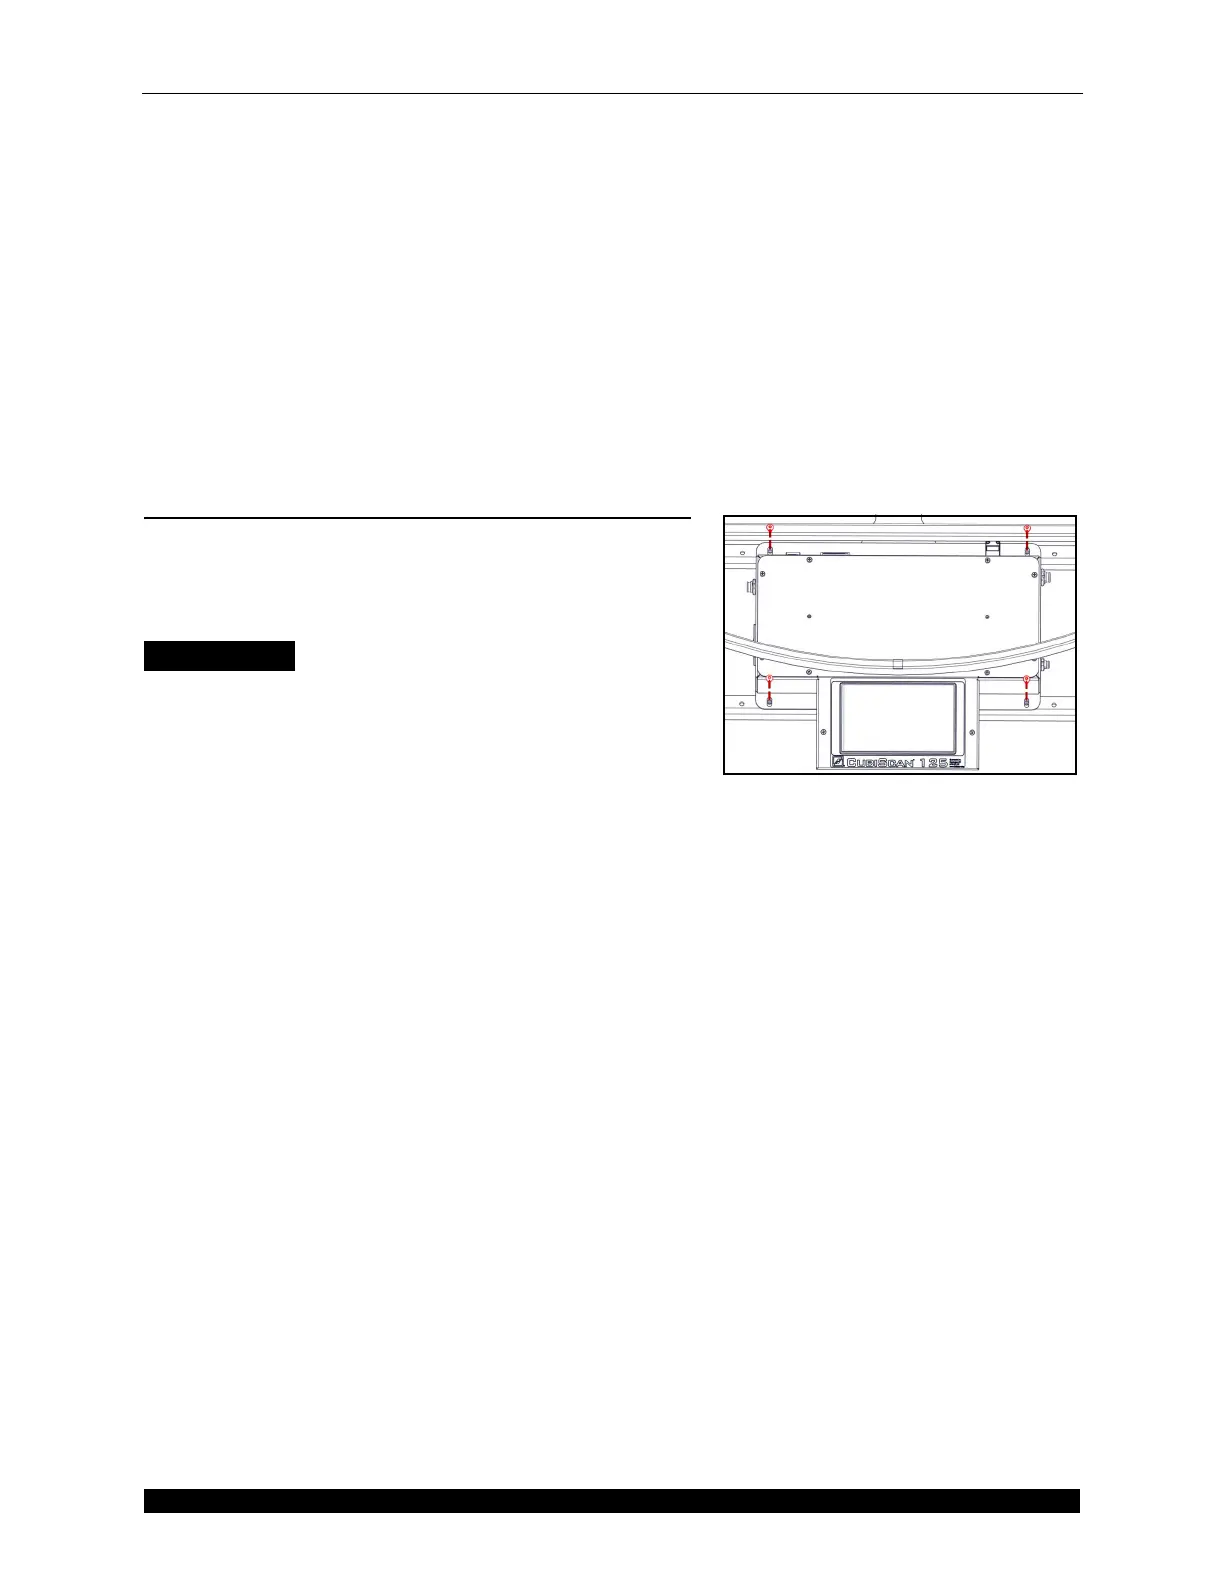
Replacing the Controller Box
This section describes how to replace the controller. The
controller box is attached to the touchscreen, located at
the front of the CubiScan 125.
Items Needed
• Phillips screwdriver
• 5/16'' wrench
• 1/8'' Allen wrench
•Replacement controller box
Complete the following steps to replace the controller.
1. Power the CubiScan 125 off and disconnect the
power cord.
2. Carefully remove the glass platform and place it in a
safe location.
3. Unplug all cables that connect to the controller.
Depending on your connection choice, you may only
need to remove one (or none) of the following cables;
Ethernet, USB, or serial.
•To remove the Ethernet cable, press the tab and pull
it straight out.
•To remove the USB or display cable, simply pull it
straight out using even pressure.
•To remove the serial or load cell cable, loosen the
screws and pull the cable straight out.
Figure 39
Controller Box
 Loading...
