(1) Mark the model for which a support
structure should be created.
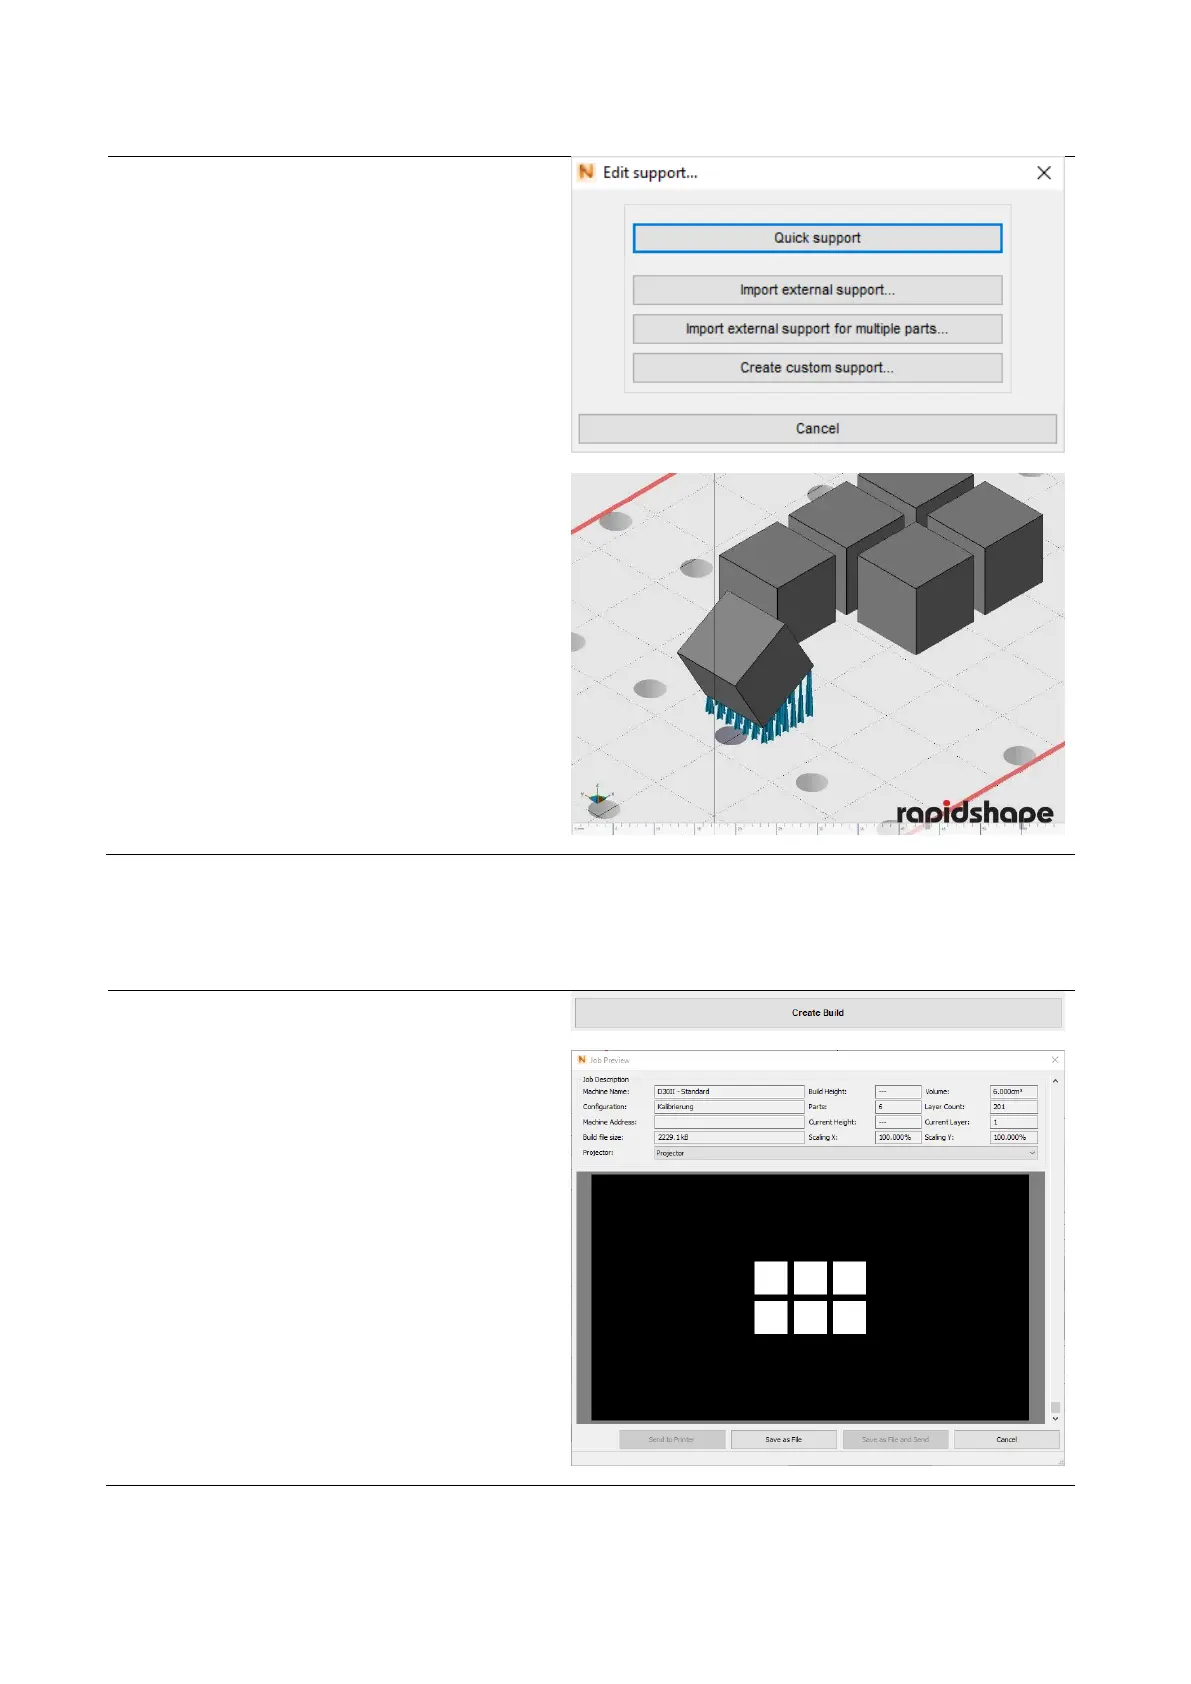
(2) Click on the button “Edit support…“.
A window with the following support
possibilities will be displayed:
— Quick Support: Creating a support
automatically
— Import external support: Load the
support as an external file
— Import external support for multiple
parts: See above
— Create custom support: Manual post-
processing of the created support
(Quick Support)
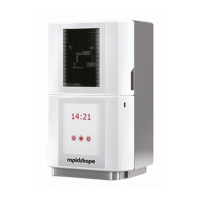
(1) Click on the button “Create Build“.
(2) The slicing process will be performed
automatically. Depending on the size and
complexity of the job, this may take some
time.
(3) After the slicing process has been
performed successfully, a new window
will be opened (Job Preview).
(4) In the displayed job preview, you can
check and save the printing data and the
individual layers (e.g. for later sending via
USB stick) and/or you can directly send
the printing data to your printer - see
chapter 6.7.12-6.7.13.