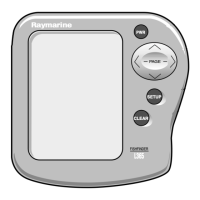
3.4Trunnion
bracketmounting
Thesuppliedtrunnionbracketcanbeusedtomountyourdisplayonahorizontalsurface.
Ensureyouhavechosenasuitablemountinglocationforyourdisplay,withsufficientheadroomto
allowthedisplay’sangletobeadjustedorthedisplaytoberemovedifnecessary.Ifinstalling
‘abovehead’,takeextracaretoensuretheknobsaretightenedsufficientlytopreventthemcoming
undoneduetovibrationwhenunderway.
Important:
Beforemountingthedisplay
,
ensureyouhavesourcedsuitablefixingsformountingthedisplay’s
trunnionbrackettothedesiredmountingsurface.Fixingtypewillbedeterminedbythemounting
location,andthematerialtypeandthicknessofthemountingsurface.
•Element™7:Requires4xfixings.TheTrunnionbracket’smountingholediameteris4.2mm
(0.17in).
•Element™9andElement™12:Require5xfixings.TheTrunnionbracket’smountingholediameter
is5.75mm(0.23in).
1.UsingtheBracket asatemplate,markanddrillpilotholesinthemountingsurface.
2.Usingappropriatefixings(notsupplied),securethetrunnionbrackettothemountingsurface.
Ifthemountingsurfaceistoothinforthescrewsprovided,usestainlesssteelmachinescrews,
washersandlockingnuts.Alternatively,reinforcetherearofthemountingsurface.
3.Usingthebracket knobs,securethedisplaytotheBracket,ensuringtheratchetteethare
correctlyengaged.
Theknobsshouldbetightenedbyhand,sufficientlytopreventthedisplayfrommovingwhilst
yourvesselisunderway.
4.Route andconnectnecessarycables.
Installation31