P36E-10 Zero Clearance Direct Vent Gas Fireplace | 13
13
|
installation
Install Side Nailing Strips, Top Facing
Support, and Top Standos before unit
is slipped into position. See the "Unit
Assembly Prior to Installation" section for
assembly details.
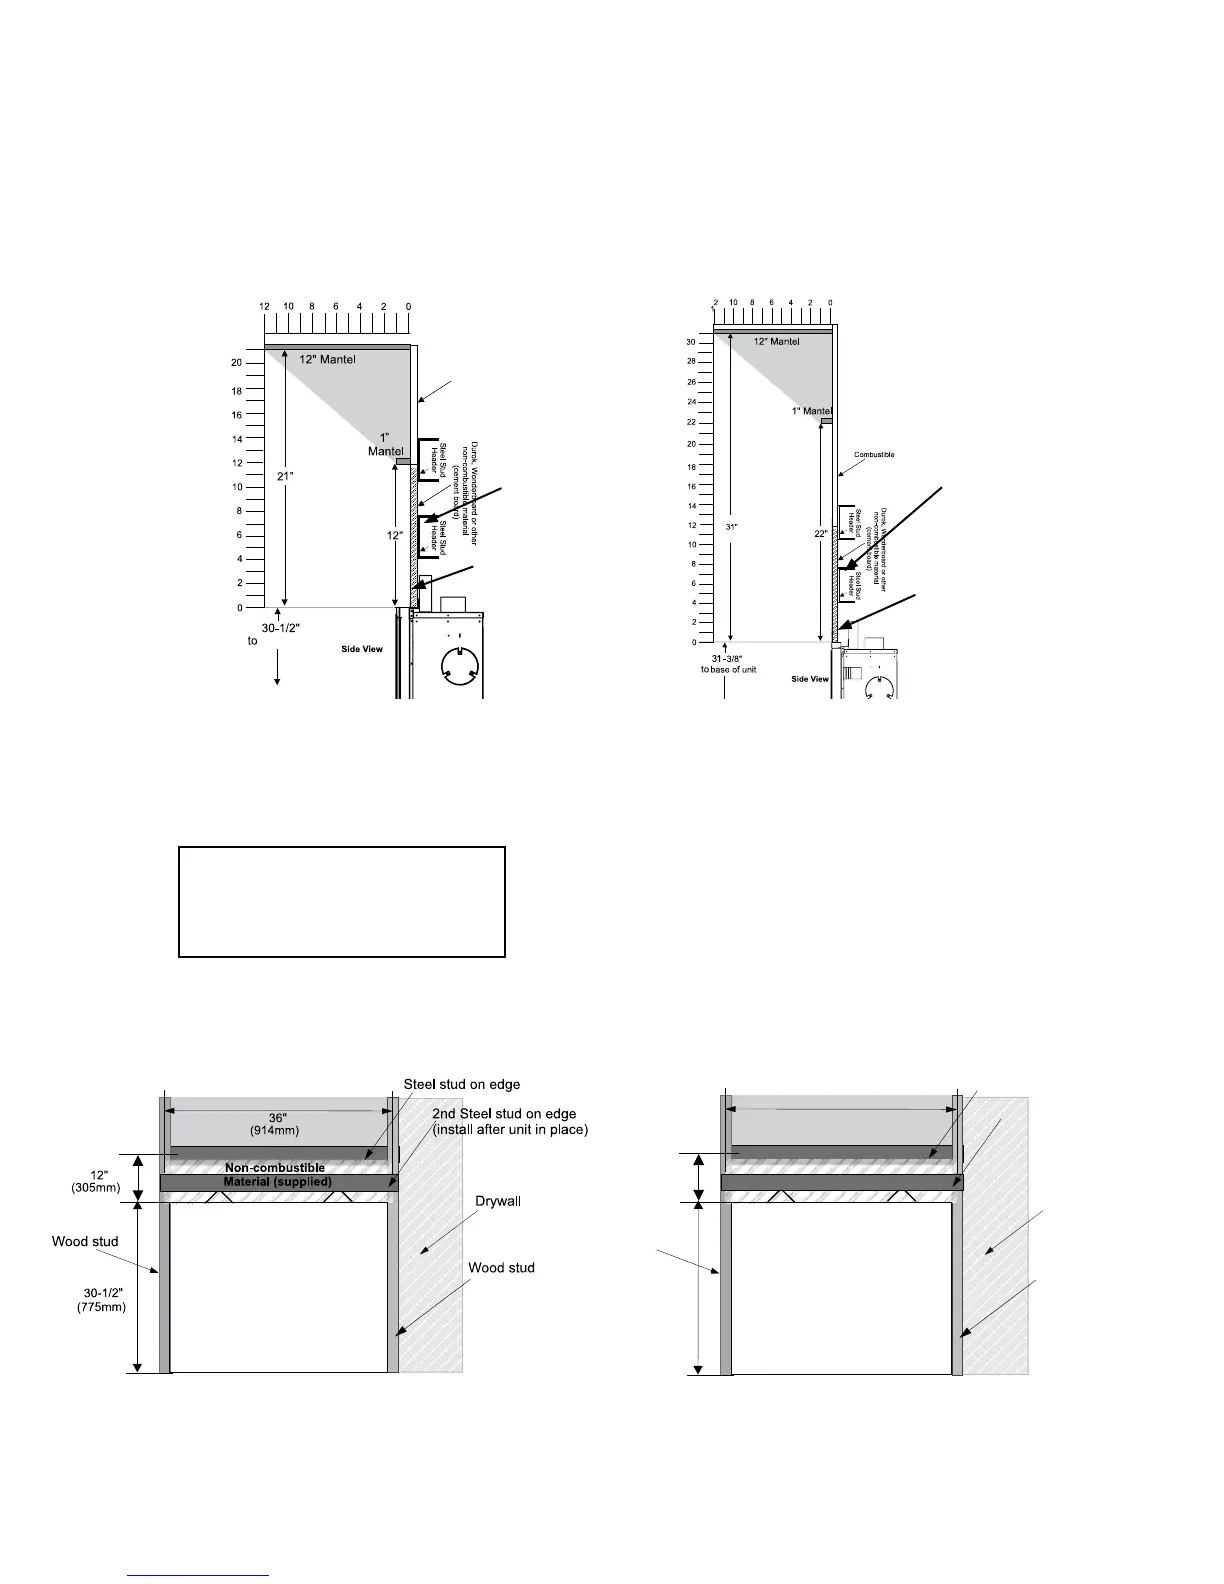
1) Determine the total thickness of facing material (e.g. non combustible plus ceramic tiles) to allow the finished surface to be flush with the front of the unit.
Total facing thickness can vary from 1/2" (13mm) to 1-1/4" (32mm) thick with Vignette only, Vignette + Vignette Finishing Trim Stepped Finish and Safety
Screen and Louvers. When installing the Vignette + Vignette Finishing Trim Flush Finish the facing thickness is up to 3".
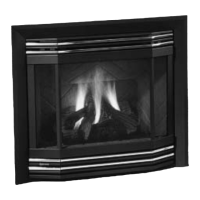
2) Add a second steel stud at midpoint for ease of installation/securing the non combustible board. See Diagrams 1 & 2.
FRAMING
3) For exterior walls, insulate the enclosure to the
same degree as the rest of the house, apply
vapour barrier and drywall, as per local instal-
lation codes. (Do not insulate the fireplace
itself.)
4) The top of the unit must not be closer than 32"
(813mm) to the ceiling.
3 - /8"1 3
(82 mm)2
37-7/16"
(951mm)
Non-combustible
Material (supplied)
Steel stud on edge
2nd Steel stud on edge
(install after unit in place)
12"
(305mm)
Wood stud
Wood stud
Drywall
Diagram 4
Diagram 5
Vignette + Vignette Finishing Trim Flush Finished
Vignette + Vignette Finishing Trim Stepped Finish
NOTE: If using ush louvers and safety screen the steel studs and non-combustible material are not required. Wood studs and drywall
may be used. See framing and nishing for details.
Non-combustible
Note: Secure the non-combustible board (supplied)
directly above the unit as shown. Install a steel
stud directly above the unit as shown to secure the
non-combustible material.
Diagram 1
Diagram 2
Shown with Vignette Faceplate
Stepped Finish
Shown with Vingette and
Vignette Finishing Trim,
Flush Finished
Second Steel Stud
Second Steel Stud