IN-790010
• Turn Off the Overhead Lamp..
• Press and hold the Lamp Down Switch for ve (5)
seconds.
• If a long 1-second beep is heard, the Beep-on-Switch
Feature has been turned On.
• If a short 0.2-second beep is heard, the Beep-on-Switch
Feature has been turned Off.
• Simply press and hold the Lamp Up Switch for ve (5)
seconds to toggle the Beep-on-Switch Feature On and Off
2.5. Third Arm
2.5.1. If supplied, unpack the Third Arm. Slide the Clamp
Sleeve carefully down over the Support Column until
positioned as shown in Figure 1. Tighten the clamp screw
using the hex key wrench provided.
2.5.2. Position the Clamp initially so that the clamp screw is
toward the rear of the Base Unit. If necessary, this position
can be altered to center the rotation of the arm about the
Column (300°) within the desired range of movement.
2.5.3. Springs are used to counterbalance the Instrument
mounted on the arm. Adjustment of the springs is by means
of a screw which is accessible upon removal of Plug Button.
Rotating the screw clockwise increases the tension. With
the Instrument in place, adjust the screw to balance the
Instrument.
2.5.4. Plug the Third Arm into the receptacle marked “3RD
ARM” located on the Console or Base Cap.
WARNING – THE MAINS OUTLET LOCATED
ON THE BACK OF THE CONSOLE OR
BASE CAP MARKED “ARM” AND THE
MAINS OUTLET LOCATED ON THE THIRD
ARM ITSELF, ARE INTENDED TO SUPPLY
POWER TO A KERATOMETER OR SIMILAR
MEDICAL DEVICE COMPLYING WITH IEC
60601-1. ONCE CONNECTED, RESULTING
LEAKAGE CURRENTS MUST COMPLY WITH
IEC 60601-1-1 FOR MEDICAL ELECTRICAL
(ME) SYSTEMS. DO NOT CONNECT
UNAUTHORIZED DEVICES.”
AVERTISSEMENT : LA PRISE DE COURANT
SITUÉE À L’ARRIÈRE DE LA CONSOLE OU
DU COUVERCLE MARQUÉE « ARM » (BRAS)
ET LA PRISE DE COURANT SITUÉE SUR LE
TROISIÈME BRAS LUI-MÊME SONT CONÇUES
POUR FOURNIR L’ALIMENTATION À UN
KÉRATOMÈTRE OU AUTRE APPAREIL MÉDICAL
SIMILAIRE CONFORME AVEC IEC 60601-
1. UNE FOIS L’APPAREIL CONNECTÉ, LES
COURANTS DE FUITE RÉSULTANTS DOIVENT
ÊTRE CONFORMES À IEC 60601-1-1 POUR
LES SYSTÈMES ÉLECTRIQUES MÉDICAUX.
NE CONNECTEZ PAS DE DISPOSITIFS NON
AUTORISÉS.
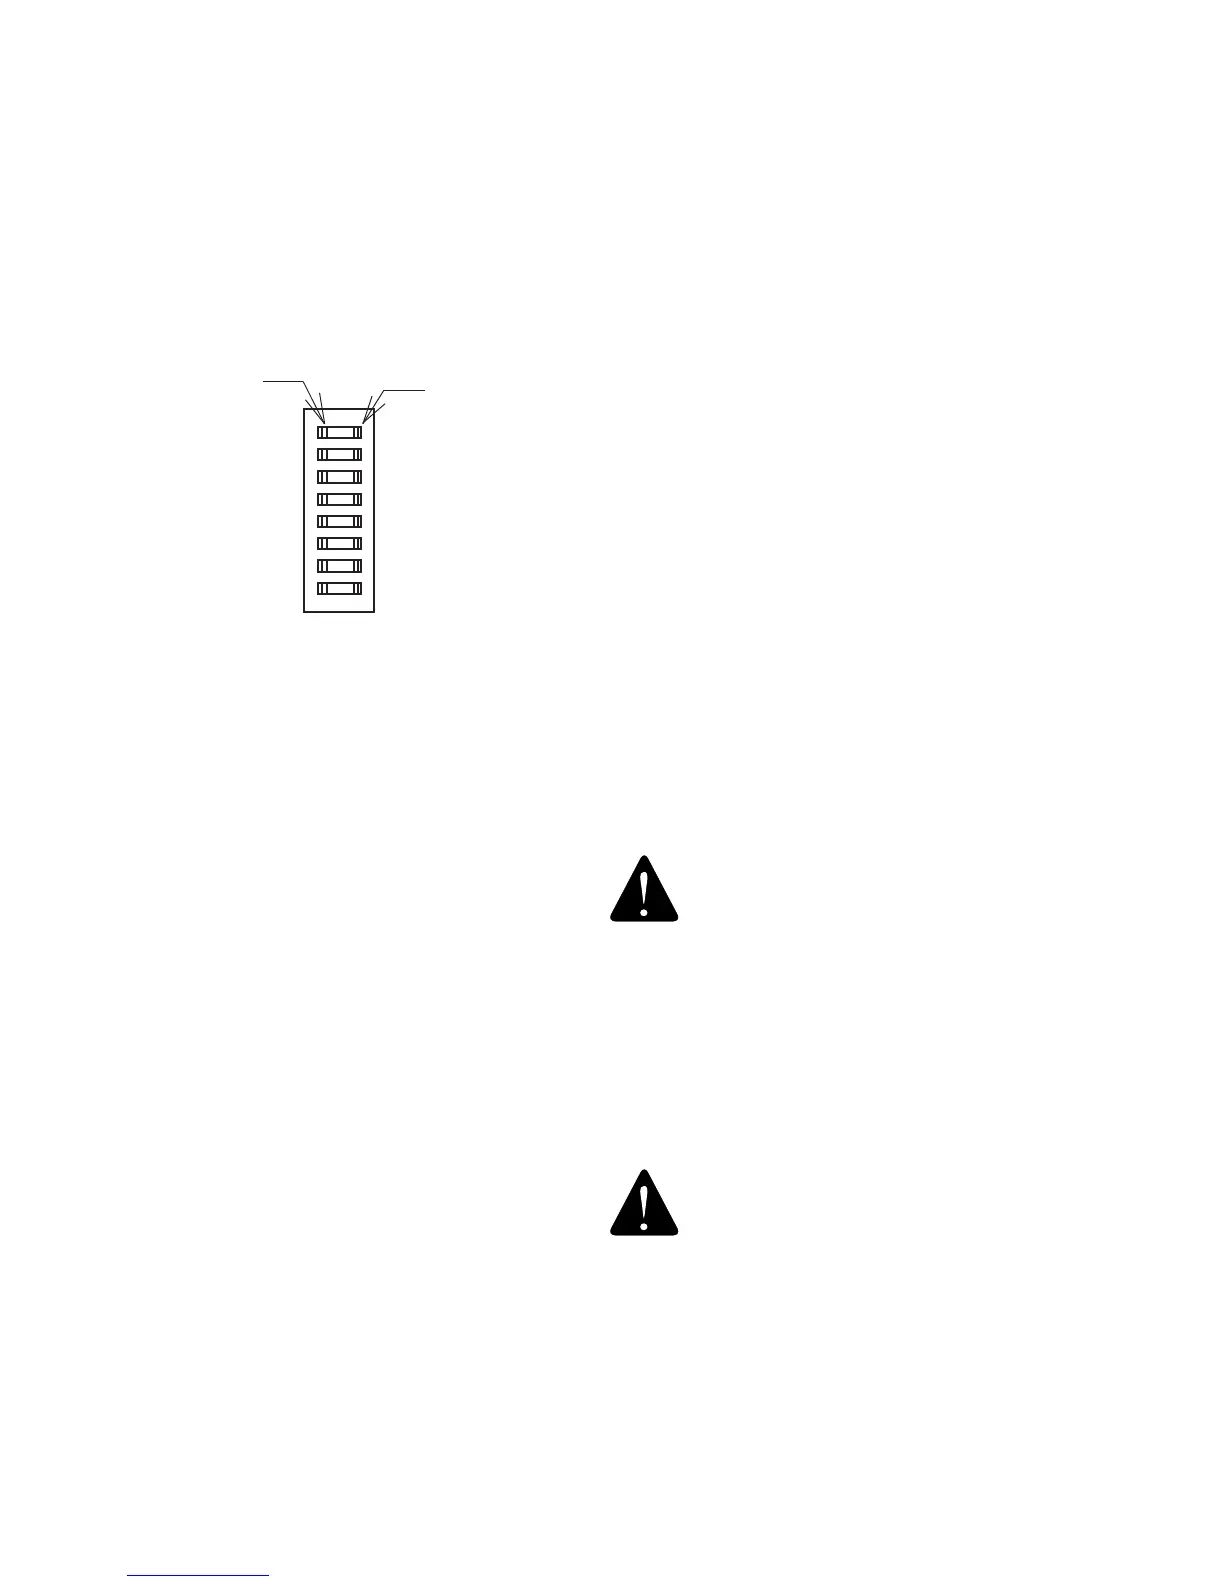
SW2-1 SW2-2 SW2-3 B/P VOLTAGE
OFF OFF OFF
6.5V/18W
INCANDESCANT
OFF OFF ON 6V/10W HALOGEN
ON OFF ON 6V/20W HALOGEN
OFF ON ON 12V/12W HALOGEN
TABLE 1
SWITCH SETTINGS FOR B/P VOLTAGES
OFF
1 2 3 4 5 6 7 8
PRESS HERE
TO TURN OFF
PRESS HERE
TO TURN ON
SW2
Switch 4
• Turn Switch 4 ON if your system contains a indirect
hanger (Figure 13) for an Indirect Ophthalmoscope and
you want that hanger to automatically supply power to
the Instrument.
• Turn Switch 4 OFF if your system does not contain a
hanger for an Indirect Ophthalmoscope. In this case,
power is turned ON and OFF to the Instrument via the
B/P Switch on the front panel (See Switch 5 on SW1).
Switch 5
• If you want your system to beep whenever a switch is
pressed , set Switch 5 ON.
• If you do not want to hear a beep whenever a switch is
pressed, set Switch OFF.
Switches 6, 7 and 8
• Reserved
2.4.2. BASE CAP: CONFIGURING THE BEEP-ON-
SWITCH FEATURE
2.4.2.1. The Base Cap has one congurable feature
unrelated to the Eclipse® Room Light Controls: the Beep-
on-Switch Feature. The Factory Default Setting for the
Beep-on-Switch Feature is Off. The following programming
sequence is required if you want to turn the Beep-on-Switch
Feature On.
To congure the Base Cap Beep-on-Switch Feature: