IN-790020
OFF
1 2 3 4 5 6 7 8
ZONE
WELL #1
WELL #2
WELL #3
BINDING POST
S/L ARM
AUXILIARY
LAMP
SW1
ENABLE-ON
PRESS HERE
TO TURN OFF
PRESS HERE
TO TURN ON
HRET E
ECLIPSE® ROOM LIGHT SYSTEM
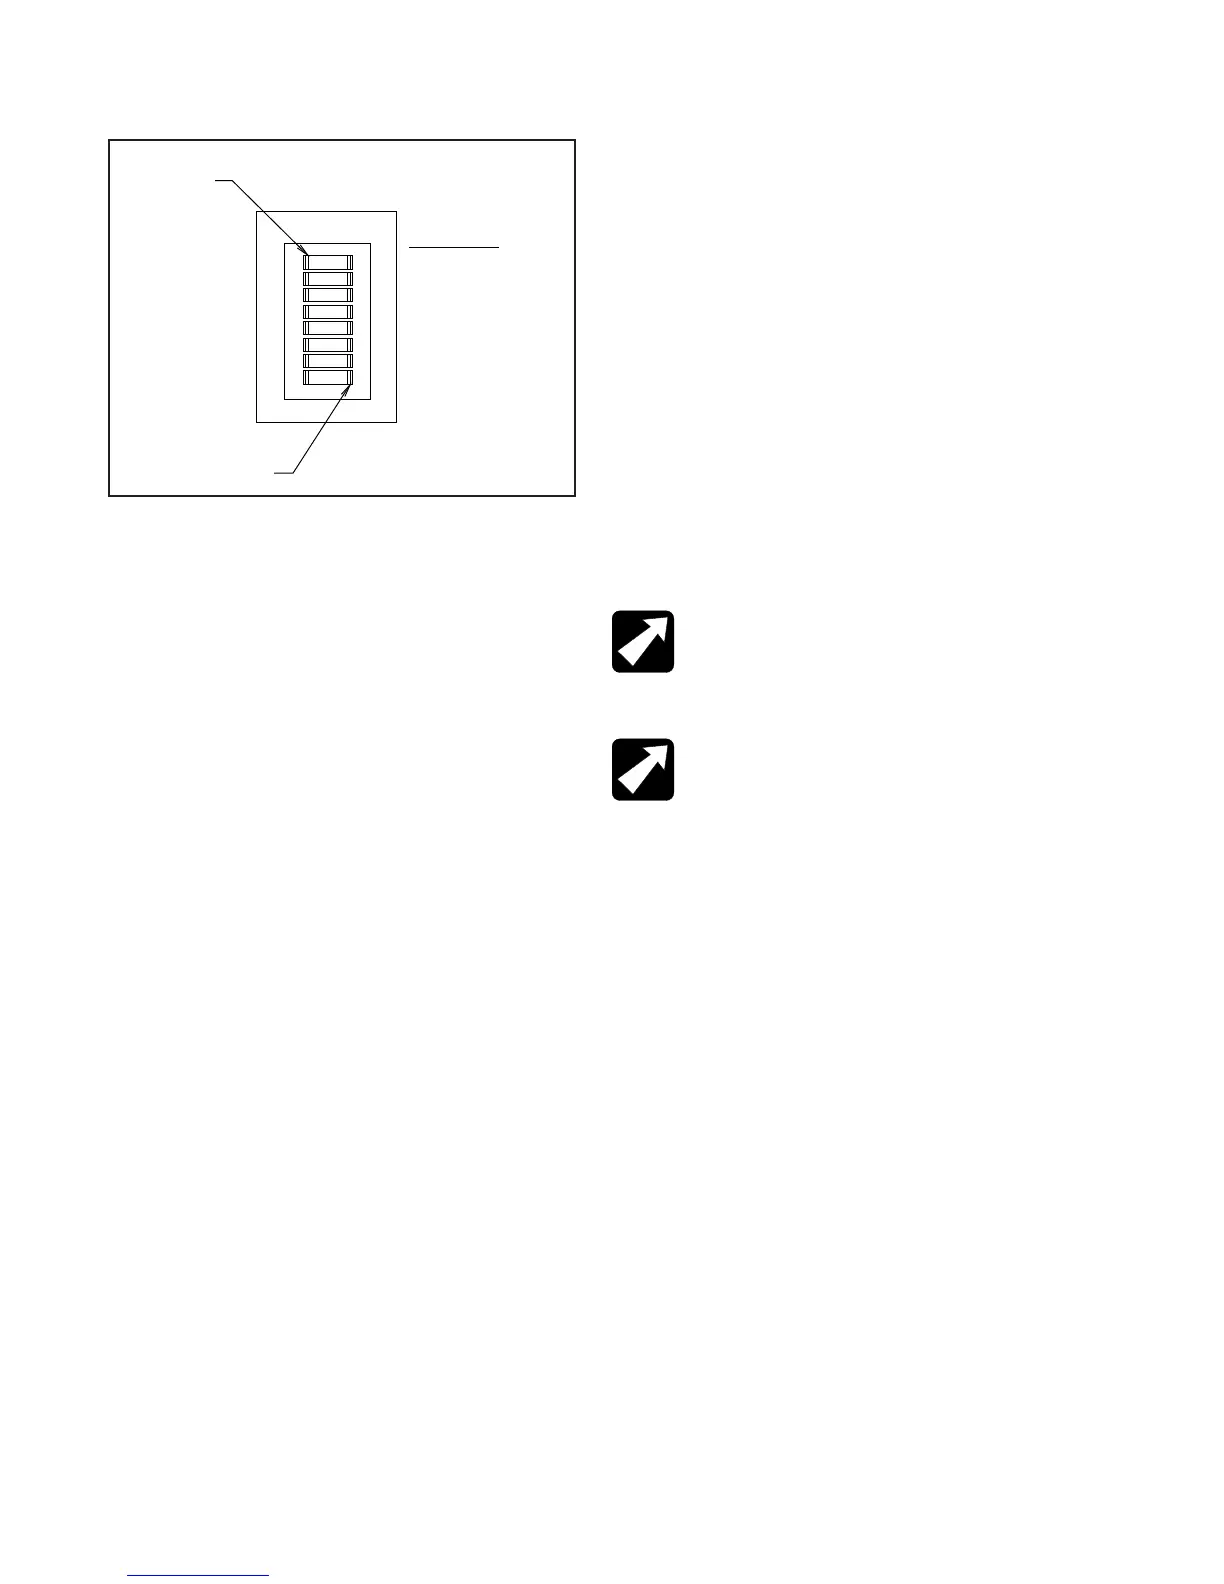
TABLE 3
REAR VIEW OF CONSOLE ASSEMBLY
Switch 4
• Turn Switch 4 ON to enable Well #3 to affect room lights.
• Turn Switch 4 OFF to disable Well #3 from affecting room
lights.
Switch 5
• If power to the Indirect Ophthalmoscope is controlled by
the B/P Switch on the front panel, turn Switch 5 ON if
you want the B/P Switch to affect room lights.
• Turn Switch 5 OFF if you do not want the B/P Switch to
affect room lights.
Switch 6
• Turn Switch 6 ON to enable Slit Lamp Arm Switch to affect
room lights.
• Turn Switch 6 OFF to disable Slit Lamp Arm Switch from
affecting room lights.
Switch 7
• Turn Switch 7 ON to enable the AUX1 Switch to affect
room lights.
• Turn Switch 7 OFF to disable the AUX1 Switch from
affecting room lights.
Switch 8
• Turn Switch 8 ON to enable the LAMP Switch to affect
room lights.
• Turn Switch 8 OFF to disable the LAMP Switch from
affecting room lights.
3.8.3.2. Base Cap: Configuring the Base Cap Software
(The Base Cap Circuit Board does not contain Dip
Switches.)
The Base Cap controls just two IR functions:
• the Room Lights Switch on the Slit Lamp Arm, and
• the Hanger Switch
These functions are always enabled and cannot be
disabled by Dip Switches or software. However, you still
need to congure the Base Cap to communicate with
Single or Three-Zone IR Receiver. The Factory Default
Setting is the Three-Zone IR Receiver. The following
programming sequence is not required if a Three-Zone
IR Receiver has been installed in your examination room.
To congure the Base Cap:
• Turn Off the Overhead Lamp.
• Press and hold the Overhead Lamp Up Switch for ve
(5) seconds.
• If a short 0.2-second beep is heard, the Base Cap has
been congured for a Single-Zone IR Receiver.
• If a long 1-second beep is heard, the Base Cap has been
congured for a Three-Zone IR Receiver.
• Simply press and hold the Lamp Up Switch for ve (5)
seconds to toggle between the Single or Three-Zone IR
Receiver.
**
NOTE:
When using a Base Cap, only these two
switches** control room lights. These switches
always send IR signals to the IR Receiver and this
functionality cannot be disabled.
**REMARQUE : Lorsqu’un couvercle est
utilisé, seulement ces deux interrupteurs**
contrôlent l’éclairage de la pièce. Ces interrupteurs
envoient des signaux IR au récepteur IR et cette
fonctionnalité ne peut pas être désactivée.
3.8.3.3. Entering and Exiting Programming Mode
Three-Zone IR Receiver
After your IR Receiver has been installed, only a few steps
are required to enable your Instrument Stand to control room
lights. In this example, let’s assume you want to dim the room
lights when performing an examination using the Slit Lamp.
In this case, a switch has been provided on the Slit Lamp
Arm for controlling room lights during a Slit Lamp exam.
3.8.3.4. Entering Programming Mode
Press and hold the top and bottom scene buttons
simultaneously for 3 seconds. The LEDs in the scene
buttons will scroll from top to bottom, conrming that
you are in programming mode, and the info screen will
display the main menu.
3.8.3.5. Exiting Programming Mode
Press and hold the top and bottom scene buttons
simultaneously for 3 seconds. The info screen will go to
Scene 1.
3.8.3.6. Navigating Menus in Programming Mode
FIGURE 13