5.14 Contactor Adapter - The Contactor Adapter Kit
provides a means of connecting the user-supplied M con-
tactor (and optional user-supplied reversing M contactor)to
the Basic Flex Pak Plus Controller . Refer to Paragraph 2.4.4
for M contactor specifications .
The Kit is an assembly consist ing of an Auxiliary Mounting
Bracket , a power terminal strip , two wire harnesses and
four screws .
To install the Kit, follow these procedures .
Step 1 - Orient the Auxiliary Mounting Bracket (Refer to
Figure 5.2.) over the Basic Controller al igning the mounting
holes . Secure the Bracket with the provided washers and
screws. Make sure the washer teeth are firmly embedded
in the Chassis to provide proper ground.
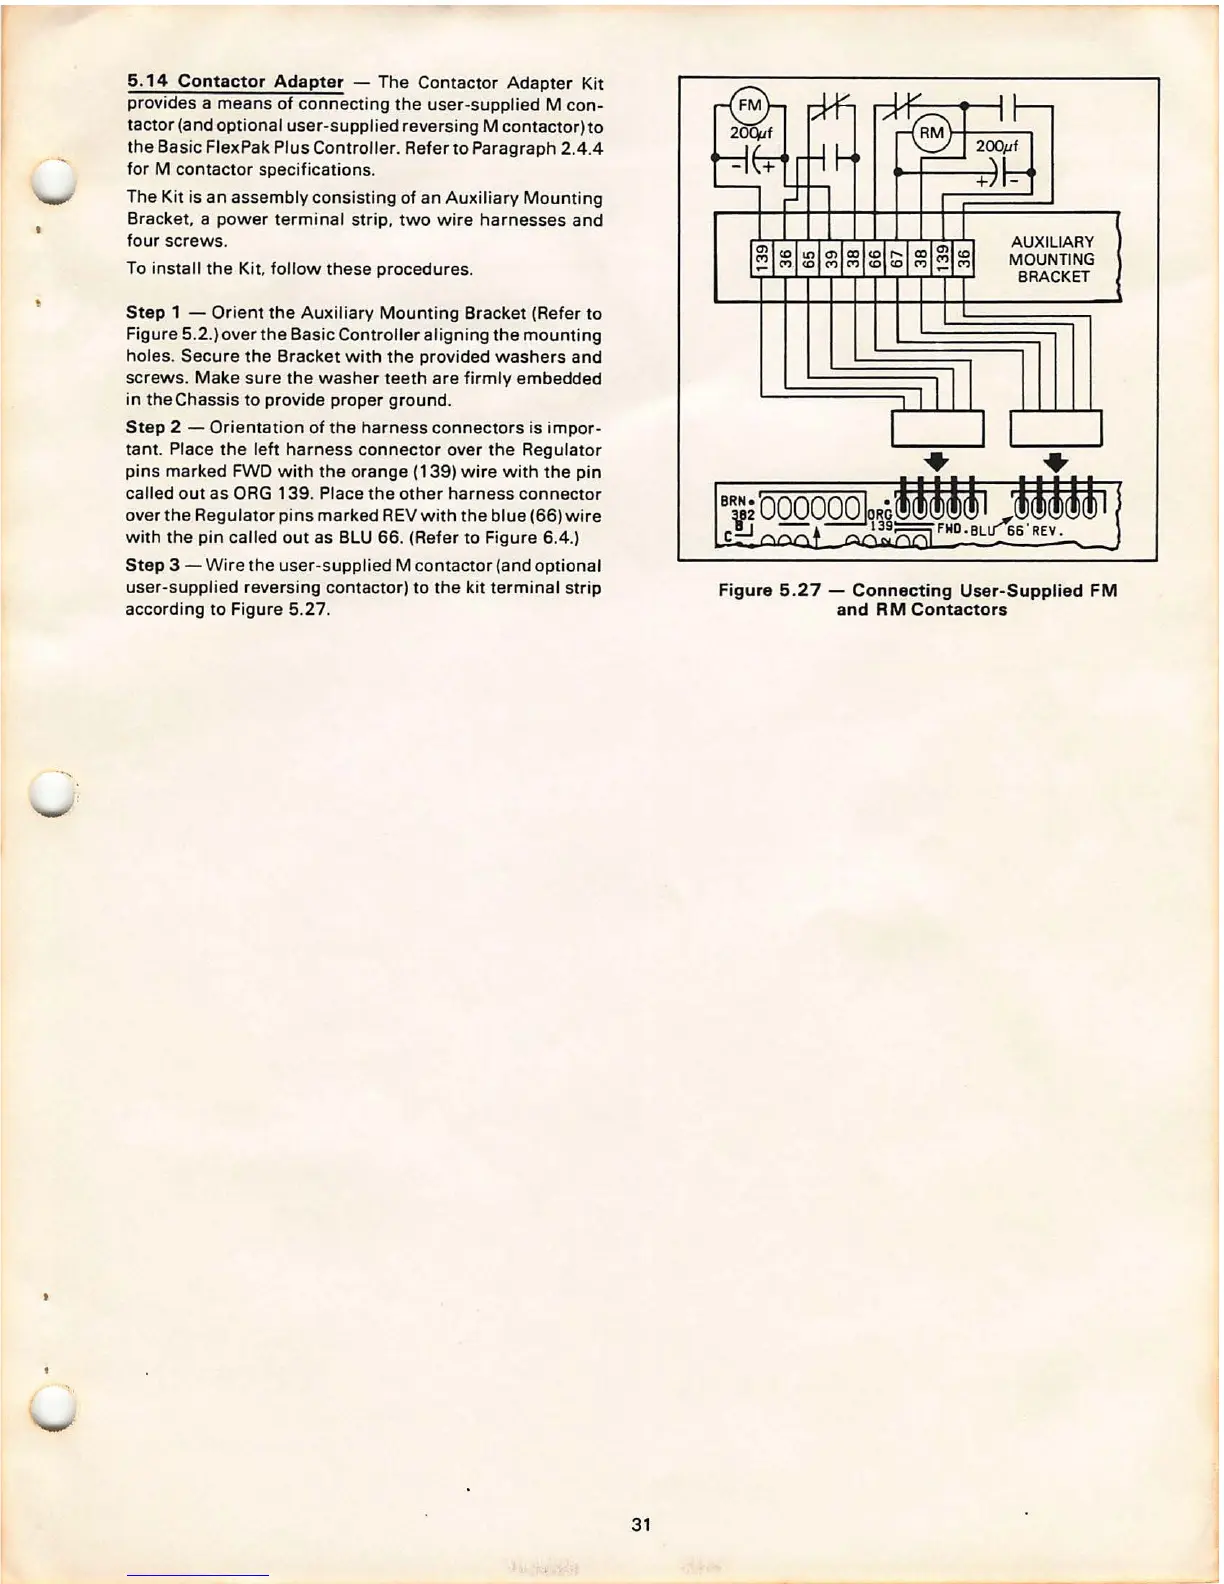
Step 2 - Orientation of the harness connectors is impor -
tant . Place the left harness connector over the Regulator
pins marked FWD with the orange (139) wire with the pin
called out as ORG 139 . Place the other harness connector
over the Regulator pins marked REV with the blue (66) wire
with the pin called out as BLU 66. (Refer to Figure 6.4.)
Step 3 - Wire the user-supplied M contactor (and optional
user-supplied reversing contactor) to the kit terminal strip
according to Figure 5.27 .
31
AUXILIARY
MOUNTING
BRACKET
Figure 5 .27 - Connecting User-Supplied FM
and RM Contactors